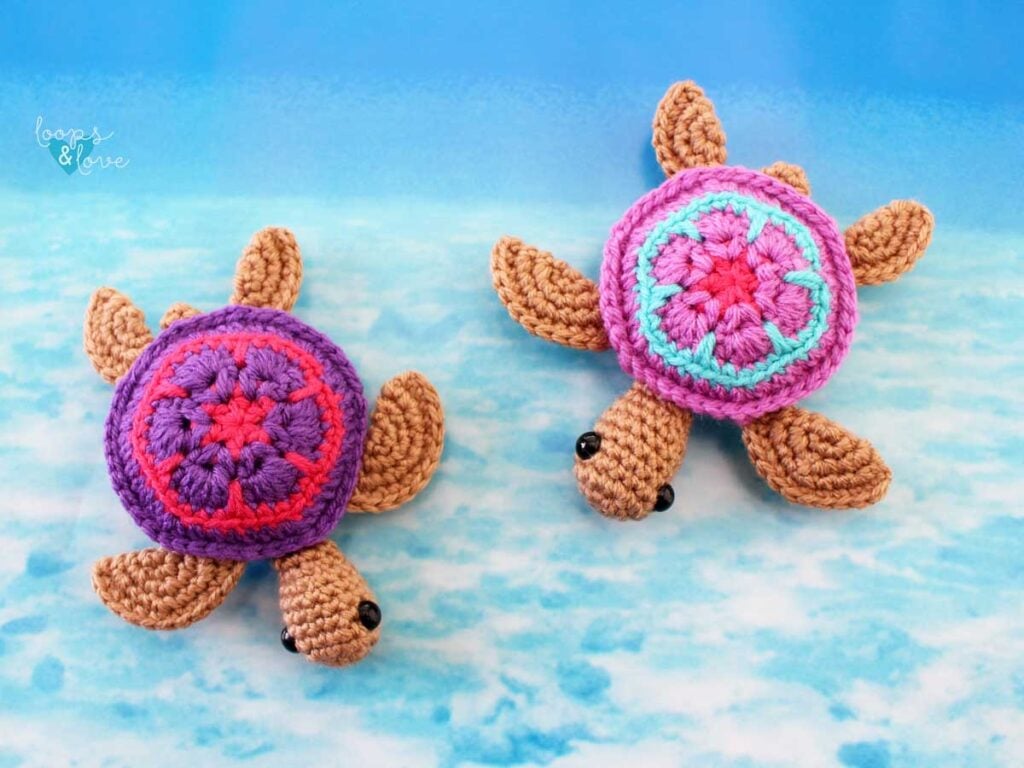
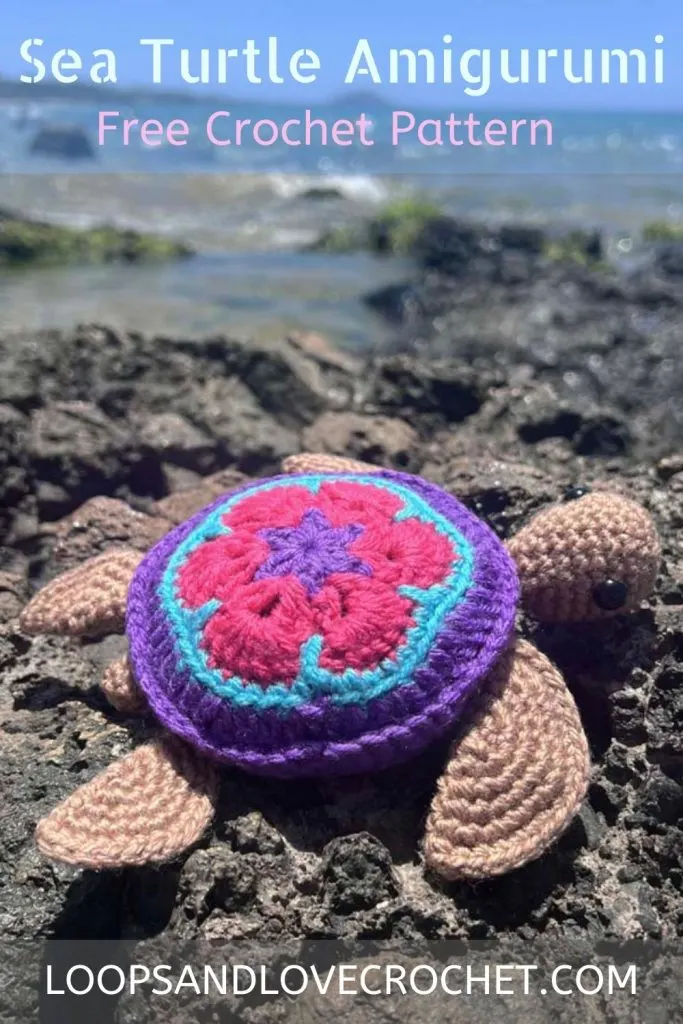
This sea turtle amigurumi crochet pattern is a fun and easy project for all skill levels. Perfect as a gift or a playful decoration, this sea turtle can be made in bright colors using leftover yarn in your stash.


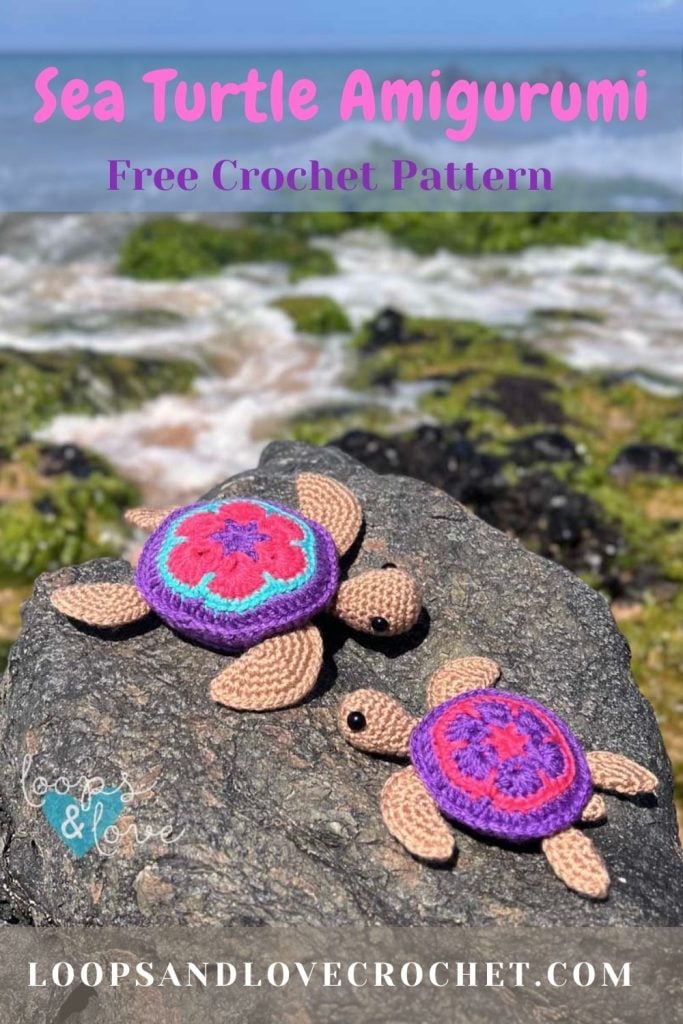
This Sea Turtle Amigurumi crochet pattern was originally published in 2018 and has been one of our most popular patterns on the blog ever since! We’ve given this pattern a refresh and update more recently, but you can still expect the same adorable sea turtle! You’ll find new photos, updated instructions with a couple minor process changes, plus a video tutorial for the African flower shell piece!
In addition, the sea turtle amigurumi now has a smaller side kick! You can find the Mini Sea Turtle Amigurumi on the blog! This miniature version packs the same colorful cuteness as the original, but in more compact form. Check it out here!
Let’s dive into an underwater crochet adventure and crochet a charming little sea turtle amigurumi!
Sea Turtles have always been close to my heart. They are so beautiful and fascinating to watch. The inspiration for the sea turtle amigurumi crochet pattern came on one of our family vacations on Maui and watching the green sea turtles swim at the beach in the waves.
I decided to name this little turtle “Honu,” which is Hawaiian for turtle, referring to the green sea turtles that are native to the Hawaiian Islands. Also, I learned that the Hawaiian green sea turtle symbolizes good luck, endurance and long life. No wonder it feels like such a lucky event each time you spot a sea turtle!
Remember to like Loops and Love Crochet on Facebook and join the Loops and Love Crochet Group! I’d also LOVE it if you followed @loopsandlovecrochet on Instagram! If you like crochet video tutorials, check out (and subscribe to) Loops and Love Crochet YouTube Channel!
Choosing Colors for your Sea Turtle Amigurumi
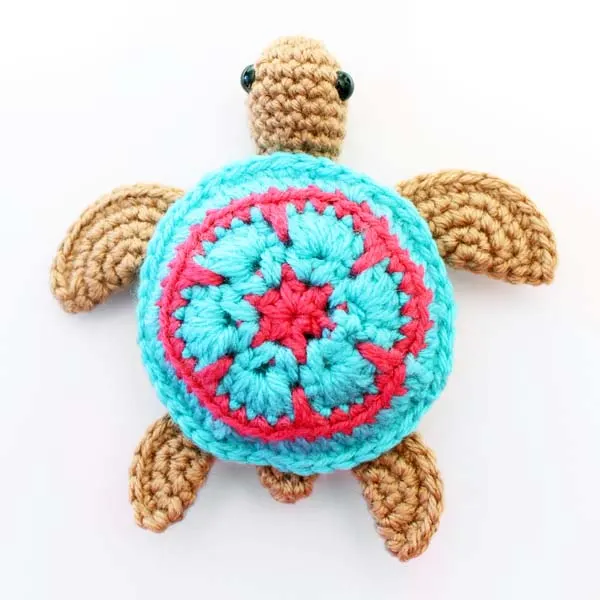
When it comes to crafting your Honu – Sea Turtle Amigurumi, the possibilities for shell colors are as vast as the ocean itself. From deep, rich greens, mottled blends of browns and creams, there’s no limit to the hues you can incorporate into your creation.
You can also consider experimenting with variegated yarns to capture the intricate patterns found in real sea turtle shells, or opt for bold, contrasting colors.
Whether you prefer a traditional approach or a more whimsical interpretation, the beauty of crafting your own sea turtle is that you can let your imagination run wild as you select the perfect palette to bring your crochet creation to life!
Fun Fact! Did you know that sea turtles play a crucial role in maintaining the health of ocean ecosystems? As they graze on seagrasses and algae, they help maintain the balance of marine plant life, which in turn supports a diverse array of other marine species.

Step-by-Step Pattern for Making your own Sea Turtle Amigurumi
To make this sea turtle amigurumi, you’ll start by working up all of the pieces (shell, flippers, head, tail) and then attaching them together at the end. I hope you read on and enjoy making your own little Honu!
If you are like me and love everything ocean themed, you’re in luck! On the blog, you’ll find a whole collection of patterns inspired by the sea! Check out our Amigurumi Ocean Friends collection blog post!


The Sea Turtle Amigurumi crochet pattern is available for FREE on this website. If you’d like an ad-free, printable PDF version, you may purchase it for a small fee from my Etsy or Ravelry shops. You can purchase this individual pattern or a bundle of all of the ocean themed crochet patterns. Thank you so much for supporting Loops & Love Crochet!
Disclosure: This post may contain affiliate links, which means I may receive a small commission if you click a link and purchase something that I have recommended. This is done at no extra cost to you. Thank you for supporting Loops & Love Crochet!
Materials
- Worsted weight yarn – Any #4 worsted weight yarn can be used for this project (cotton or acrylic). The sea turtles pictured were made with WeCrochet Brava Worsted yarn in the Rouge, Freesia, Cornflower, Marina, Alfalfa, and Almond colorways. Approximately 105 yards of yarn is needed for this project.
- 3.5 mm crochet hook – or your preferred hook size for amigurumi.
- Safety Eyes – 9 mm (or preferred size). Eyes can also be stitched on.
- Stuffing – any fiber-based stuffing
- Scissors – for cutting yarn ends.
- Yarn needle – for weaving in ends and attaching pieces together.
- Tip – bent yarn needles work great for sewing together amigurumi pieces.
Stitches Used
- Ch – chain
- Sl St – slip stitch
- SC – single crochet
- DC – double crochet
- INV DEC – invisible single crochet decrease – insert hook into front loop of next stitch, then insert your hook into the front loop of the following stitch (3 loops on hook). Yarn over and draw through 2 loops (2 loops on hook), yarn over and pull through 2 remaining loops on hook. Here’s a video tutorial for the INV DEC.
- Long SC – long single crochet – Work a deep single crochet just like a normal single crochet, except you will be inserting your hook one row down (into the previous row/round).
down.
Important Notes:
- Continuous Rounds – the inner shell pieces, flippers, head, and tail are worked up in continuous rounds. This means the last stitch of the round is not joined to the first stitch. It is recommended that a stitch marker is used to keep track of where each round starts/ends to make it easier to keep track of your stitches.
- Joined Rounds – the African flower for the outer shell is worked up in joined rounds. This means the last stitch of the round is joined to the first stitch with a slip stitch before starting the stitches of the next round.
- Color Changes – the only color changes in this pattern are for the African flower/outer shell piece. When it is time to change colors, work the last stitch of the first color up to the last yarn over. Yarn over in the new color and pull through the loop to finish the stitch. Your next stitch will be the first stitch in the new color. There are other ways to make color changes, but this way keeps the color change more hidden.
- Video Tutorial – Watch the Crochet African Flower Video Tutorial for a visual on making the flower shell piece for your sea turtle amigurumi!
Finished Size
- When finished, this sea turtle amigurumi measures approximately 6.5 inches from head to tail.
Sea Turtle Amigurumi – The Pattern
African Flower Hexagon
This 6-petal flower hexagon is the top of the outer shell. Choose 2-4 colors for the African flower. For this part of the pattern only, the chain at the start of each round counts as one of the DC stitches of the round. Watch the video tutorial here!
Round 1: In first color, magic circle, ch 3, work the following stitches inside the ring: DC, ch 1, *2 DC, Ch 1, repeat from* four more times. Join with a sl st to top of the chain 3. (18 stitches -12 DC and 6 chain stitches)
Round 2: Change to next color with a sl st in the next stitch, then sl st into the ch 1 space from the previous round. Ch 3, [DC, ch 1, 2 DC] all in the chain 1 space. [2 DC, ch 1, 2 DC] in each chain 1 space around. Join to top of chain 3. (30 stitches – 24 DC and 6 chain spaces)
Round 3: Sl st across to the ch 1 space from the previous round. Sl st in the ch 1 space, ch 3, work 6 DC into the ch 1 space. Work 7 DC stitches into each of the remaining ch 1 spaces of the round. Change color and join to top of ch 3 starting the round. (42 stitches)
Round 4: Ch 1, SC in same stitch, SC in next 6 stitches, long SC in next space (inserting your hook into the previous round). *SC in next 7 stitches, long SC in next stitch. Repeat from * around. Change color and join with a sl st in top of first SC stitch. (48 SC stitches, not including chain 1 at start of round).
**Notes about round 4 – chain 1 does not count towards stitch count in this round. Your long single crochet stitches should be lining up between each of the “petals” of the flower.
Round 5: Work this round in back loops only. Ch 3, DC in next 2 stitches. *[DC, Ch 1, DC] in next stitch, then DC in next 7 stitches. Repeat from * 4 more times. [DC, Ch 1, DC] in next stitch, DC in last 3 stitches, skipping the last long SC stitch. Join to first DC of the round. Fasten off, weave in ends. (59 stitches – 53 DC and 6 chain spaces)
**Note about round 5 – the stitches with the DC, Ch 1, DC in them should line up with the middle of each “flower petal.” Each petal is 7 stitches long, so the middle of the petal would be the 4th stitch in.
Put your flower/outer shell piece aside for now and continue working up the pieces of the turtle.
Front Flippers (make 2)
Round 1: Magic circle, 6 SC into ring (6)
Round 2: 2 SC in each st around (12)
Round 3: *2 SC in first st, SC in next st, repeat from * around (18)
Round 4: *2 SC in first st, SC in next 2 sts, repeat from * around (24)
Round 5: *2 SC in first st, SC in next 3 sts, repeat from * around (30)
Round 6: *2 SC in first st, SC in next 4 sts, repeat from * around (36)
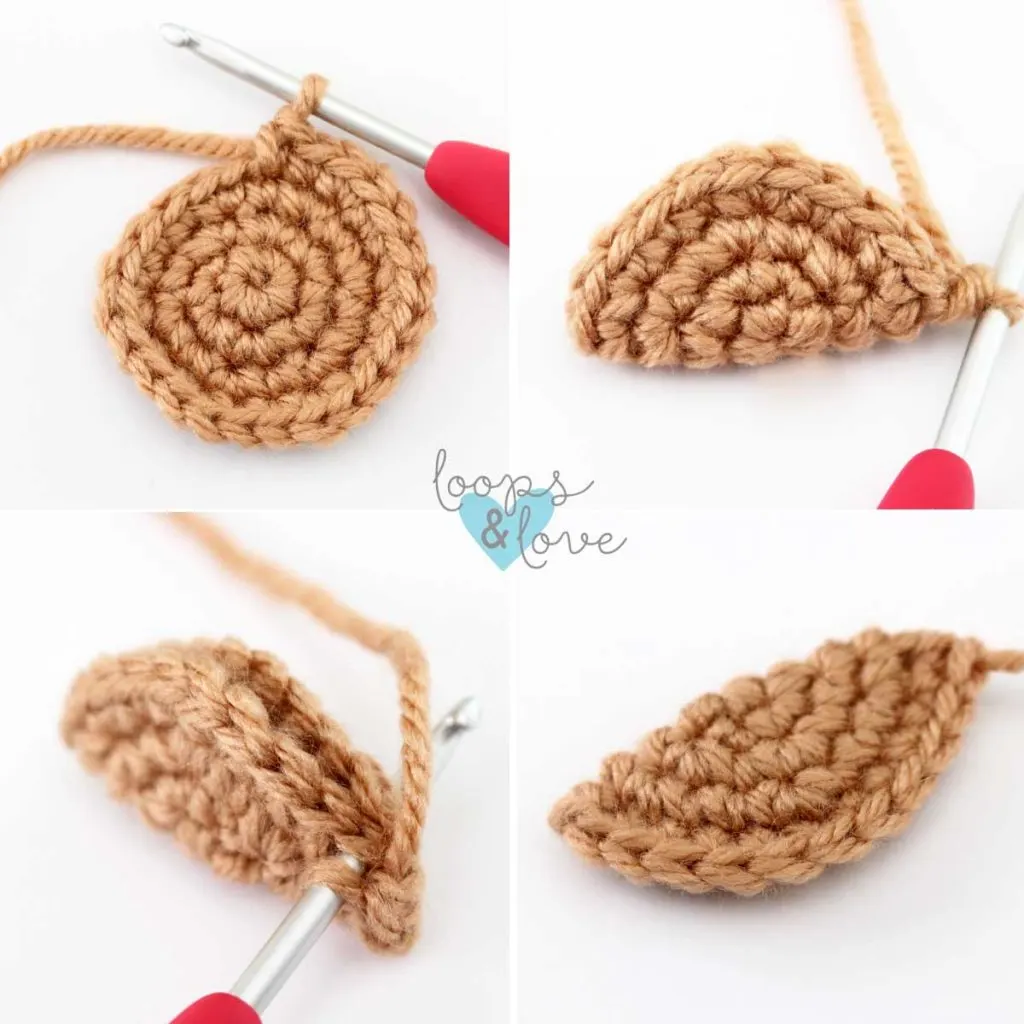
Don’t fasten off yet. Fold leg in half with your loop at the end. Single crochet along the edge through both layers to close the flipper (see step by step photo below). Fasten off leaving a tail to sew onto turtle. Repeat instructions for second flipper. Set aside for assembly later.
Back Flippers (make 2)
Round 1: Magic circle, 6 SC into ring (6)
Round 2: 2 SC in each st around (12)
Round 3: *2 SC in first st, SC in next st, repeat from * around (18)
Round 4: *2 SC in first st, SC in next 2 sts, repeat from * around (24)
Round 5: *2 SC in first st, SC in next 3 sts, repeat from * around (30)
Don’t fasten off yet. Fold leg in half with your loop at the end. Single crochet along the edge through both layers to close the flipper (see step by step photo below). Fasten off leaving a tail to sew onto turtle. Repeat instructions for back flipper. Set aside for assembly later.


Head
Round 1: Magic circle, 6 SC into ring (6)
Round 2: 2 SC in each st around (12)
Round 3: *2 SC in first st, SC in next st, repeat from * around (18)
Rounds 4-9: SC in each st around (18)
Insert safety eyes between rounds 5 and 6 about 6-7 stitches apart. They should line up with one on each side of the head.
Round 10: *INV DEC, SC, repeat from * around (12)
Round 11: *INV DEC, SC, repeat from * around (8)
Round 12: SC in each st around (8)
Fasten off leaving a long tail. Stuff head and then sew closed using your yarn needle.


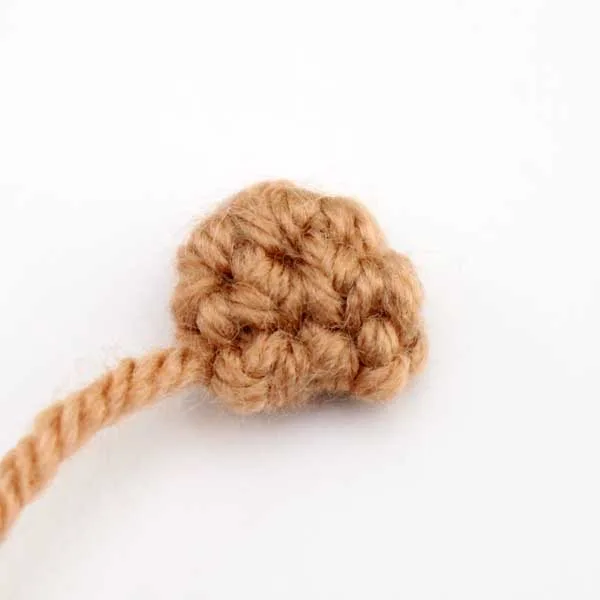
Tail
Round 1: Magic circle, chain 1 and make 4 SC into ring (4)
Round 2: 2 SC in first stitch, SC in next, repeat around (6)
Rounds 3 and 4: SC in each stitch around (6)
Fasten off leaving a long tail. Sew closed.

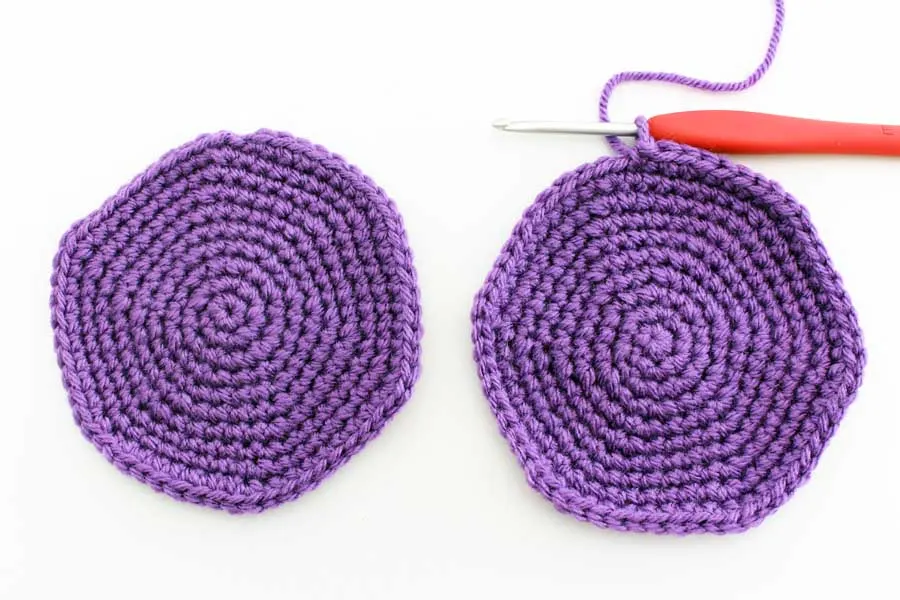
Inner Shell (make 2)
For the inner shell pieces, choose a color that complements the outer shell/flower piece. Only the bottom of the inner shell will be visible when the turtle is finished, so choose which color you’d like to see on the bottom of the turtle.
Round 1: Magic circle, 6 SC into ring (6)
Round 2: 2 SC in each st around (12)
Round 3: *2 SC in first st, SC in next st, repeat from * around (18)
Round 4: *2 SC in first st, SC in next 2 sts, repeat from * around (24)
Round 5: *2 SC in first st, SC in next 3 sts, repeat from * around (30)
Round 6: *2 SC in first st, SC in next 4 sts, repeat from * around (36)
Round 7: *2 SC in first st, SC in next 5 sts, repeat from * around (42)
Round 8: *2 SC in first st, SC in next 6 sts, repeat from * around (48)
Round 9: *2 SC in first st, SC in next 7 sts, repeat from * around (54)
Round 10: *2 SC in first st, SC in next 8 sts, repeat from * around (60)
Fasten off, weave in ends. When you are finished working up the second inner shell piece, don’t fasten off. Continue to next set of instructions to assemble your sea turtle together.

Assembly Instructions
Now that you have made all the parts of the sea turtle, you need to attach it all together.
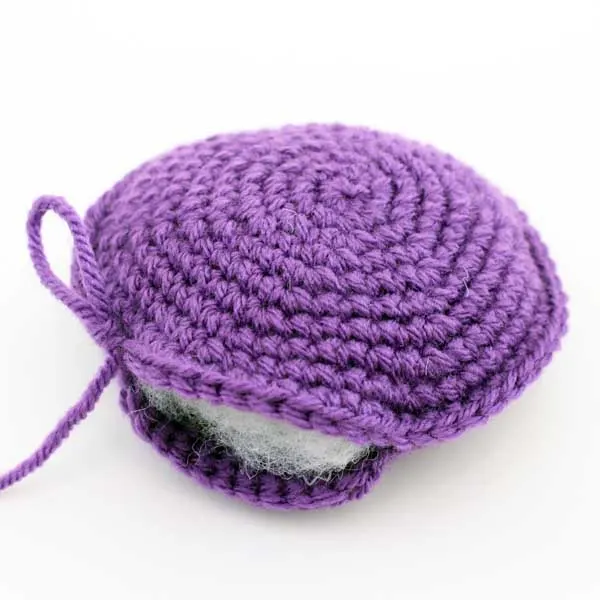
1) Join the Inner Shell Pieces Together
Place the first inner shell piece under the second one (with your yarn still attached). Keep the right sides facing outwards (this is the front side that faces you while crocheting) and the back sides against each other in the middle. Working through both layers (all 4 loops), single crochet around the outside of the circles, joining them together. When about two thirds of the way around, add stuffing inside. Continue crocheting around to close the inner shell piece. Finish stuffing before the opening gets too small. Join to first SC stitch with a slip stitch, fasten off and weave in ends.

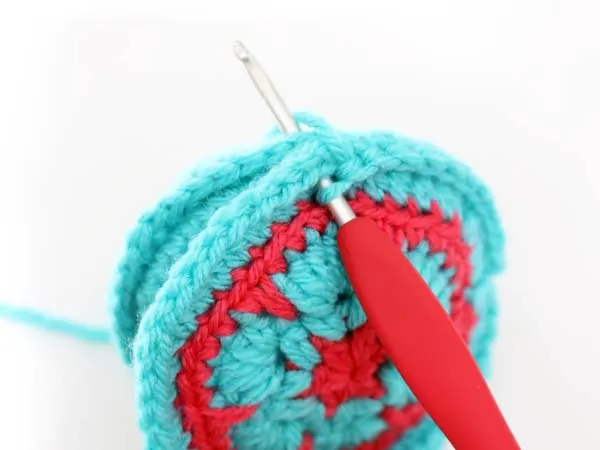
2) Attach African flower Piece to Shell
Place flower piece on top of the inner shell. Insert your crochet hook through a stitch on both the flower piece and the inner shell. Pull a loop of yarn through both layers, slip stitch, and chain 1. Work SC stitches around the outside of the shell, passing through both layers to join them together. One SC will be worked in each stitch around, including the chain spaces. When all the way around, join to first SC with a slip stitch and fasten off. Weave in ends and cut yarn. (The photo below is from our mini sea turtle amigurumi pattern, but the African flower shell piece is joined in the same way).

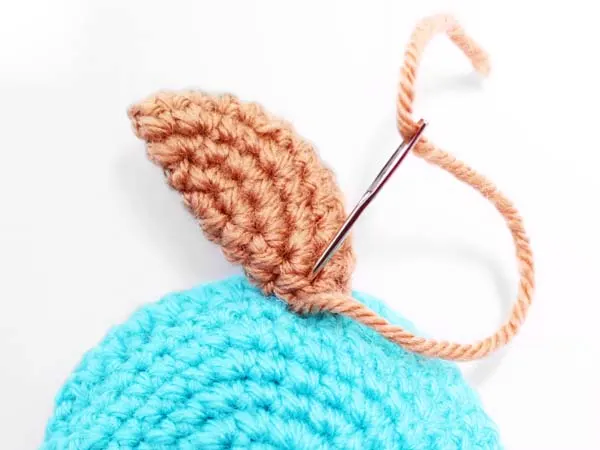
3) Sew on Legs, Head, and Tail
Use your yarn needle to sew the legs, head, and tail to your sea turtle. Place your stitches on the bottom of the turtle in the 2nd and 3rd round from the outside edge. Start with the head, then the front flippers, back flippers, and finally the tail. Sew on limbs by passing through a stitch on the limb and then passing through a stitch on the bottom of the body. Repeat until the limb is secure then weave in ends and cut yarn. (Note these photos are from our mini sea turtle amigurumi pattern, but the flippers, head, and tail are joined the same way).


You’re all done with your sea turtle! Now you can have fun making more with all different shell colors.
Remember, you can also make the Mini Sea Turtle Amigurumi and have a sweet little pair of turtles!

**Want to be kept in the loop? Be sure to like Loops and Love Crochet on Facebook and join the Loops and Love Crochet Group! Don’t forget to follow @loopsandlovecrochet on Instagram! Remember to tag Loops and Love Crochet when you post your fnished projects on social media! I’d love to see them! **
*You may make and sell any items made from my patterns, but please link back to my blog or Loops & Love Crochet as the designer. Please do not copy this pattern or photos and share as your own, in part or in whole. Instead, link back to the Loops and Love Crochet blog (especially when selling items you make from my patterns). Thank you!
Lorraine
Sunday 12th of August 2018
great pattern
Loops and Love Crochet
Sunday 12th of August 2018
Thank you so much!!
Lorraine
Sunday 12th of August 2018
Just made one of the cute turtles. Soooo in love with them. Great item to sell at Craft Fairs.
Loops and Love Crochet
Sunday 12th of August 2018
Great idea! Glad you like them! Thanks!! :)
diane carey
Friday 10th of August 2018
I wanted to save the sea turtle pattern but I can't seem to . I right click , left click and nothing happens. Help!
Loops and Love Crochet
Sunday 12th of August 2018
Hi Diane, I have copy/paste protection on my blog so you will be unable to right click to cut/copy text. I do sell a printable PDF for a few dollars in my Etsy and Ravelry shops. Sorry for the inconvenience, but it helps me protect the content on my site. Thank you for your question! Happy crocheting!