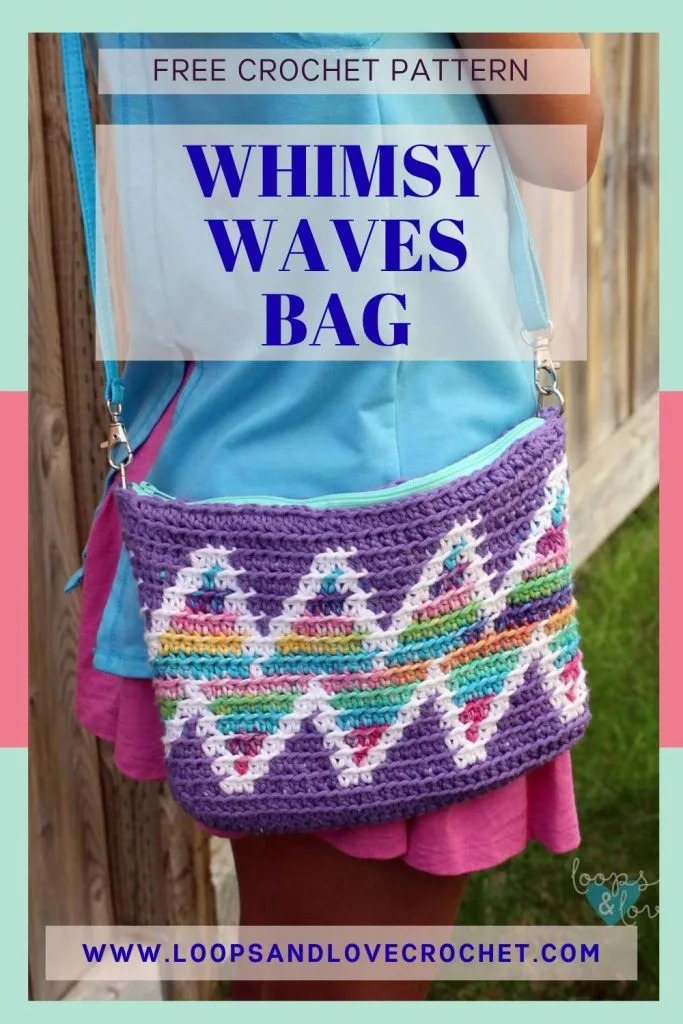
Worked in tapestry crochet, the Whimsy Waves Bag looks amazing in rainbow, neutral, or pastel yarns. Choose your favorite colors and enjoy working it up!

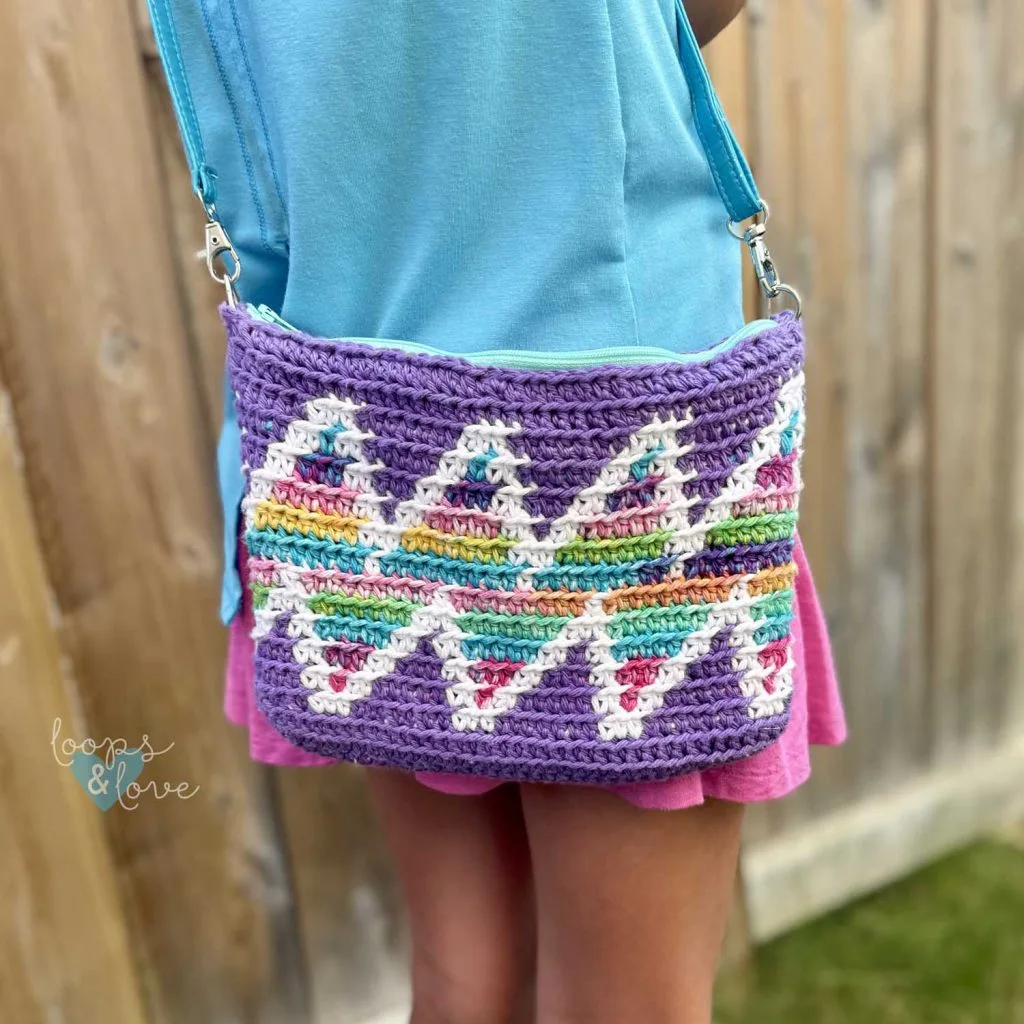
If you love crochet projects that are both fun to make and practical to use, you’ll love the Whimsy Waves Bag! Whether you are working in bright, cheerful colors or a more neutral palette, your bag will be eye-catching and the perfect stylish accessory. You’ll want to make them in different color combinations to match your moods or outfits!
The bold wave design for the Whimsy Waves Bag is created using the tapestry crochet technique and an easy-to-follow graph. Even if you are new to colorwork and tapestry crochet, you’ll find this bag manageable and fun to work up. If following a graph is not your thing, don’t worry, we’ve also added written instructions for the color changes too!
How big is the Whimsy Waves Bag?
This bag is designed as a small to medium sized purse-style bag that has room to carry your essentials without being bulky. The finished bag dimensions are approximately 9.5” wide by 7” tall. Want to make a larger bag? No problem at all! There are size adjustment instructions in the “Important Notes” below to help you crochet a bag in your preferred size!
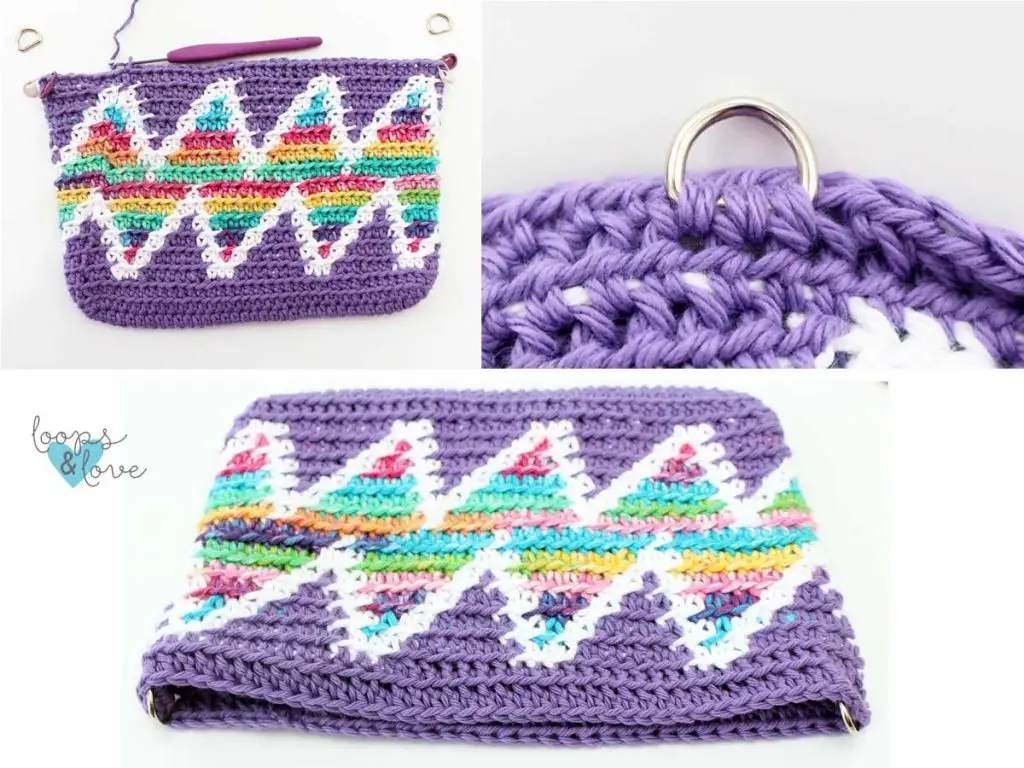
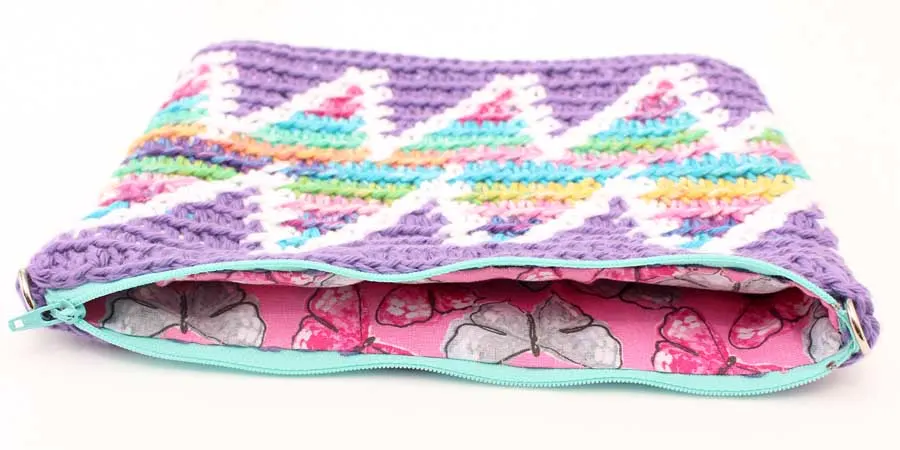
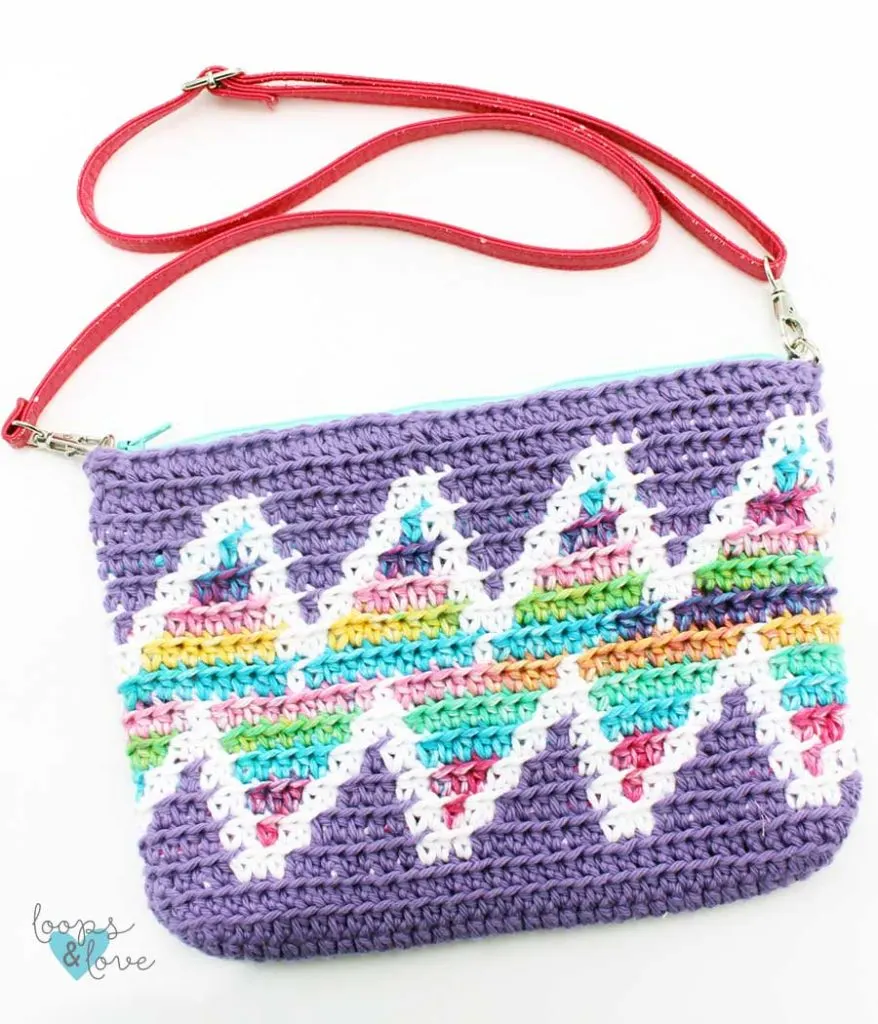
Now, let’s talk bag construction! The Whimsy Waves Bag is crocheted in one piece and from the bottom up. A zipper and optional lining is added after the bag is worked up. Finish your Whimsy Waves Bag by adding a clip-on strap so that your finished creation can be worn crossbody or over the shoulder.
Are your ready to crochet your own?
Ready to make your own Whimsy Waves Bag? Grab your yarn, hook, and let’s get started! The free crochet pattern and graph are below, or you can purchase the ad-free, printable PDF version from our shops!
Remember to like Loops and Love Crochet on Facebook and join the Loops and Love Crochet Group for sharing your finished projects! I’d also LOVE it if you followed @loopsandlovecrochet on Instagram! If you like crochet video tutorials, check out (and subscribe to) my Loops and Love Crochet YouTube Channel!
The Wimsy Waves Bag Crochet Pattern is available for FREE on this website. If you’d like an ad-free, printable PDF version, you may purchase it for a small fee from my Etsy or Ravelry shops. Thank you so much for supporting Loops & Love Crochet!

Looking for more crochet bag patterns? We have so many fun ones in all shapes and sizes on the blog! Check out our crochet bag patterns here!


Disclosure: This post may contain affiliate links, which means I may receive a small commission if you click a link and purchase something that I have recommended. This is done at no extra cost to you. Thank you for supporting Loops & Love Crochet!
Materials:
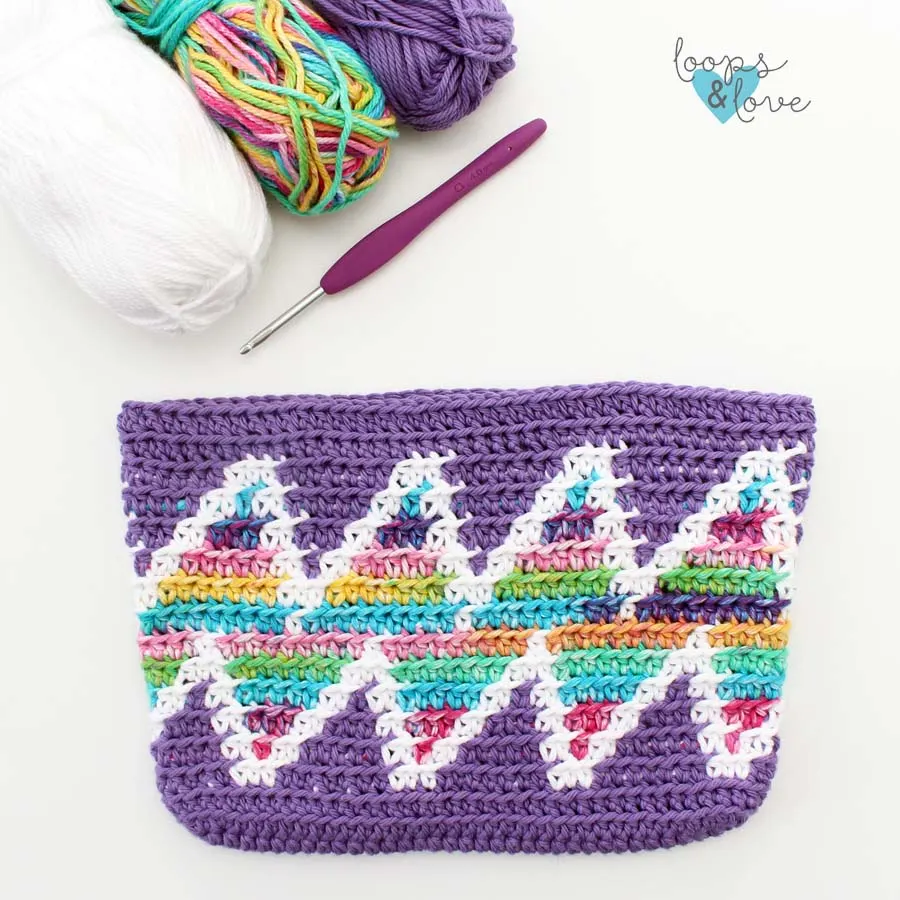
- Worsted Weight Yarn (#4) – worsted-weight cotton yarn was used for this project. The bag pictured is worked up in I Love This Cotton yarn in Amethyst, White, and Brights Print. Approximately 150 yards are needed in total for this project. This works out to about 50 yards of each color.
- 4 mm crochet hook
- Yarn needle to weave in ends
- Scissors for cutting yarn
- Zipper (optional) – 9” zipper (a longer zipper can easily be trimmed to size)
- Optional purse strap materials (or you can crochet a long strap and sew it onto the bag):
- Two “D-rings” for attaching bag strap – 0.5” size was used for the bag pictured
- Purse strap with clips on the ends
Stitches Used:
- Ch – chain
- Sl st – slip stitch
- HDC – Half Double Crochet
- BLO HDC – Half double crochet in the back loops only.
Finished Size:
- When finished, this bag measures approximately 9.5” wide x 7” tall.
Gauge:
- Gauge is not critical to this pattern turning out, however, for reference, two square inches is approximately 5 rows of 8 SC stitches.
Important Notes:
- Joined Rounds–At the end of each round, you will be joining the last stitch of the round to the first one with a slip stitch. Then you will chain 2 and start the next round in the same stitch. This will create a more hidden seam. It’s normal for the seam to travel a bit as the bag rounds are worked up, but a tight tension on the joins and ch 2 stitches will help hide it.
- Color Changes – Since you will be working most of this bag in tapestry crochet, you will be changing colors often and carrying the colors you are not using along with you under your stitches. To change colors, complete the last single crochet stitch in the first color up until the last yarn over. Yarn over with the new color and pull through last step of the single crochet stitch. So, your SC will go like this: insert hook into last stitch in the first color, pull up a loop, yarn over with the new color, pull through all loops on hook. Now you will be working in the new color until you change colors again.
- Tapestry Crochet Tips – You will be carrying the inactive yarn colors behind the active yarn you are using. Working in the back loops only helps hide the carried yarn. Try to keep your tension a little on the tighter side and the carried yarn behind and towards the bottom of your stitches to keep it more hidden. See the video tutorials below to help with the tapestry crochet and changing colors.
- Adjusting Bag Size – This pattern can easily be adjusted to make a wider/taller bag by extending the graph horizontally and vertically.
- Bag height – To make your bag taller, extra rows of the solid color (rows 1 and 14 on the graph) can be repeated at the bottom and top of the bag to increase the bag height. To keep the waves design in the center of the bag vertically, be sure to repeat the rows on the bottom and top an equal number of times.
- Bag width – The bag pictured in this pattern is 80 stitches around, but the graph repeats in multiples of 10. For the same graph to work out with the new bag size, you’ll need to have a stitch count that is a multiple of 10 after round 2. Don’t worry though, I’ve done the math for you!
- To have the stitch count to be a multiple of 10 after round 2, you’ll just need to add chains in groups of 5 to the starting chain for each set of 10 stitches you’d like to increase the bag width by. Here is what this looks like:
- A starting chain of 41 will give you 90 stitches after round 2.
- A starting chain of 46 will give you 100 stitches after round 2.
- A starting chain of 51 will give you 110 stitches after round 2.
- Video Tutorials – While there is not a video tutorial made specifically for this pattern, you might find the following videos helpful in working up this bag.
How to Make your Wimsy Waves Bag
**For the bag pictured, color A is purple, color B is white, and color C is rainbow yarn.
Bag Base
Round 1: In color A, ch 36, 2 HDC in 3rd chain from hook, HDC in each chain across, make 4 HDC in the last chain. Continue around so you are working on the other side of the chain. HDC in the next stitch and in each stitch across, make 2 HDC in last stitch (this will be the other side of the same stitch as the first 2 HDC of the round). Join with a sl st to first SC, ch 2. (72)
To keep your bag seam less noticeable and from traveling too much, pull your slip stitch joins tight and work the ch 2 with a tight tension. It’s normal for your seam to travel a bit as you work the rest of the bag up, but this will help hide it.
Round 2: 2 HDC in first 2 sts, HDC in next 32 sts, 2 HDC in each of the next 4 stitches (these are the ones at the end of the chain), HDC next 32 sts, 2 HDC in each of the last 2 stitches. Join, ch 2. (80)
Bag Body/Height:
The rest of the rounds for this bag are worked in the back loops only (BLO). The round count will start at 1 again so the round numbers match up with the row numbers on the graph.
Rounds 1-14: BLO HDC in each stitch around, join, ch 2. (80)
**For these rounds, you’ll need to follow the tapestry crochet graph or the written instructions for the color changes. Both the graph and written instructions are below.
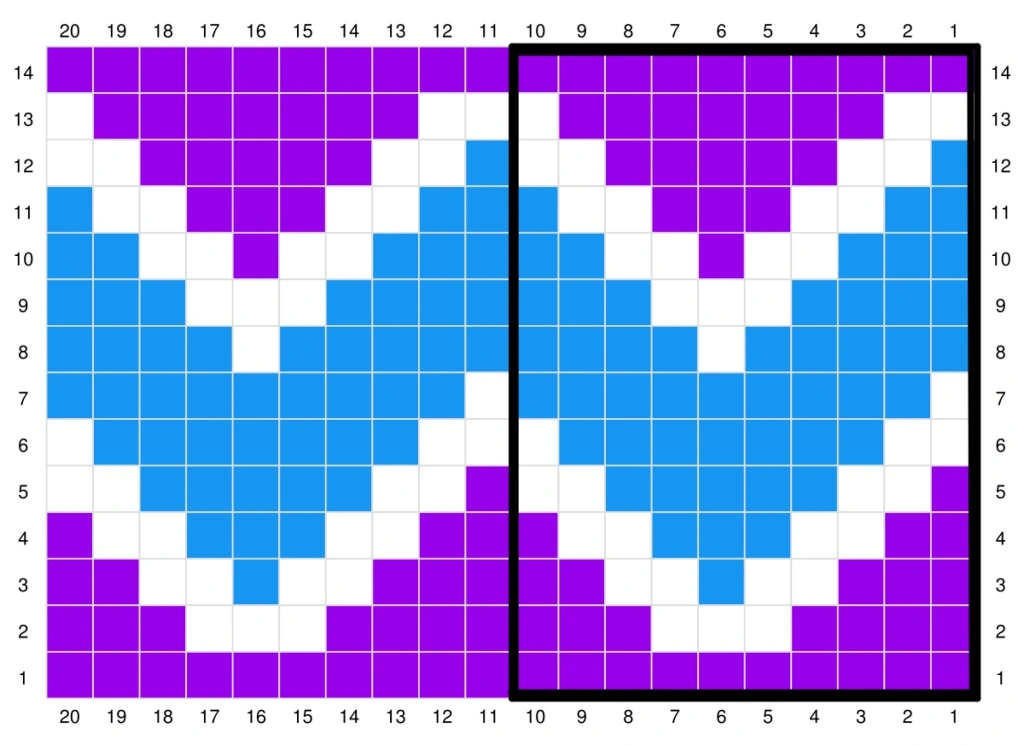
Graph Notes:
- Each box represents one BLO HDC stitch.
- Sl st join and chain 2 after each row.
- Inactive yarn colors are carried along with you under your stitches.
- This design has a repeat multiple of 10. These stitches have been marked off so you can see the repeated section easier.
- The graph is 20 stitches wide; however, the bag is 80 stitches around. The graph will need to be repeated for a total of 4 times for the 80 stitches around the bag.
- To read the graph, start at the bottom right and move from right to left, bottom to top (left to right if you are left-handed).
- After row 14 of the graph, continue to the top of bag instructions.

Written Instructions for Graph
**For the bag pictured, color A is purple, color B is white, and color C is rainbow yarn.
Row 1: A20
Row 2: A4, B3, A7, B3, A3
Row 3: A3, B2, C1, B2, A5, B2, C, B2, A2
Row 4: A2, B2, C3, B2, A3, B2, C3, B2, A1
Row 5: A1, B2, C5, B2, A1, B2, C5, B2
Row 6: B2, C7, B3, C7, B1
Row 7: B1, C9, B1, C9
Row 8: C5, B1, C9, B1, C4
Row 9: C4, B3, C7, B3, C3
Row 10: C3, B2, A1, B2, C5, B2, A1, B2, C2
Row 11: C2, B2, A3, B2, C3, B2, A3, B2, C1
Row 12: C1, B2, A5, B2, C1, B2, A5, B2
Row 13: B2, A7, B3, A7, B1
Row 14: A20

Top of Bag
Work one more round of HDC stitches to work in the D-rings for the clip-on bag strap. If you are not using D-rings or are crocheting the strap instead, you can just add the last round of BLO HDC and disregard the instructions about adding the rings.
Start by laying the bag flat and use stitch markers to mark the 3 stitches on each side of the bag. This is so your strap is lined up correctly. Your marked off stitches should be about the width of the stitch marker, so if you are using a different size of D-ring, adjust the number of stitches accordingly. Next, you’ll complete a round of BLO HDC stitches, but you will work over the D-rings for the marked off stitches. Flip the D-ring upside down and line the flat end up along your stitches. When you insert your hook into the next stitch, also pass it under the flat edge of the D-ring. Do this for 3 stitches for each D-ring and then finish the rest of the round, joining and fastening off at the end.

If you need a visual of working the D-rings into the round of SC stitches, this video tutorial will show the steps for adding D-rings to a similar bag.
Once your D-rings are attached to the bag, you can flip them, so the curved part is facing upwards and then clip the ends of your bag strap to the rings.
Adding a zipper and/or a lining to your bag is optional. If need a visual on sewing in a zipper and lining, please see the links in the important notes section above for all the video links. Once the zipper and/or lining are added, clip the strap on and you’re all done!


I hope you love your beautiful crochet Wimsy Waves Bag! If you share your finished projects on social media, I’d love to see them! Tag @loopsandlovecrochet so I don’t miss them!

**Want to be kept in the loop? Be sure to like Loops and Love Crochet on Facebook and join the Loops and Love Crochet Group! Don’t forget to follow @loopsandlovecrochet on Instagram! Remember to tag Loops and Love Crochet when you post your finished projects on social media! I’d love to see them! **
*You may make and sell any items made from my patterns, but please link back to my blog or Loops & Love Crochet as the designer. Please do not copy this pattern or photos and share as your own, in part or in whole. Instead, link back to the Loops and Love Crochet blog (especially when selling items you make from my patterns). Thank you!