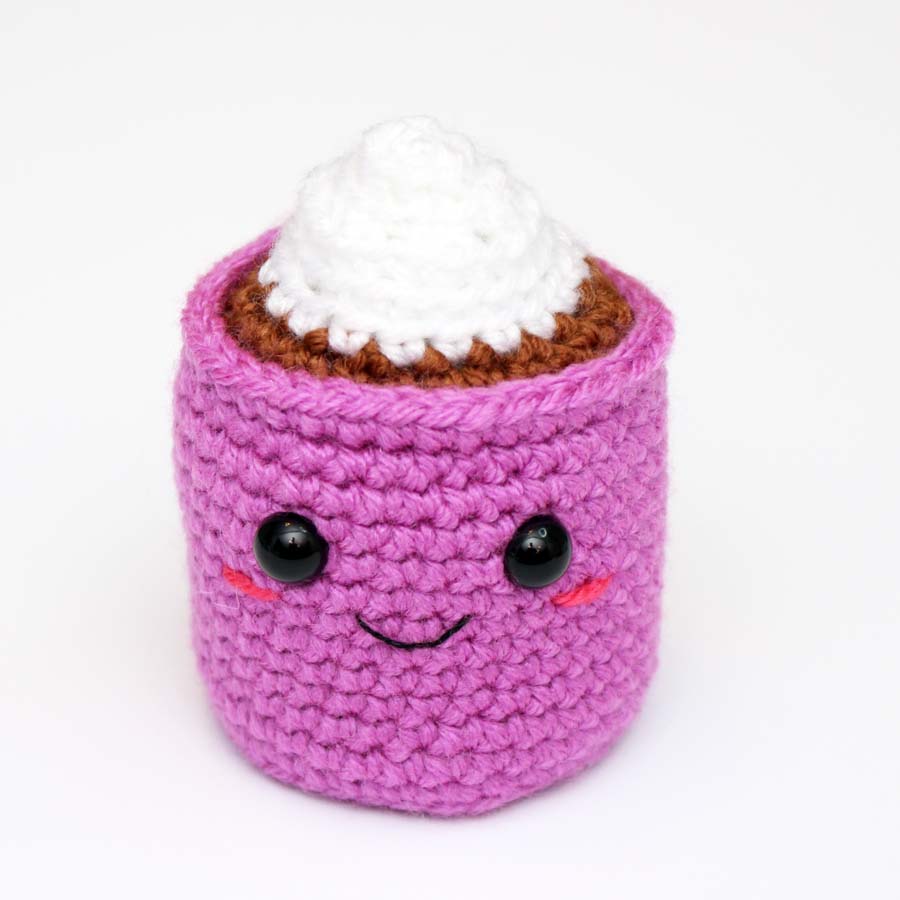
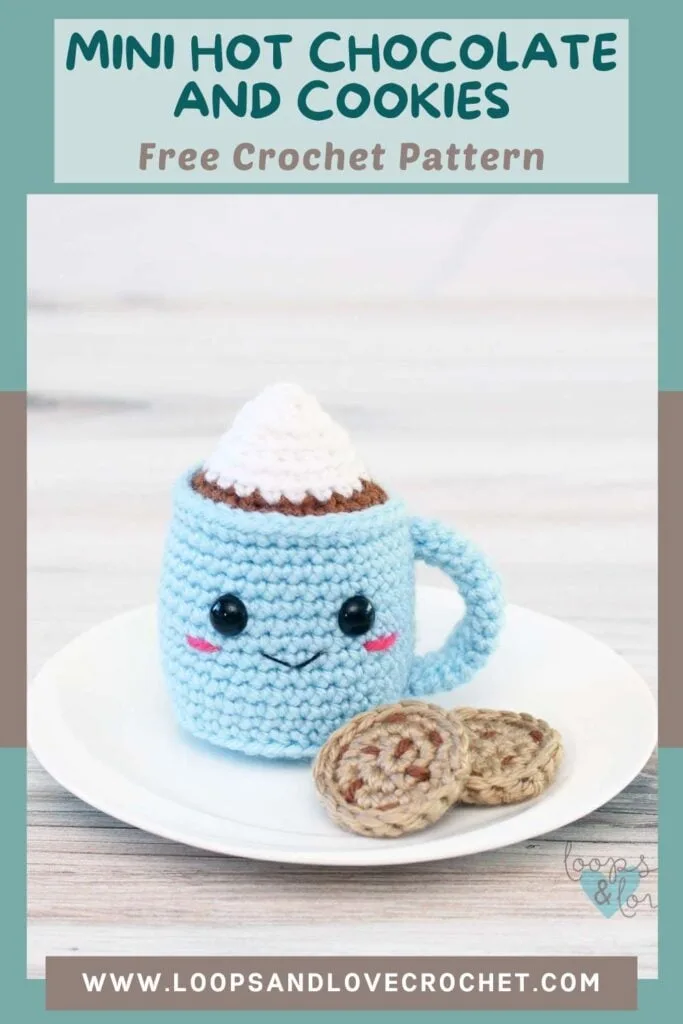
This Mini Hot Chocolate and Cookies crochet pattern has the warmest and coziest vibes with a side of cuteness! Enjoy working up this free crochet pattern!

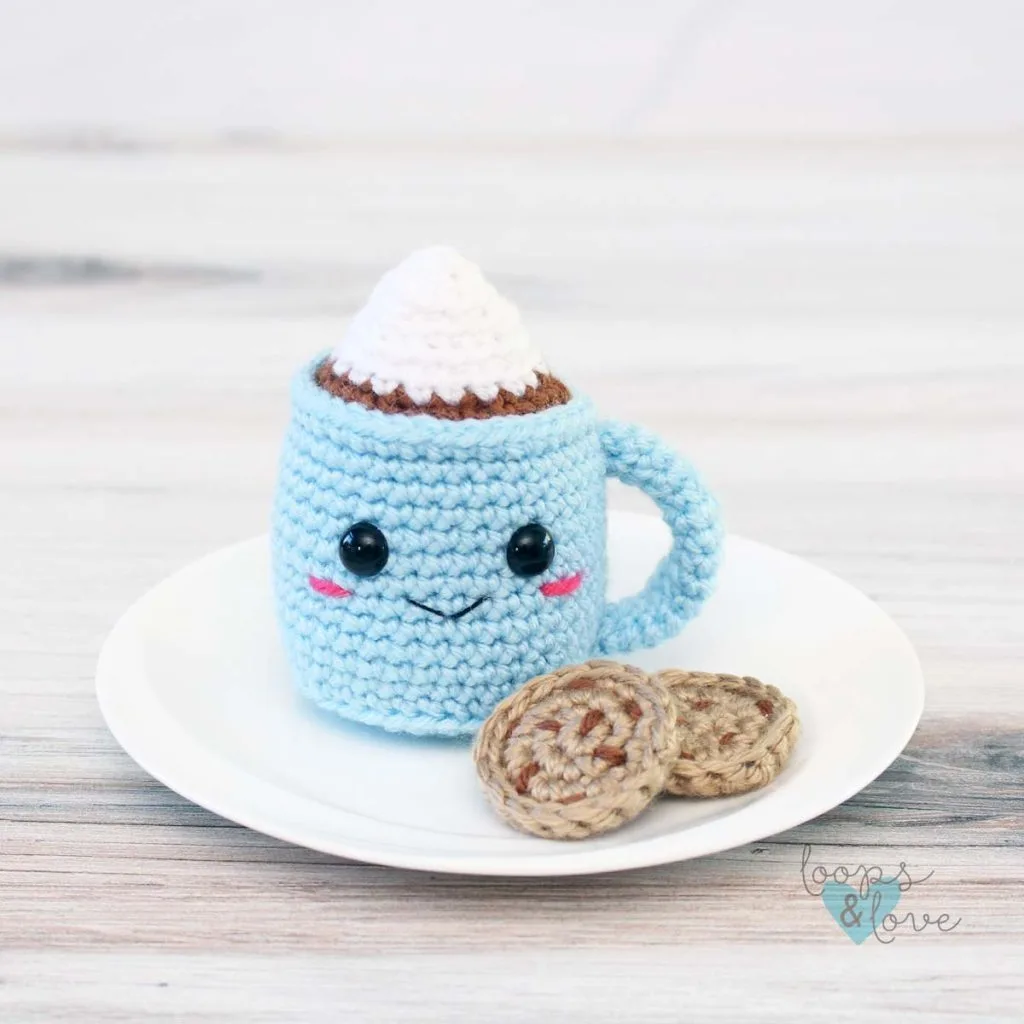
There’s just something about hot chocolate and cookies that instantly makes everything feel a little more magical. Whether it’s a snowy afternoon or a holiday tradition, this mini hot chocolate and cookies crochet pattern captures all the cozy vibes. I hope you enjoy the tiny details and cute charm of our little hot chocolate. It’s such a fun project that works up quickly too!
Your mini hot chocolate and cookies are perfect as ornaments, tiered tray or shelf décor, or even as a gift for someone special. Plus, they’re calorie-free and look delicious! This would make a great homemade gift for teachers, friends, or anyone who loves winter coziness.
This crochet pattern is a very low-sew pattern! You’ll be happy that the only time you’ll need your sewing/yarn needle is for adding the facial features, attaching the handle to the cup, and weaving in ends. The hot chocolate cup is worked up in one piece from bottom to top. Then the handle is worked up and sewn to the cup.
Full Video Tutorial!
You’ll also love that this crochet pattern includes a full video tutorial! Check out the follow-along video on your YouTube Channel: Mini Hot Chocolate and Cookies Video Tutorial.
What color of mug will you choose? I can’t wait to see!
Remember to like Loops and Love Crochet on Facebook and join the Loops and Love Crochet Group for sharing your finished projects! I’d also LOVE it if you followed @loopsandlovecrochet on Instagram! If you like crochet video tutorials, check out (and subscribe to) my Loops and Love Crochet YouTube Channel!
Pin this post on Pinterest to save it for later!


Disclosure: This post may contain affiliate links, which means I may receive a small commission if you click a link and purchase something that I have recommended. This is done at no extra cost to you. Thank you for supporting Loops & Love Crochet!
The Mini Hot Chocolate and Cookies crochet pattern is available for FREE on this website. If you’d like an ad-free, printable PDF version, you may purchase it for a small fee from my Etsy or Ravelry shops. Thank you so much for supporting Loops & Love Crochet!
Materials
- Worsted Weight #4 yarn – Any worsted-weight yarn for this project, cotton or acrylic. The hot chocolate and cookies pictured in this pattern are made with WeCrochet/Knit Picks Brava Worsted. For the hot chocolate, approx. 45 yards of yarn is needed. This breaks down to about 30 yards in the main color for the mug, 10 yards in white, and 5 yards in brown (pictured in Sky, Espresso, and White colorways). For the cookies, just a few yards of two shades of brown are needed (pictured in Almond and Espresso).
- 3.5 mm crochet hook
- Safety Eyes – 9 mm size
- Stuffing – any fiber-based stuffing
- Embroidery or crochet thread – a small amount of black for the mouth (optional)
- Yarn needle – for weaving in ends and attaching pieces together (bent yarn needles work great for amigurumi projects).
- Scissors for cutting yarn
Stitches Used
- Ch – chain
- Sl St – slip stitch
- SC – single crochet
- BLO SC – single crochet worked in the back loops only
- FLO SC – single crochet worked in the front loops only
- SC DEC – single crochet decrease
- INV DEC – invisible single crochet decrease – insert hook into front loop of next stitch, then insert your hook into the front loop of the following stitch (3 loops on hook). Yarn over and draw through 2 loops (2 loops on hook), yarn over and pull through 2 remaining loops on hook. Here’s a video tutorial for the INV DEC.
Finished Size
- Finished hot chocolate measures approximately 3” tall. The bottom of the cup is approx. 2.5” in diameter.
Important Notes
- Worked in rounds – This pattern is mostly worked in continuous rounds, which means that you will not be joining the last stitch of the round with the first one. Instead, you’ll need to keep track of where each round started and how many stitches you have made because after each round you’ll continue right on to the stitches of the next round (with no join). It is useful to use a stitch marker (or a piece of yarn) to mark the start or end of each round. Please not that there are a couple places where a slip stitch join is in the instructions to help make the color changes less visible.
- Magic Circle – Make a circle with your yarn, insert crochet hook into circle and draw up a loop. Chain one and then start making the stitches of round 1 into the ring. This video tutorial will show you the magic circle and working the first rounds of stitches.
- Sew pieces together – after the hot chocolate cup and handle are worked up, the handle will be sewn to the cup with yarn and yarn needle.
- Video Tutorial – This crochet pattern has a full video tutorial to help you crochet your mini Hot Chocolate Amigurumi from start to finish. Find the video on our YouTube channel here!
Crochet Your Mini Hot Chocolate Amigurumi
Hot Chocolate Mug
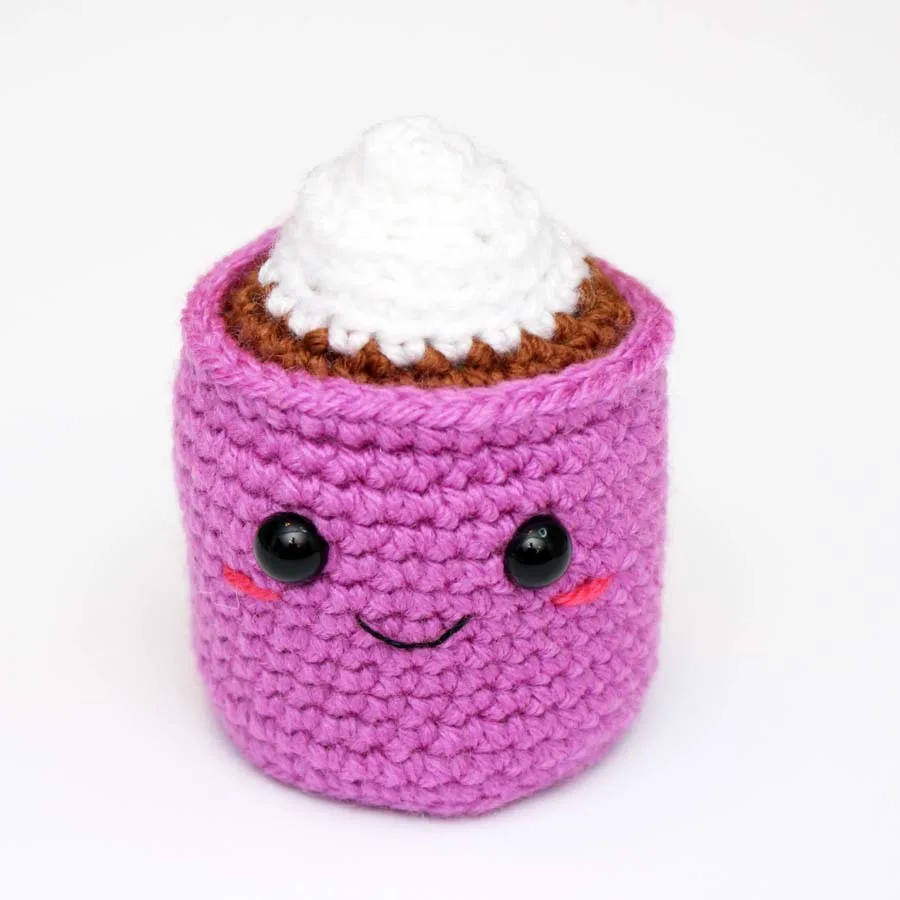
Cup with Hot Chocolate and Whipped Cream
The hot chocolate cup is worked from the bottom up. Start with the main color you are using for the mug.
Round 1: Magic circle, ch 1, make 6 SC sts into ring (6)
Round 2: 2 SC in each st around (12)
Round 3: *2 SC in first st, SC in next st, repeat from * around (18)
Round 4: *2 SC in first st, SC in next 2, repeat from * around (24)
Round 5: *2 SC in first st, SC in next 3, repeat from * around (30)
Round 6: *2 SC in first st, SC in next 4, repeat from * around, sl st join to first st, ch 1 (36)
Round 7: BLO SC in each st around (36)
Rounds 8-18: SC in each st around (36)
At the end of round 18, sl st join to first st, ch 1
Round 19: FLO SC in each st around, sl st join to first st
Fasten off, weave in ends.
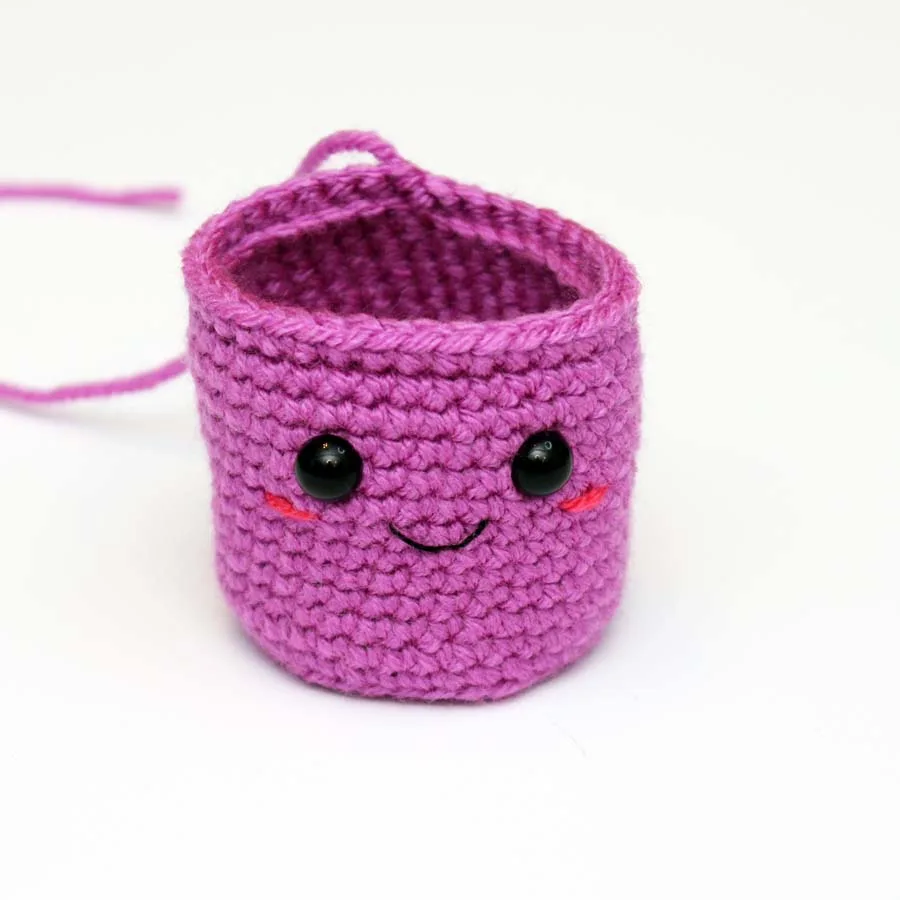
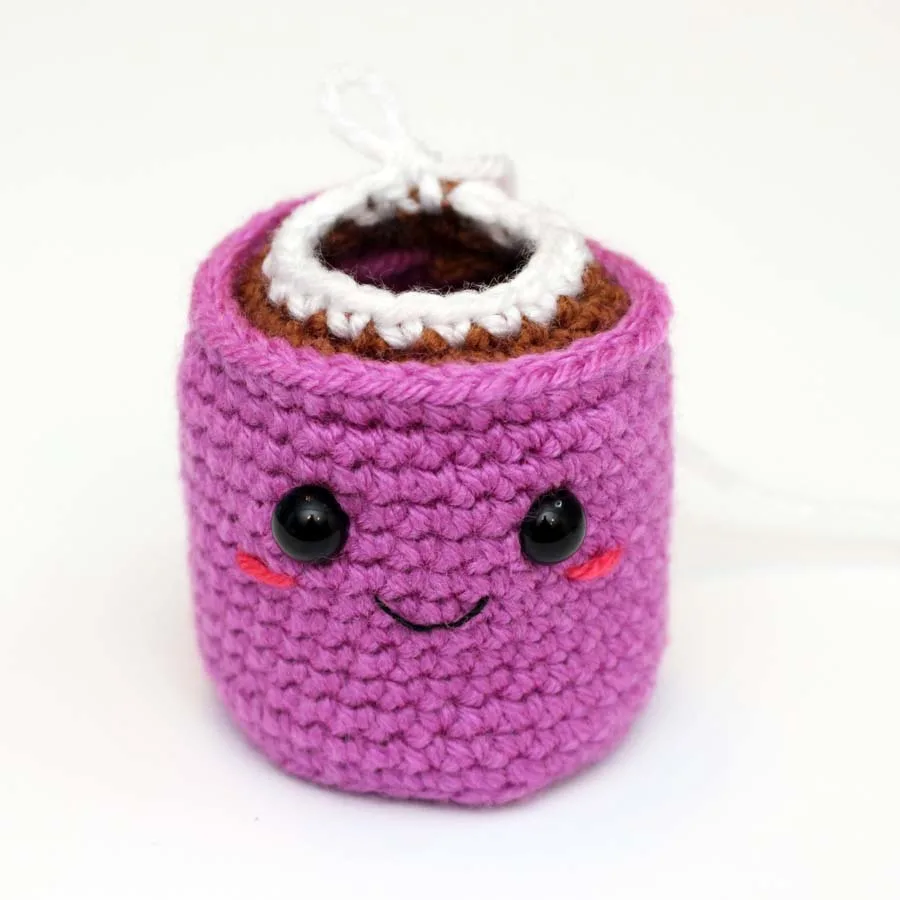
Insert safety eyes between rounds 15 and 16, approximately 5 stitches apart. Next, stitch on the mouth and cheeks (optional). To form the mouth, use your black yarn or embroidery thread and yarn needle, make two stitches forming a “V” in the center of the face, starting one round below the bottom of the eyes. To form the cheeks, using a piece of pink yarn and your yarn needle, make a small horizontal stitch (about 2 SC in width) below each eye towards the outside of the face.
Weave in or tie off all ends from the mouth and cheeks. These ends can be hidden inside the hot chocolate cup, but be sure to tie off any loose ones to make sure they’re secure.

Optional – To help keep the shape of the bottom of the cup so it can sit flat on a surface, cut a piece of cardboard or plastic slightly smaller than the size of the bottom of the cup and place it in the bottom. Part of a yogurt/dip container lid or a piece of a cardboard box will work perfectly.
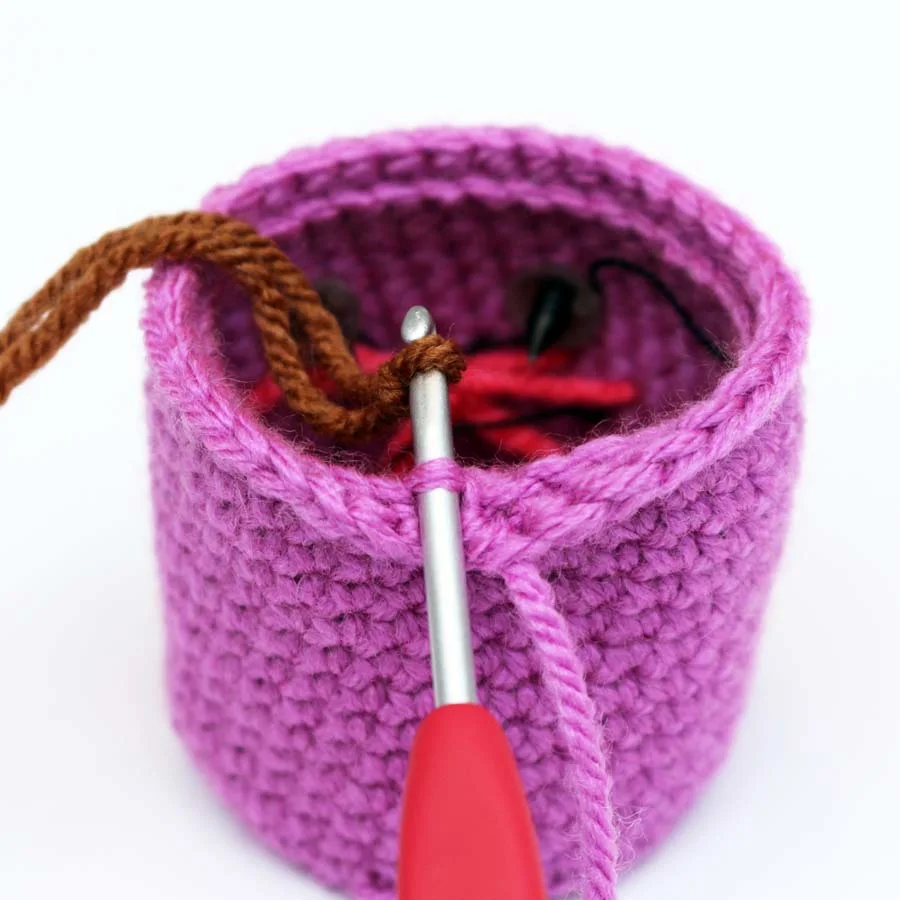
Next, we will add the brown yarn for the hot chocolate and then the white for the whipped cream. The round count will start at 1 again here.
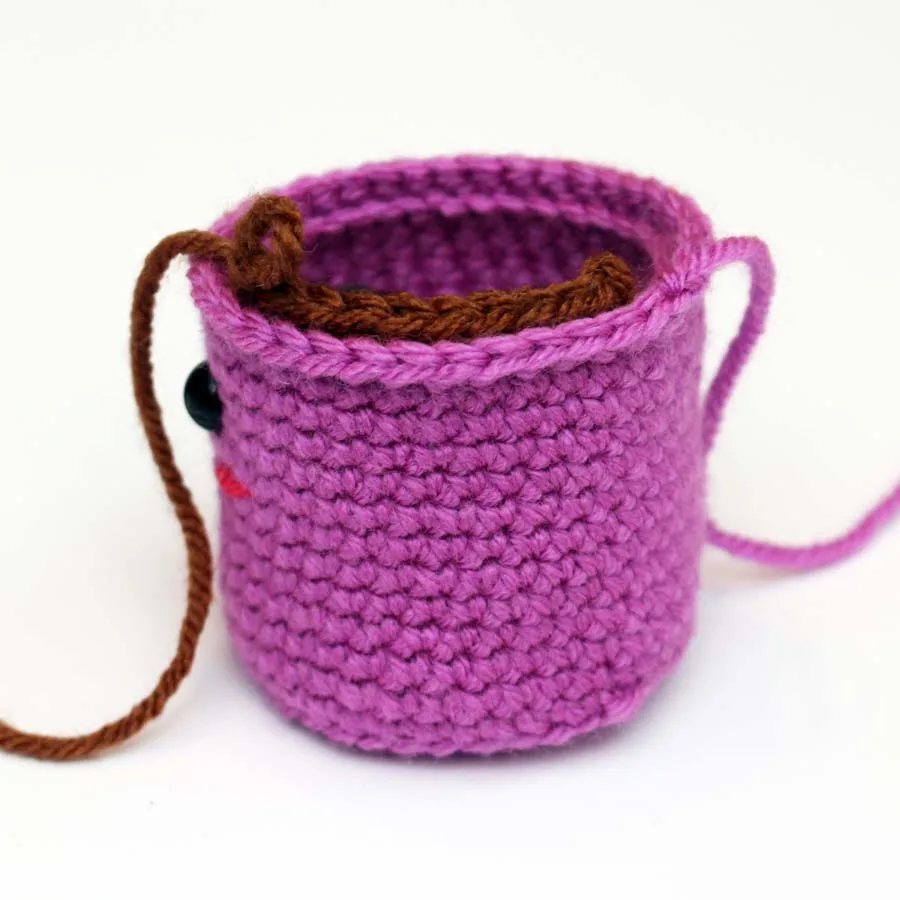
Round 1: Make a slip knot with brown yarn. Join the slip knot through the first unworked back loop stitch of round 19. You will be able to see the back loops because they are where you made the round of front loop only stitches. Ch 1, *SC DEC, SC in next 4 sts, repeat from * around (30).


For the SC decrease stitches in the next rounds, invisible SC decrease stitches can be worked instead. Invisible single crochet decreases are generally less bulky and less noticeable than regular single crochet decreases, however both types of stitches are fine for this project.
Round 2: *SC DEC, SC in next 3 sts, repeat from * around (24)
Change color to white yarn
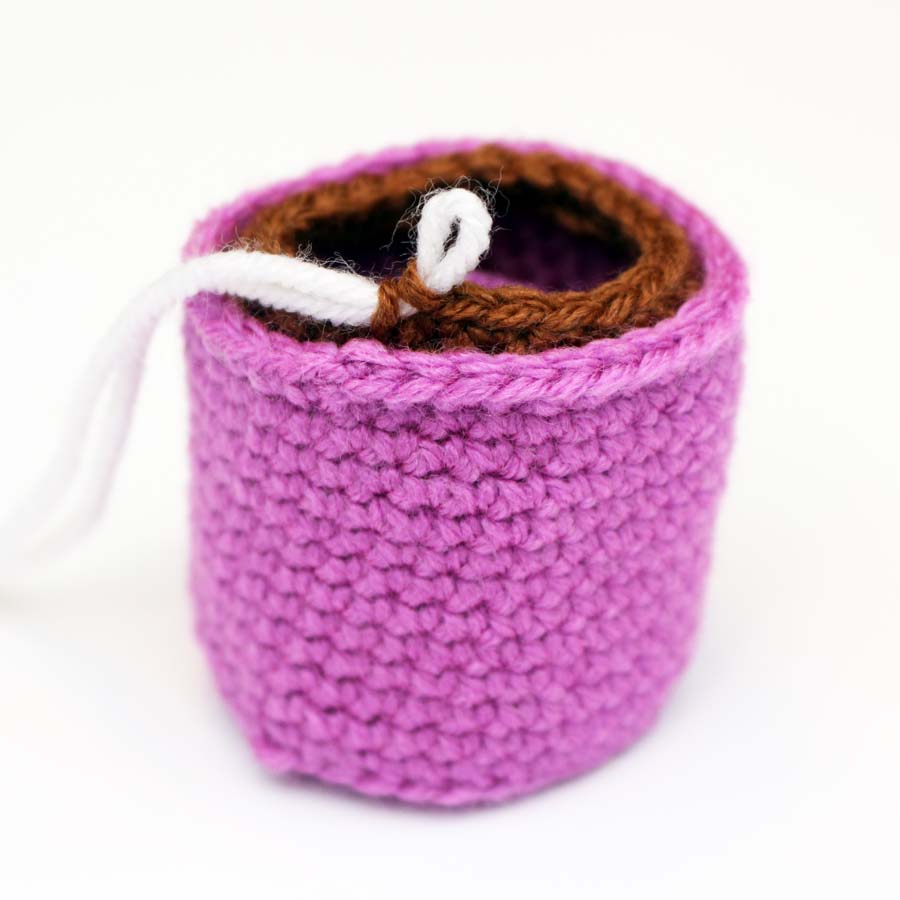

Add stuffing to the cup. Stuff firmly, but not so firmly that it shows through the stitches or changes the shape of your project. Be sure to keep stuffing 1-2 rounds below the top so you can keep working your stitches without catching stuffing. Continue stuffing over the next few rounds. Add the final bits of stuffing before the opening gets too small.
Round 3: *SC DEC, SC in next 2 sts, repeat from * around (18)

For rounds 4-7, work in the BACK LOOPS ONLY.This is to create the ridge along the “whipped cream swirl” by leaving the front loops unworked.
Rounds 4-5: SC in each st around (18)
Round 6: *SC DEC, SC in next st, repeat from * around (12)

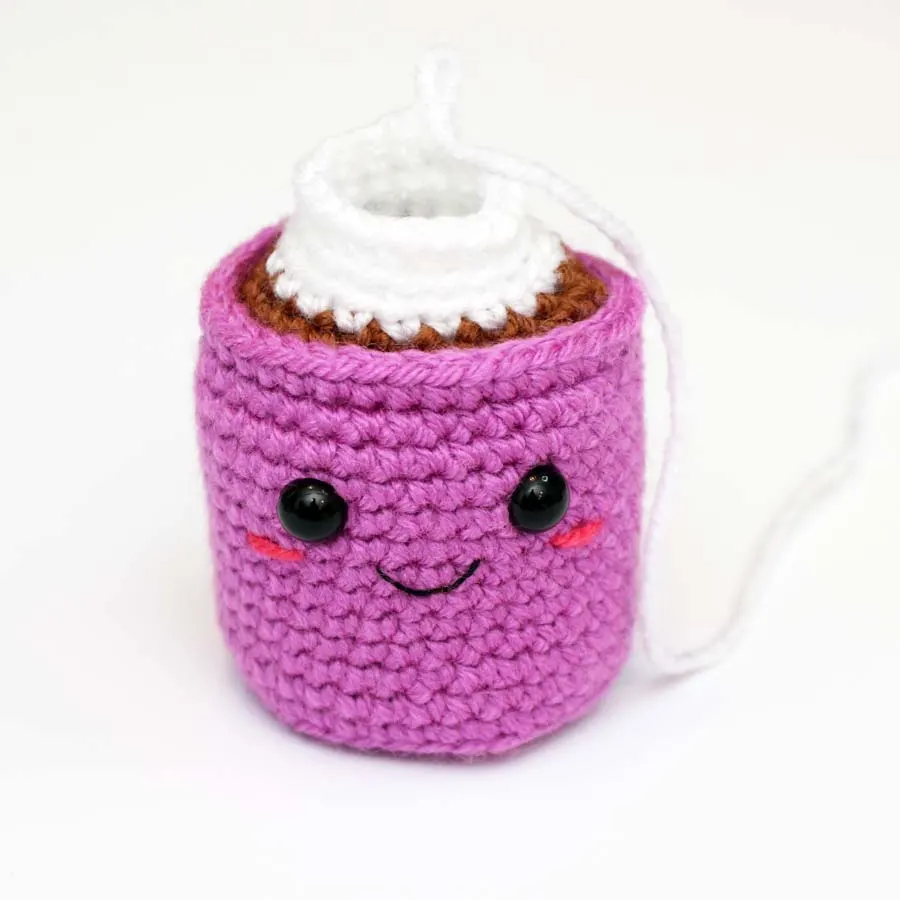
Round 7: SC DEC in each st around (6)
Fasten off. Close the using your yarn needle and passing yarn through the back loop of each stitch of round 7 and pulling tightly to close. If the top needs a bit of shaping, use your yarn needle and yarn tail to sew a few stitches down at the top before securing and cutting. Set cup aside and work up the handle below.
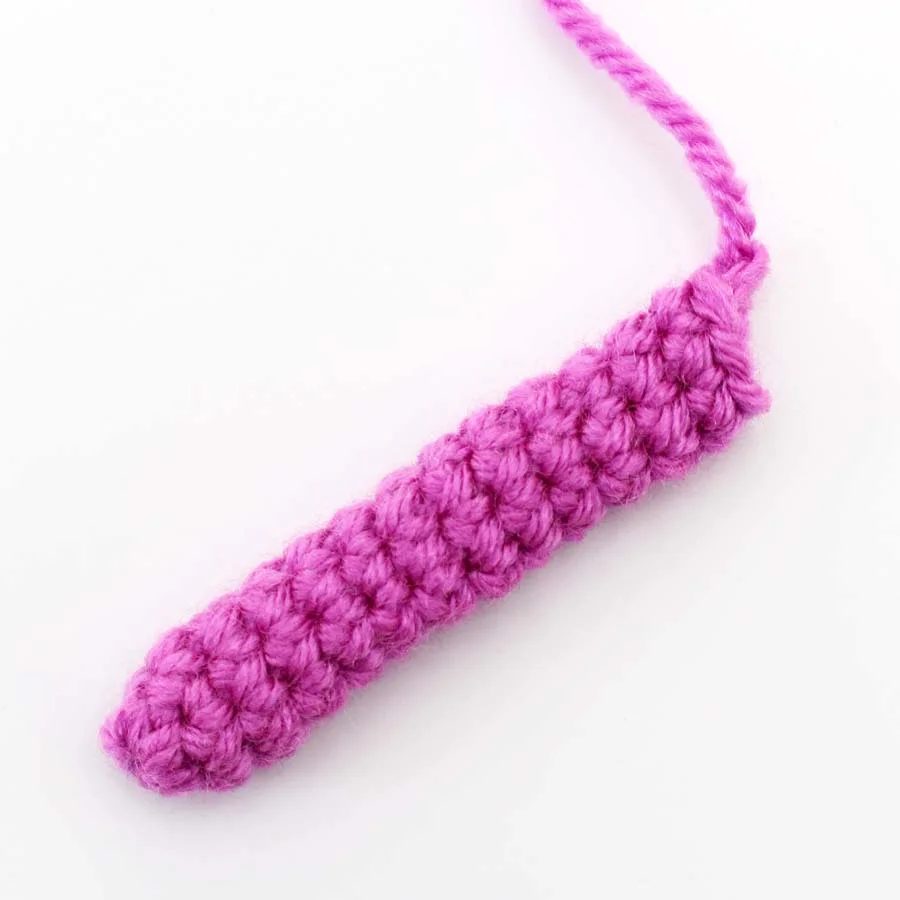
Cup Handle
The handle will be worked up separately and then sewn to the cup afterwards to form the mug.
Round 1: In main color, magic circle, ch 1, 6 SC into ring (6)
Rounds 2-14: SC in each st around (6)
*After the first few rounds, be sure to flip your project so the right side of the stitches are facing outward (not inside out).
*More or less rounds of SC stitches can be worked to achieve desired handle length. For the mug shown, the handle was about 2.5” long when sitting flat.
Fasten off, cut yarn leaving a long tail for sewing the handle to the mug.

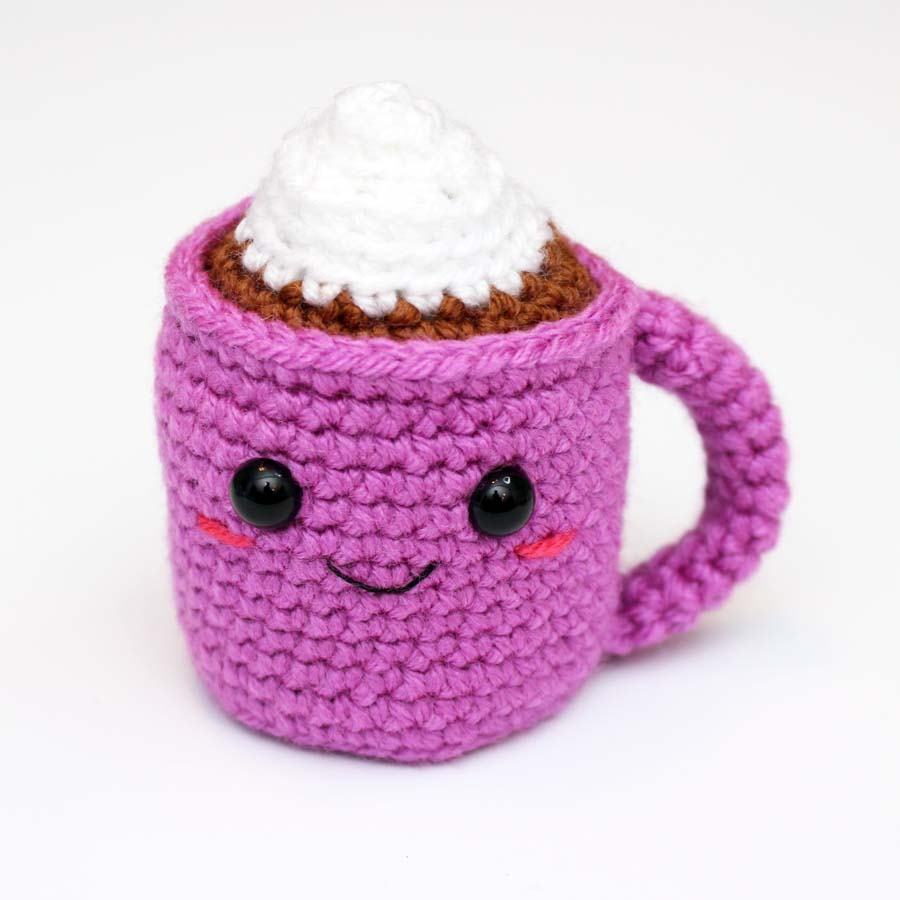
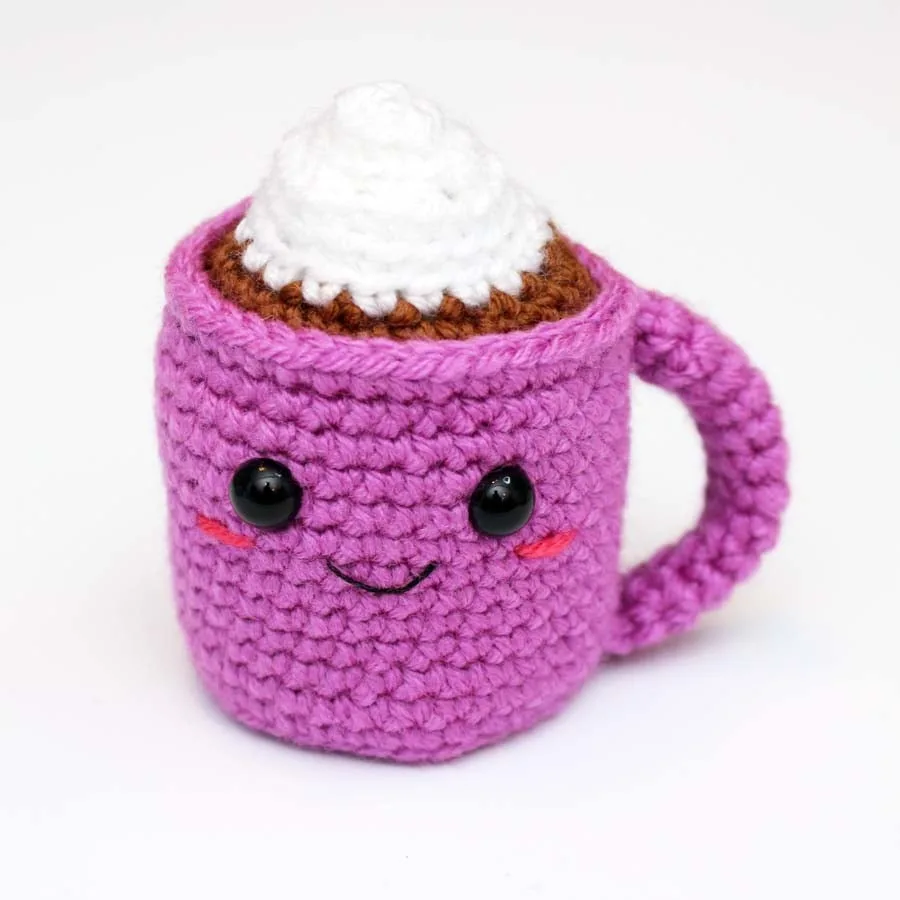
Mini Hot Chocolate Assembly Instructions
Use your yarn needle and the yarn tail to sew the handle to the mug. First, flatten and pass your yarn needle through the stitches to close the top of the handle. With the amigurumi face facing towards you, line the handle up on the side of the cup (right as pictured), using sewing pins to hold it in place. For the mug shown, the handle was lined up 1-2 rounds below the top and 1 round above the bottom. Sew in and out of a few stitches on the handle, passing through the cup with each stitch to secure the handle in place. When the one end of the handle is secured, pass your yarn tail through the cup to the bottom of the handle. Repeat the same sewing steps as used for the top of the handle. When the handle is securely attached, pass yarn tail through the cup to the other side and cut yarn.
You’re all done with your cute little Hot Chocolate Mug! Now you can make some cute little cookies to go with it!
Cookies
Make two cookie pieces and then crochet them together to form one cookie. The “chocolate chips” will be added at the end.
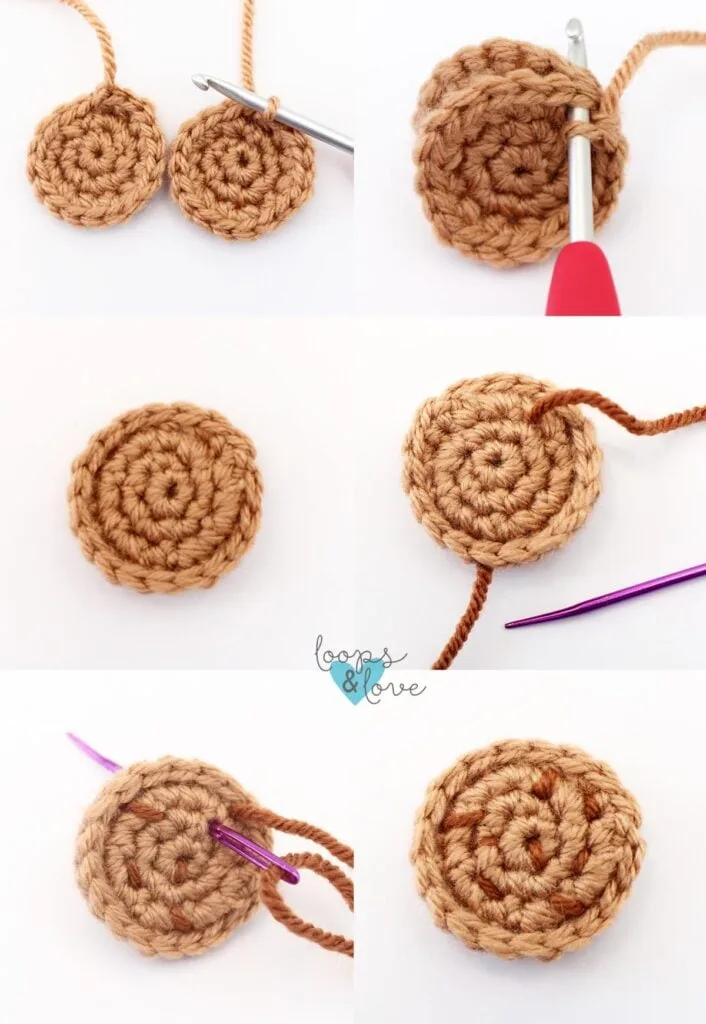
Cookie Pieces (make 2)
Round 1: In light brown yarn, magic circle, ch 1, 6 SC into ring (6)
Round 2: 2 SC in each st around (12)
Round 3: *2 SC in first st, SC in next st, repeat from * around, join to first SC (18)
Fasten off, weave in ends. Work up the second cookie piece, but do not fasten off after joining. Continue to cookie assembly instructions below.
Cookie Assembly
To assemble the cookies, place cookie pieces on top of each other with the right sides facing out. The cookie on the top is the one that you still have attached to your hook. Chain 1, SC in the same stitch as joining and each stitch around, working through both layers of stitches (both cookies). When back to the first SC, join with a slip stitch, fasten off, and weave in any ends.
To add the chocolate chips, thread a strand of darker brown yarn onto your yarn needle. Sew small stitches of brown by passing your yarn needle up and down through random stitches on the cookie, passing through both layers of cookie. Weave in ends inside of cookie and cut yarn.

Repeat instructions above to make as many cookies as you’d like to accompany your hot chocolate!
You’re all finished your Mini Hot Chocolate and Cookies! For more winter crochet inspiration, browse our our patterns here! Our Winter Snowflake Wall Hanging is a fun one too!

**Want to be kept in the loop? Be sure to like Loops and Love Crochet on Facebook and join the Loops and Love Crochet Group! Don’t forget to follow @loopsandlovecrochet on Instagram! Remember to tag Loops and Love Crochet when you post your fnished projects on social media! I’d love to see them! **
*You may make and sell any items made from my patterns, but please link back to my blog or Loops & Love Crochet as the designer. Please do not copy this pattern or photos and share as your own, in part or in whole. Instead, link back to the Loops and Love Crochet blog (especially when selling items you make from my patterns). Thank you!