
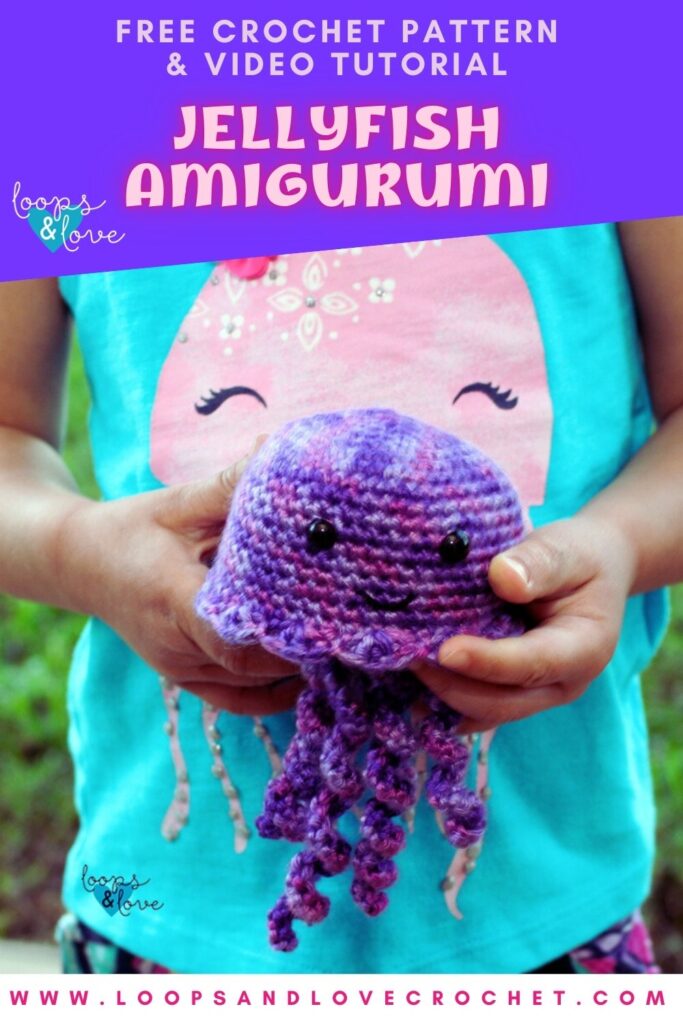
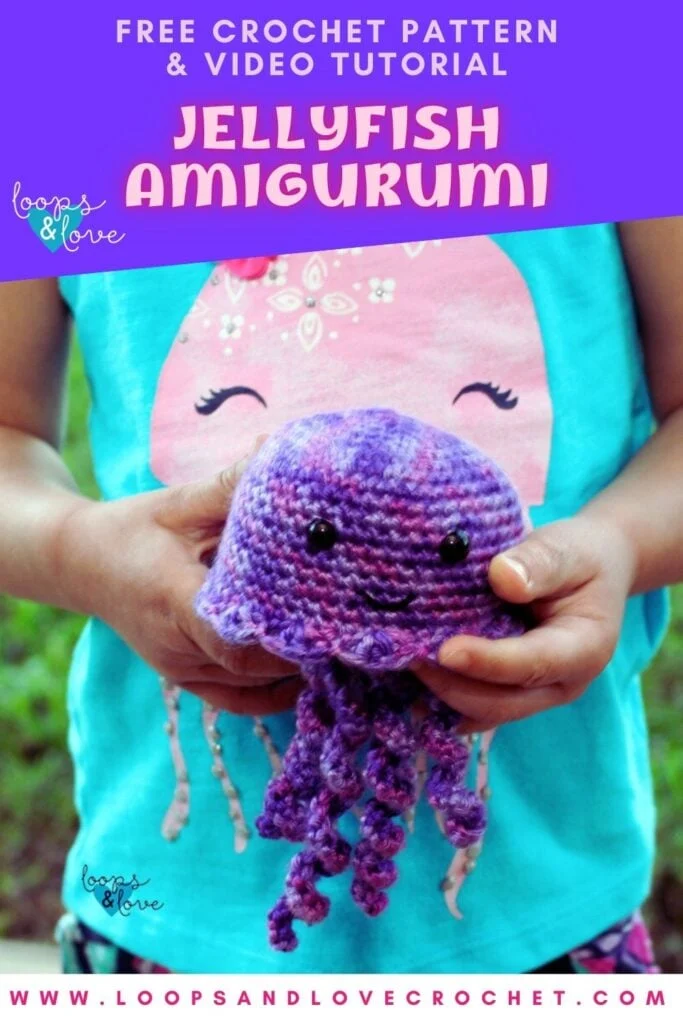
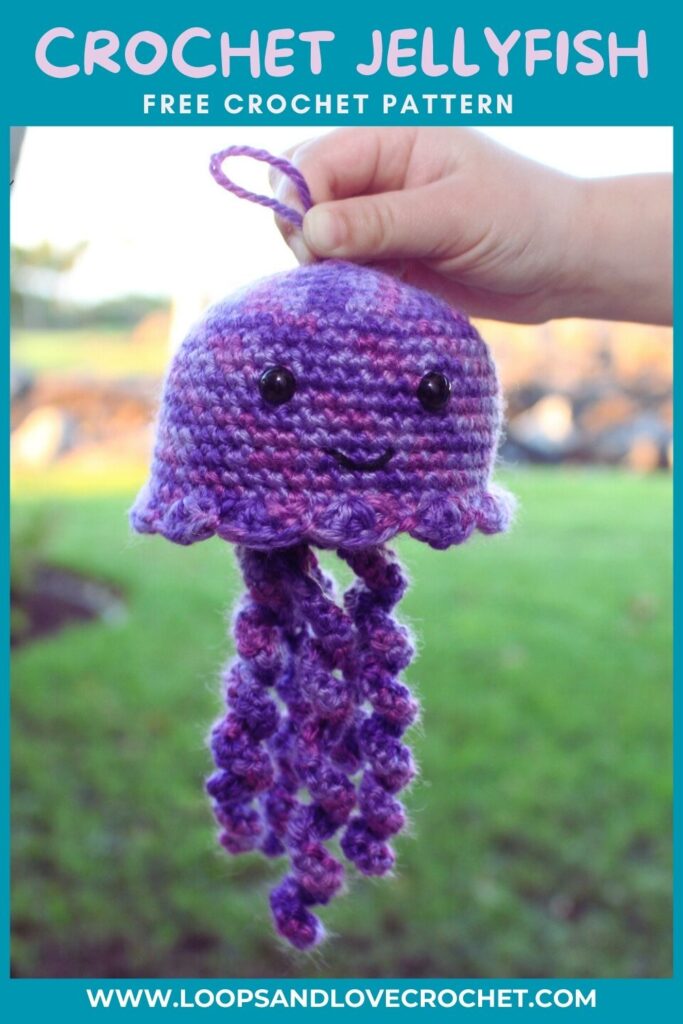
While vacationing on the Big Island of Hawaii this winter, I have been feeling inspired to work on some ocean themed crochet projects. This little jellyfish amigurumi was so much fun to make and I love how it turned out! It is the perfect size for small hands, measuring about 6 inches (from top of head to bottom of tentacles).
For this amigurumi jellyfish, the head is worked up in two pieces and then sewn together. The tentacles are added at the end. This project is a pretty quick one! Perfect for working up between larger projects, or just for a fun project that is almost immediately gratifying!
If you are feeling ocean inspired like I am, check out my other crochet patterns inspired by the sea! You can crochet the whole collection of sea creatures!
Honu the Sea Turtle Amigurumi


Bailey the Blue Whale Amigurumi

Oliver the Octopus Amigurumi


Remember to like Loops and Love Crochet on Facebook and join the Loops and Love Crochet Group! I’d also LOVE it if you followed @loopsandlovecrochet on Instagram!
This pattern is available for FREE on this website. If you’d like an ad-free, printable PDF version, you may purchase it for a small fee from my Etsy or Ravelry shops. You can purchase this individual pattern or a bundle of all of the ocean themed crochet patterns. Thank you so much for supporting Loops & Love Crochet!
Disclosure: This post may contain affiliate links, which means I may receive a small commission if you click a link and purchase something that I have recommended. This is done at no extra cost to you. Thank you for supporting Loops & Love Crochet!
Materials:
- Worsted weight yarn – I used Red Heart Soft yarn in Plummy.
- Safety eyes – I used 8 mm size
- If you’d rather not use safety eyes, Grace and Yarn has a great tutorial on making a crochet alternative for safety eyes!
- 3.5mm crochet hook
- Yarn needle – bent yarn needles work great for amigurumi projects!
Stitches Used:
- Ch – chain
- Sl St – slip stitch
- SC – single crochet
- DC- double crochet
- SC INC – single crochet increase – two single crochet stitches worked into one stitch. SC INC Video Tutorial HERE.
- INV DEC – invisible single crochet decrease – insert hook into front loop of next stitch, then insert your hook into the front loop of the following stitch (3 loops on hook). Yarn over and draw through 2 loops (2 loops on hook), yarn over and pull through 2 remining loops on hook. INV DEC Video Tutorial HERE
Important Notes:
- Magic Circle – Make a circle with your yarn, insert crochet hook into circle and draw up a loop. Use this loop to start your first chain 1 of the pattern. If you are unsure of how to make a magic circle, check out my Magic Circle Video Tutorial.
- Joining – This pattern is worked in continuous rounds without joining. After you finish the stitches of one round, start right on the next without joining between.
HEAD
First you will need to make the top of the head, next you will make the base of the head, and then crochet them together.
Top of Head
Round 1: Magic circle, chain 1 and make 6 SC stitches into ring (6)
Round 2: 2 SC in each stitch around (12)
Round 3: 2 SC in first stitch, SC in next, repeat around (18)
Round 4: 2 SC in first stitch, SC in next 2, repeat around (24)
Round 5: 2 SC in first stitch, SC in next 3, repeat around (30)
Round 6: 2 SC in first stitch, SC in next 4, repeat around (36)
Round 7: 2 SC in first stitch, SC in next 5, repeat around (42)
Round 8: 2 SC in first stitch, SC in next 6, repeat around (48)
Rounds 9-17: SC in each stitch around. (48)
*Insert safety eyes between rounds 12 and 13 approx 6 stitches apart.
Fasten off, weave in ends.

Base of Head
Round 1: Magic circle, chain 1 and make 6 SC stitches into ring (6)
Round 2: 2 SC in each stitch around (12)
Round 3: 2 SC in first stitch, SC in next, repeat around (18)
Round 4: 2 SC in first stitch, SC in next 2, repeat around (24)
Round 5: 2 SC in first stitch, SC in next 3, repeat around (30)
Round 6: 2 SC in first stitch, SC in next 4, repeat around (36)
Round 7: 2 SC in first stitch, SC in next 5, repeat around (42)
Round 8: 2 SC in first stitch, SC in next 6, repeat around (48)
Round 9: SC in each stitch around. (48)
Fasten off, weave in ends.

Now you will be stuffing the head and joining the pieces together. Insert your hook in a stitch, passing through both layers (all 4 loops), join yarn and make a slip stitch. SC in the same stitch and in each stitch around. Join to first SC with a slip stitch, do not fasten off (you’ll make the frilly edging next). (48)

*Make sure you add stuffing to the head as you join the pieces together, making sure that you’ve added enough stuffing before the opening gets too small.

Next, to add the frill around the edge of the head. Starting where you left off with the slip stitch (from joining the head pieces together), *skip the next stitch, slip stitch in next, skip next stitch, 3 DC in next.* Repeat * around. Join with a slip stitch to first stitch. Fasten off, weave in ends.

TENTACLES
I made a bunch of spirals of different lengths and attached them to the center of the bottom of the jellyfish.
To make a spiral, start by chaining your desired length. SC in 2nd chain from hook and in each chain across. Fasten off, leaving a tail to sew onto jellyfish.
Make as many of these spirals as you want for your jellyfish. I made 6 spirals of different lengths. For the longer spirals, I started with a chain of about 35, for the shorter ones, I started with a chain of about 20. Once you finish making a spiral, you make it longer by gently stretching it a little bit.
To attach the tentacles to the jellyfish, use your yarn needle to sew them around the stitches near the 3rd or 4th round of the base of the jellyfish head. Weave in/hide ends inside jellyfish before cutting.


Optional: Use your yarn and yarn needle to make a loop on top of the jellyfish head if you’d like to hang it.

That’s it! You’re all done! I hope you love your little jellyfish!
**You may make and sell any items made from my patterns, but please link back to my blog or Loops & Love Crochet as the designer. Please do not copy and post claiming it as your own. Please do not re-publish my photos as your own. Thank you!**
**Want to be kept in the loop? Be sure to like Loops and Love Crochet on Facebook and join the Loops and Love Crochet Group! Don’t forget to follow @loopsandlovecrochet on Instagram! Remember to tag Loops and Love Crochet when you post your finished projects on social media! We’d love to see them! **