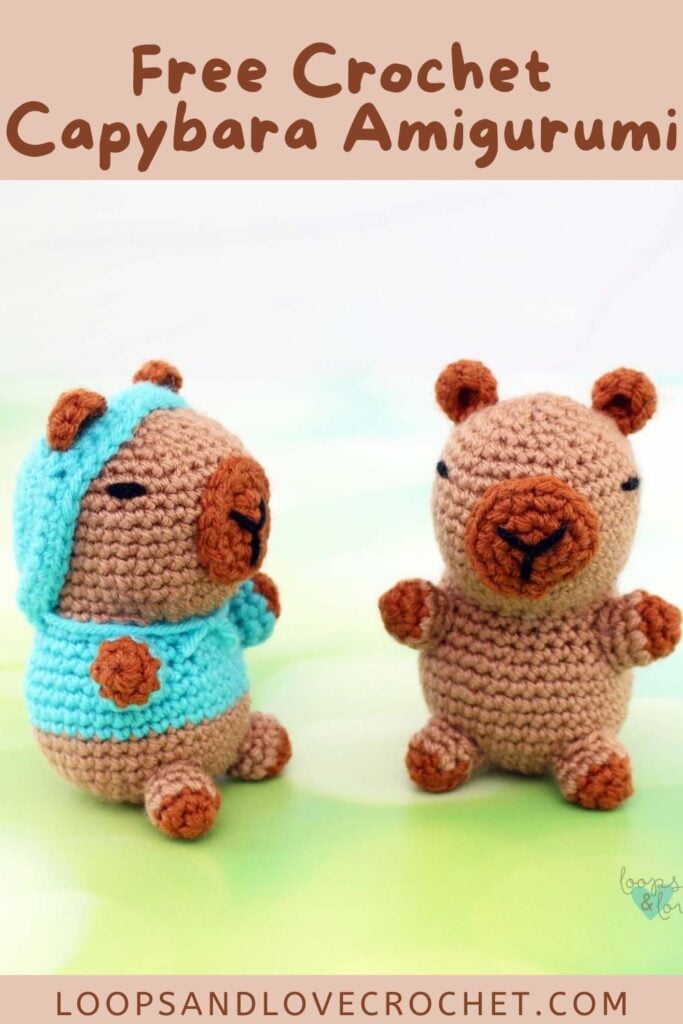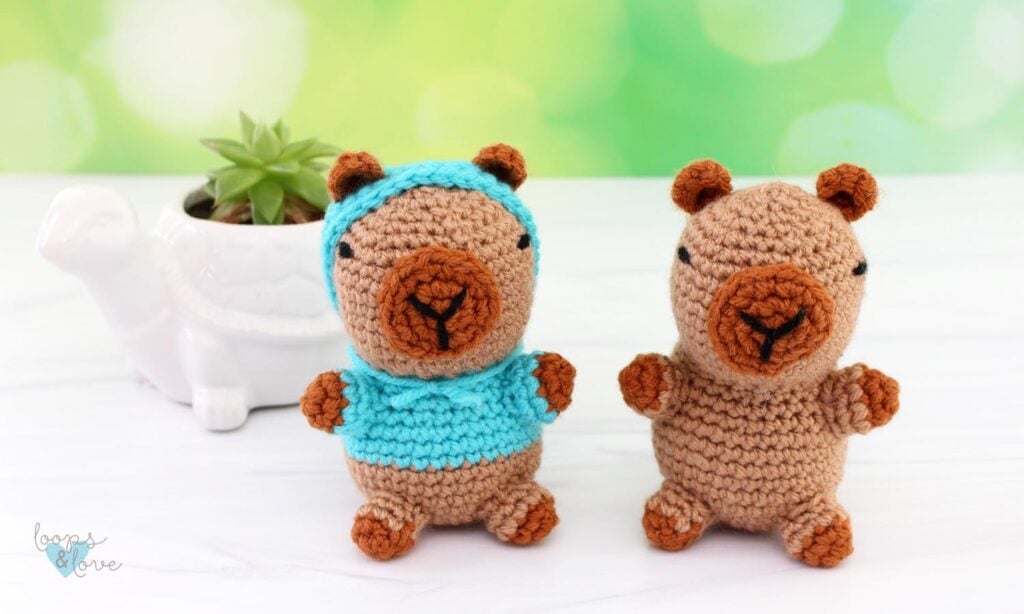
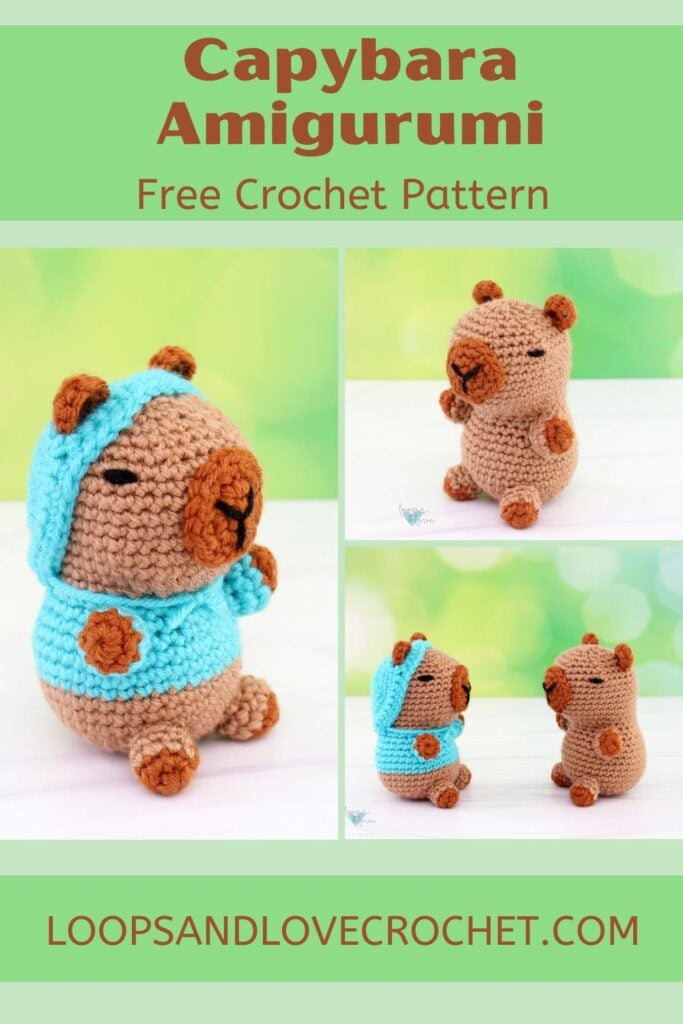
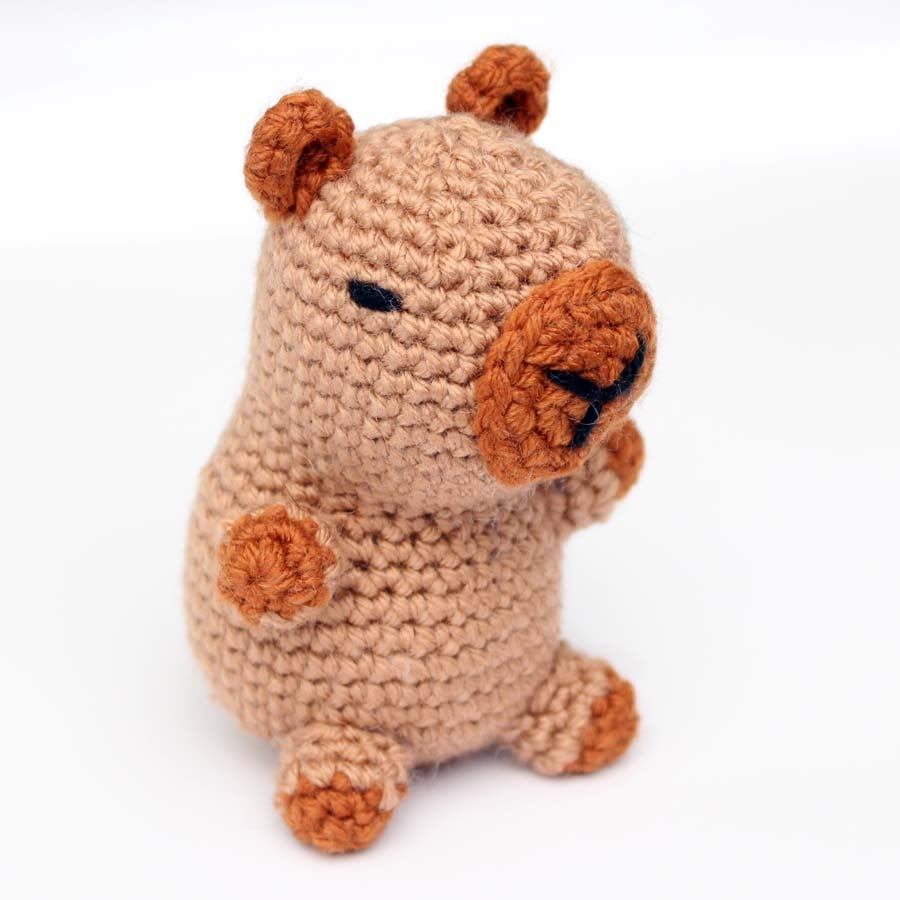
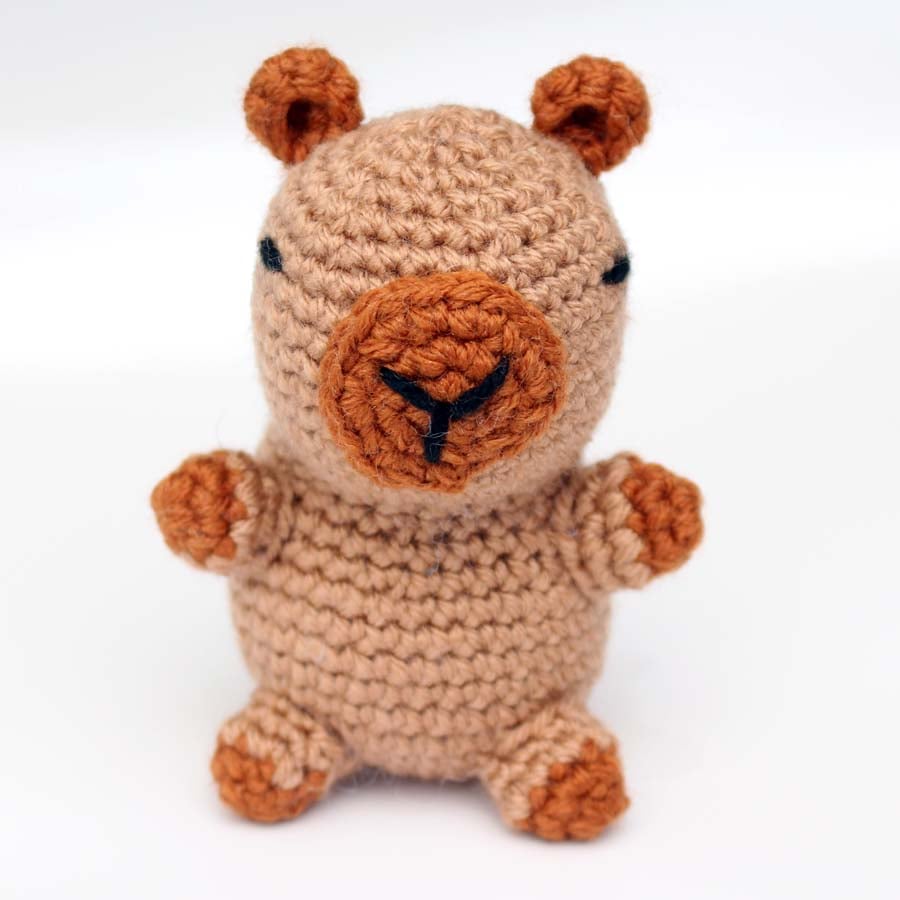
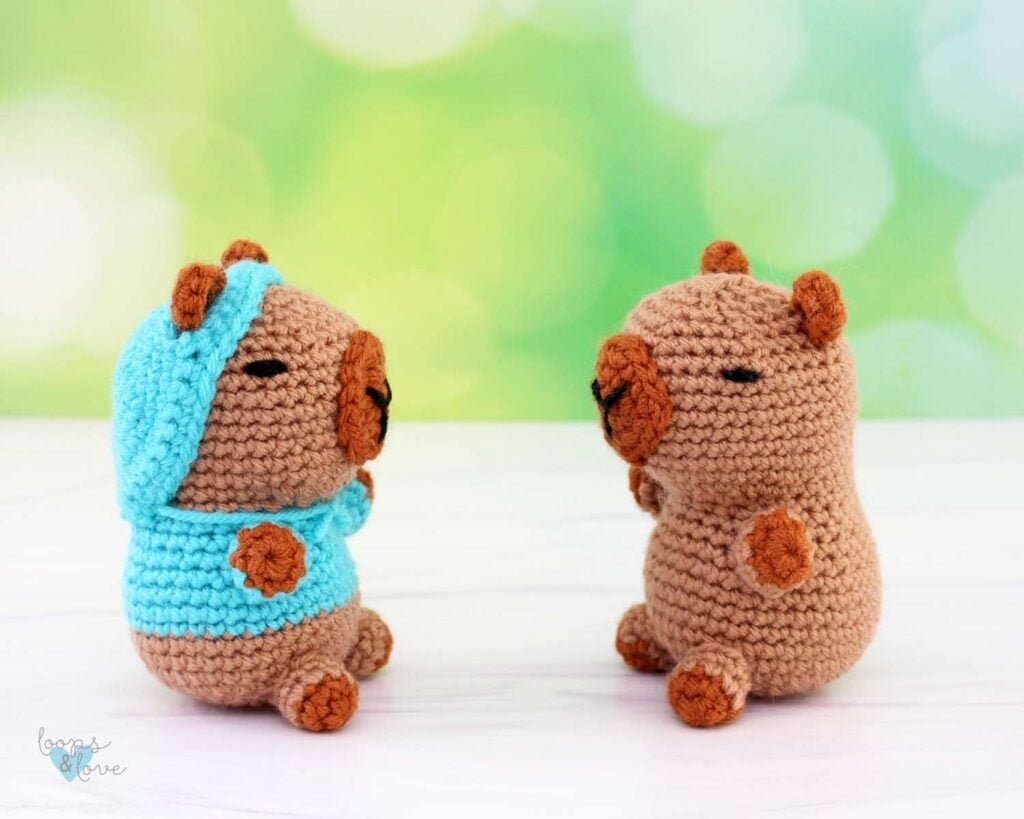
This capybara amigurumi is a fun and easy project with two adorable options to choose from. You can make your capybara in a cozy hoodie or keep it classic without — both versions are included in the pattern below.
Which yarn will you choose for your capybara amigurumi? The capybaras pictured in this pattern are made with #4 Worsted-Weight acrylic yarn (WeCrochet Brava Worsted), but substituting with another yarn is super easy with this pattern! A plush yarn substitution would be really fun to create a soft and cuddly toy, but it would also be quite a bit larger, depending on the yarn weight!
You’ll love that this capybara amigurumi crochet pattern is worked in simple stitches and is a great project for confident beginners or intermediate crocheters. The body is made in one piece, the legs, ears, and snout (and optional hood) are worked up separately and sewn on.
The optional hoodie adds a fun extra detail and can easily be customized with different colors or left off for a more classic capybara look. Whether you choose to make one or both versions, this pattern is a great way to create a soft and cuddly handmade piece.
If you’re looking for a few other cute and small amigurumi patterns, check out our Mini Boba Tea Amigurumi or our Mini Elephant Amigurumi! Or browse all our crochet patterns here!
Pin this post on Pinterest to save it for later!
Remember to like Loops and Love Crochet on Facebook and join the Loops and Love Crochet Group for sharing your finished projects! I’d also LOVE it if you followed @loopsandlovecrochet on Instagram! If you like crochet video tutorials, check out (and subscribe to) my Loops and Love Crochet YouTube Channel!
Disclosure: This post may contain affiliate links, which means I may receive a small commission if you click a link and purchase something that I have recommended. This is done at no extra cost to you. Thank you for supporting Loops & Love Crochet!
The Capybara Amigurumi crochet pattern is available for FREE on this website. If you’d like an ad-free, printable PDF version, you may purchase it for a small fee from my Etsy or Ravelry shops. Thank you so much for supporting Loops & Love Crochet!
Materials
- Worsted weight (#4) yarn – You can use any worsted-weight yarn for this project (cotton, acrylic, chenille, etc). You will need approximately 80-90 yds in total. Most of this yardage is in a lighter brown/beige color and 5-10 yds in a darker brown. For the capybara amigurumi with the hood, approximately 20 yds of an accent color will be needed. WeCrochet/Knit Picks Brava Worsted yarn was used for this project (pictured in Almond, Gingerbread, and Cornflower colorways). A small amount of black yarn is needed for the eyes and facial features.
- 3.5mm crochet hook – or your hook size for yarn choice and preference.
- Stuffing – any fiber-based stuffing.
- Yarn needle for sewing pieces together and weaving in ends. Bent yarn needles work the best for sewing amigurumi pieces together.
- Scissors for cutting yarn and weaving in ends.
Finished Size
- When finished, this capybara amigurumi measures approximately 4.5” tall from head to feet with the legs hanging straight. If you use a different yarn or hook size, the size may be a little larger or smaller.
Stitches Used
- Ch – chain
- Sl St – slip stitch
- SC – single crochet
- INV DEC – invisible single crochet decrease (video tutorial here)
Important Notes
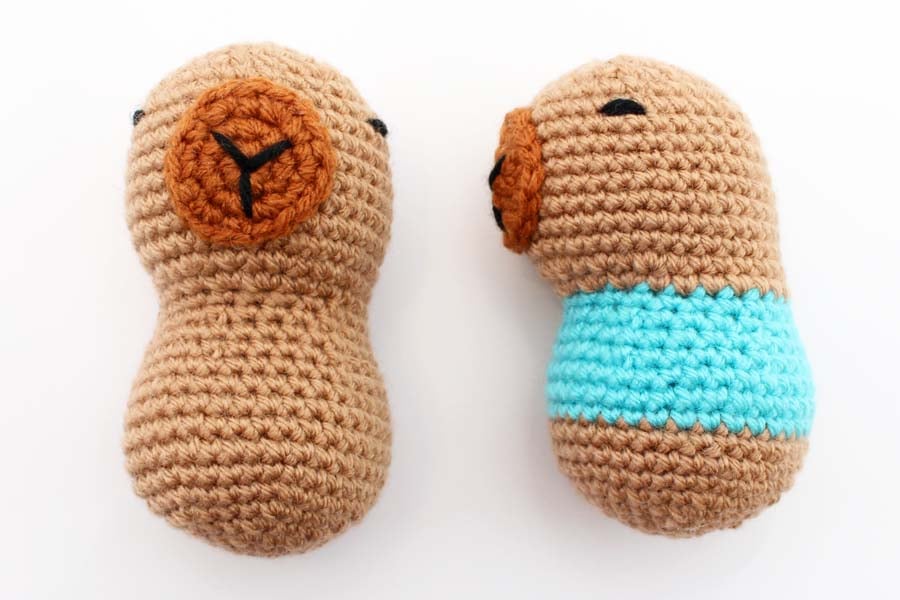
- Hoodie or No Hoodie Versions – There are two versions of this capybara amigurumi, one wearing a hoodie and one not. Both capybaras are worked up the same except for some color changes on the body and legs. The hood is worked up separately and sewn on. Please see the notes throughout the pattern for making the capybara in the hoodie.
- Magic Circle – This pattern starts with a magic circle. Magic Circle video tutorial here.
- Continuous Rounds – This pattern is worked up in continuous rounds. When you finish working the stitches for one round, continue right to making the stitches of the next round without joining. It is useful to use a stitch marker (or a piece of yarn) to mark the start or end of each round to help you keep track.
- Color Changes – There are a few color changes in this crochet pattern. To change colors, work the last stitch of the round as you would normally right up until the last yarn over. Then yarn over in the new color and pull through, finishing the stitch. Continue in the new color until your next color change. Making the first stitch of the round a slip stitch can help make the color change less visible. Work over the yarn tails for a few stitches so they are secure before cutting them or weave them in later.
Crochet your own Capybara Amigurumi!
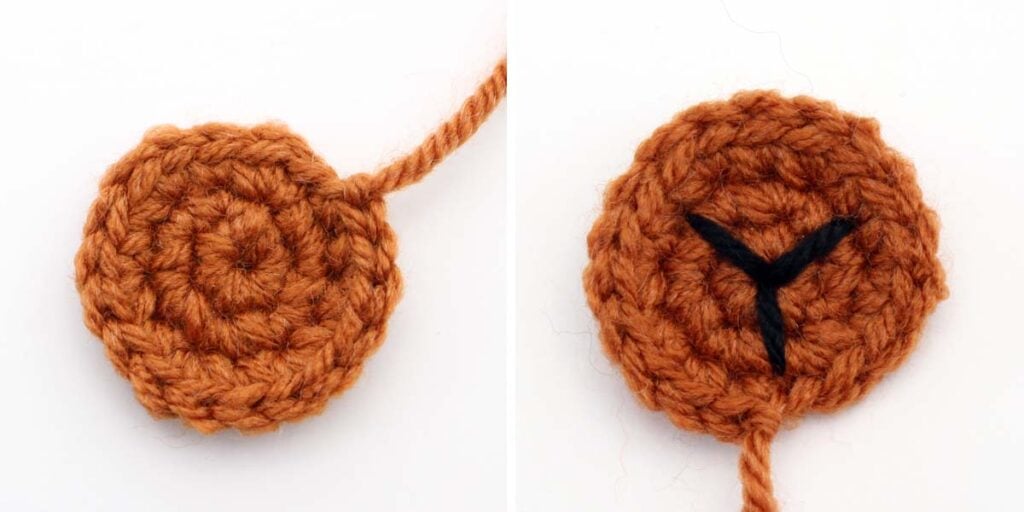
Snout
Round 1: In dark brown, magic circle, ch 1, make 6 SC into ring (6)
Round 2: 2 SC in each st around (12)
Round 3: *2 SC in first st, SC in next st, repeat from * around (18)
Fasten off, leave a long enough tail for sewing onto the face.
Using a strand of black yarn and your yarn needle, sew a “Y” shape creating the snout. Start at the center of the circle and make two stitches going diagonally upwards and then one straight down. Secure the black yarn by knotting the ends at the back. Set snout aside for now.
Body/Head
Round 1: In light brown, magic circle, ch 1, make 6 SC into ring (6)
Round 2: 2 SC in each st around (12)
Round 3: *2 SC in first st, SC in next st, repeat from * around (18)
Round 4: *2 SC in first st, SC in next 2 sts, repeat from * around (24)
Round 5: *2 SC in first st, SC in next 3 sts, repeat from * around (30)
Round 6: *2 SC in first st, SC in next 4 sts, repeat from * around (36)
Rounds 7-12: SC in each st around (36)
If you are making the capybara amigurumi with the hoodie, work rounds 10-16 of the body in the hoodie color and then change back to light brown after round 16.
Round 13: *INV DEC, SC in next 4 sts, repeat from * around (30)
Round 14: SC in each st around (30)
Round 15: *INV DEC, SC in next 3 sts, repeat from * around (24)
Round 16: SC in each st around (24)
The body section is complete. If you are making the capybara with the hoodie, remember to switch back to the main body color after round 16. The next rounds will be forming the head. The lower body can be stuffed at this point, but keep the stuffing a few rounds below the top so it does not get caught in the stitches as you work the next rounds.
Round 17: SC in first 9 sts, 2 SC in next 6 sts, SC last 9 sts (30)
Round 18: SC in first 9 sts, *2 SC in next, SC in next, repeat from * 5 more times, SC last 9 (36)
Rounds 19-26: SC in each st around (36)
Round 27: *INV DEC, SC in next 4 sts, repeat from * around (30)
Now it is time to add the facial features. With the front of the body/face towards you, position the snout in the center of the face with the top one round down from the top round of stitches. Sew it in place by passing your yarn needle in and out of each stitch around the snout, passing through the face each time. The eyes are placed by making a stitch of black yarn about 3 stitches wide between rounds 25 and 26. To make sure they line up on the sides of the head, start the eye in the 4th stitch away from the edge of the snout. Weave in or tie off all ends and hide them inside the head. See photo below for snout and eye placement.
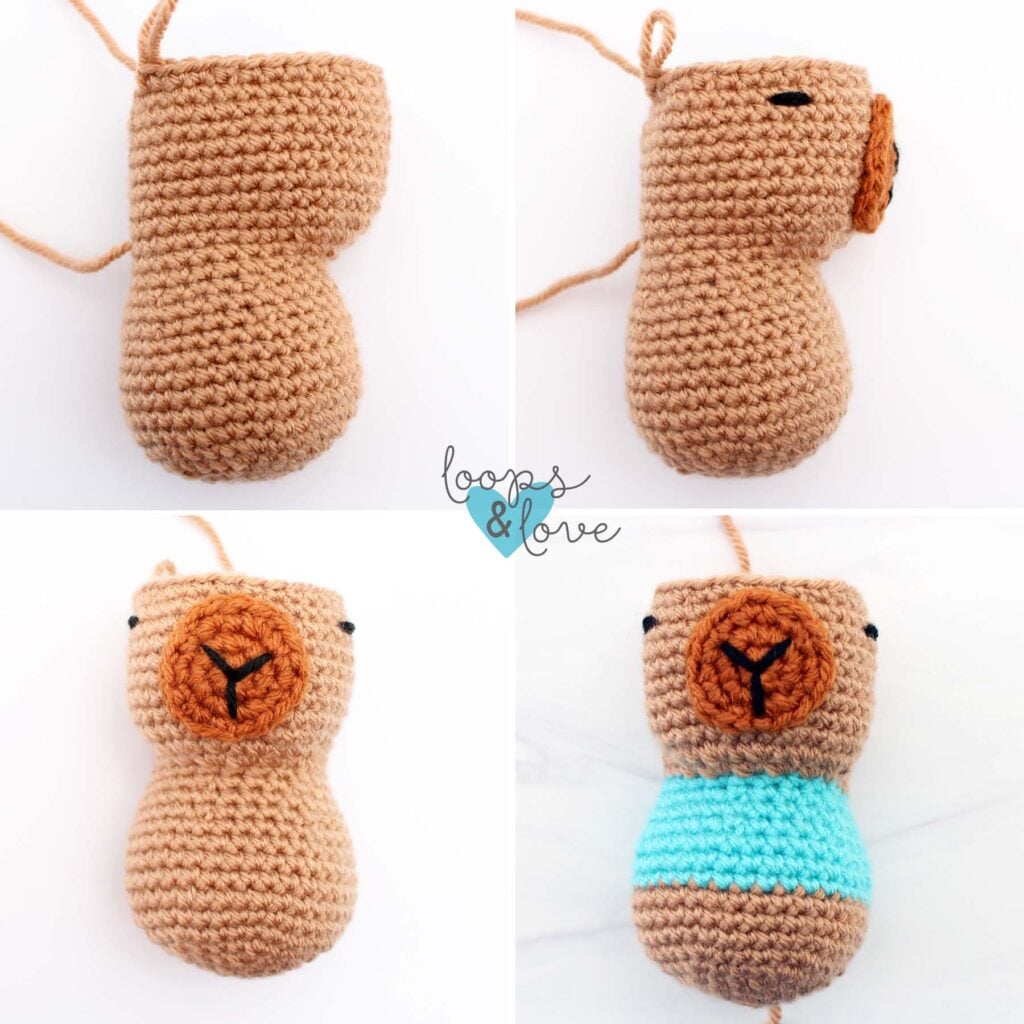
Now that the facial features are sewn on, stuffing can be added to the head. Again, keep the stuffing below the current round you are working on so that it does not get caught in your stitches. Continue working the rest of the head.
Round 28: *INV DEC, SC in next 3 sts, repeat from * around (24)
Round 29 *INV DEC, SC in next 2 sts, repeat from * around (18)
Make sure to add enough stuffing before the opening gets too small.
Round 30: *INV DEC, SC in next st, repeat from * around (12)
Round 31: *INV DEC around (6)
Fasten off. Use your yarn needle to sew the top of the head closed. Weave in ends. Set aside for now.
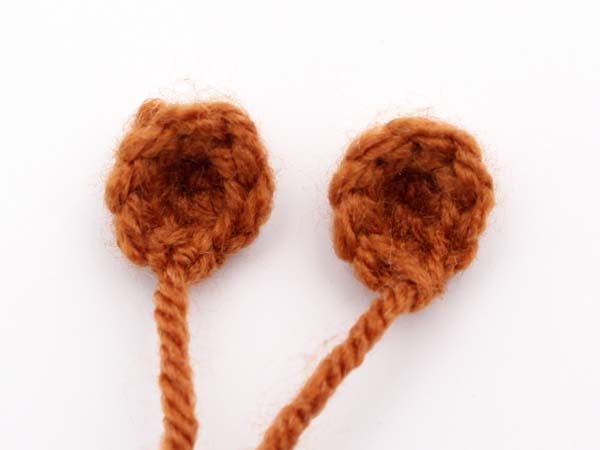
Ears (make 2)
Round 1: In darker brown, magic circle, ch 1, make 6 SC into ring (6)
Round 2: *2 SC in first st, SC in next 2 sts, repeat from * around (8)
Fasten off with a slip stitch in next st. Leave a tail for sewing onto the head. Set aside for now.
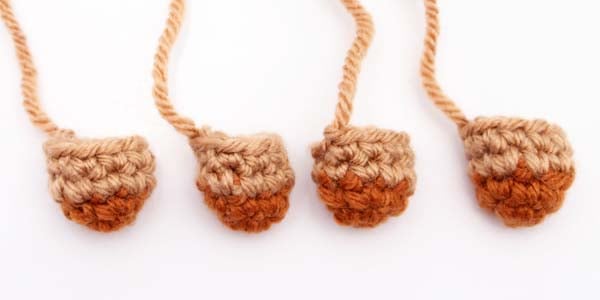
Arms/Legs (make 4)
Arms and leg are worked up the same. You’ll need 4 in total.
Round 1: In darker brown, magic circle, ch 1, make 6 SC into ring (6)
Round 2: *2 SC in first st, SC in next st, repeat from * around (9)
Change color to light brown
*If you are making the capybara in the hoodie, change to the hoodie color after round 2 for two of the arms/legs only. .
Rounds 3-4: SC in each st around (9)
Fasten off with a slip stitch in the next st. Leave a tail for sewing onto the body. Set aside for now.
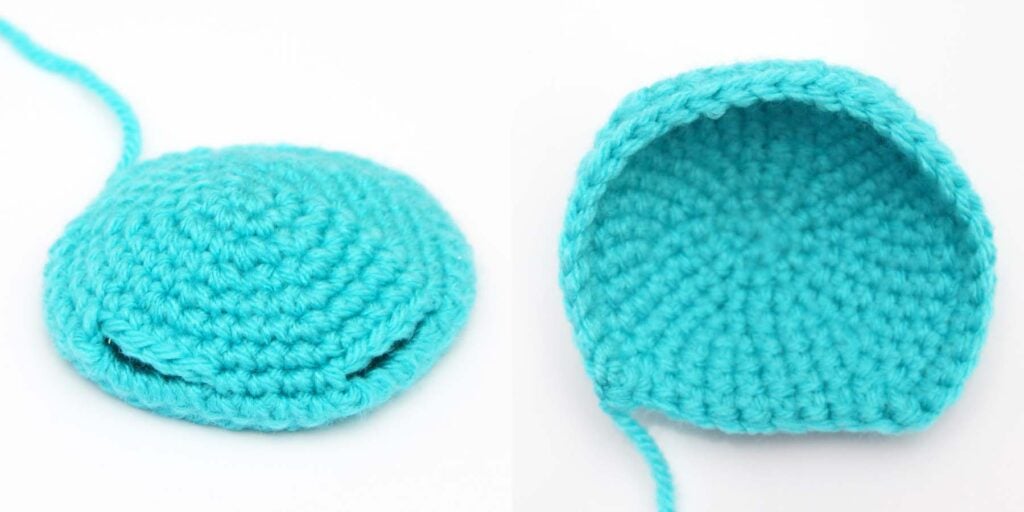
Hood (optional)
If you are making the capybara in the hoodie.
Round 1: In hoodie color, magic circle, ch 1, make 6 SC into ring (6)
Round 2: 2 SC in each st around (12)
Round 3: *2 SC in first st, SC in next st, repeat from * around (18)
Round 4: *2 SC in first st, SC in next 2 sts, repeat from * around (24)
Round 5: *2 SC in first st, SC in next 3 sts, repeat from * around (30)
Round 6: *2 SC in first st, SC in next 4 sts, repeat from * around (36)
Round 7: SC in each st around (36)
Round 8: SC in first 12 sts, ch 5, skip 4, SC next 4 sts, ch 5, skip 4 sts,
SC in last 9 sts, ch 1, turn (25 SC + 10 ch) *Last 3 sts of the round will remain unworked
Round 9: SC in first 9 sts, 4 SC in ch space, SC next 4 sts, 4 SC in ch space, SC last 9 sts (30) *Last 6 sts will remain unworked
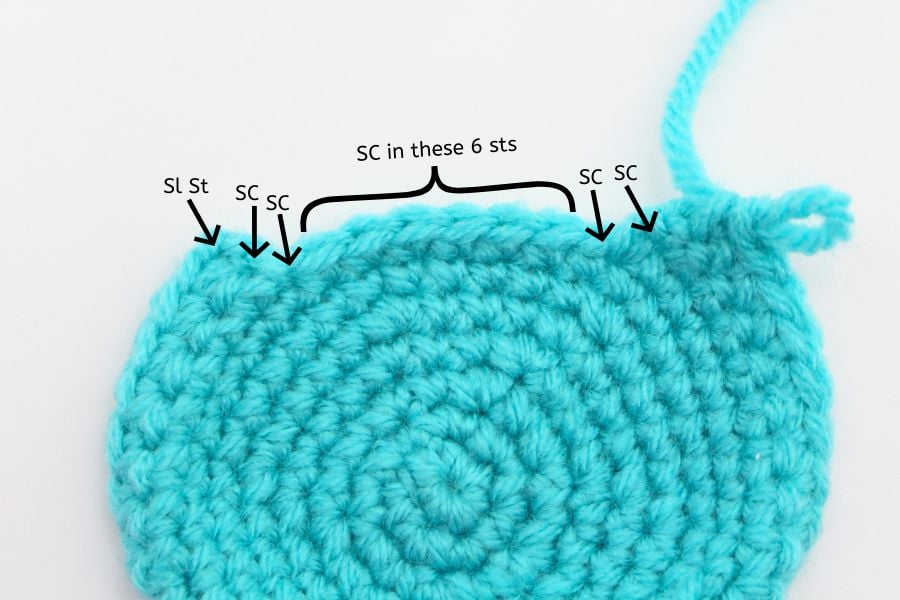
Round 10: SC in each stitch across, then continue to SC in the next 2 sts down the side of the straight edge, SC in each of the 6 previously unworked stitches across, then SC in the next 2 stitches back up the edge on the other side. Join with a slip stitch to the top of the first SC at the top of the straight edge (40)
See photo below for placement of SC stitches for round 10.
Fasten off, weave in ends. Leave a long tail for sewing onto capybara. Set hood aside for now.
Capybara Assembly Instructions
- Sew on the Ears – Place ears towards the back of the head, starting approximately 4 stitches from each eye and one round up. If you want your capybara to wear the hood, pin ears in place and test the placement with the earholes in the hood first.
- Sew on the Legs – First, sew two legs to the bottom/front of the body. The placement of these legs will give the capybara stability for sitting. For the capybara pictured, the legs are sewn in rounds 4-6 up from the bottom. Pin legs in place to test placement for sitting before sewing. Next, sew on the arms, one on each side of the body, 1-2 rounds below the head. For the capybara with the hoodie, the legs are all brown and the arms have the accent color.
- Sew on the hood (optional) – Put the hood onto the capybara’s head with the ears pushed through the openings. Sew along the stitches at the bottom of the hood at the back of the capybara, lined up in the accent-colored stitches of round 16. Sew in and out of each stitch along the hood, passing through a stitch on the capybara each time. Optional – create the tie string by passing a strand of accent colored yarn through the last stitch at the bottom of the hood on one side, pass it through the capybara and out the other end of the hood. Bring the ends together and tie a knot or bow at the front.


You are all finished your cute Capybara Amigurumi! I hope you love how it turned out!
**Want to be kept in the loop? Be sure to like Loops and Love Crochet on Facebook and join the Loops and Love Crochet Group! Don’t forget to follow @loopsandlovecrochet on Instagram! Remember to tag Loops and Love Crochet when you post your fnished projects on social media! I’d love to see them! **
*You may make and sell any items made from my patterns, but please link back to my blog or Loops & Love Crochet as the designer. Please do not copy this pattern or photos and share as your own, in part or in whole. Instead, link back to the Loops and Love Crochet blog (especially when selling items you make from my patterns). Thank you!