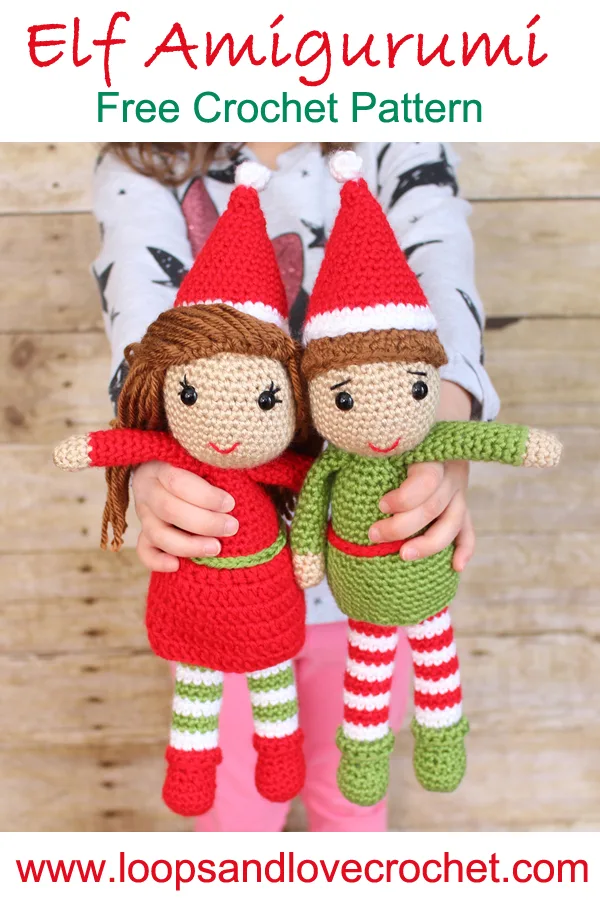
Meet Trixie and Twinkle, Santa’s little helpers! These elves are bound to put a smile on your face and get you thinking about the holidays, even if it’s only July! This Elf Amigurumi pattern was released as a Crochet Along last winter, but I’ve compiled all of the parts together into one post to make it easier for you to find it all without having to visit multiple posts.
Each Elf Amigurumi measures about 12 inches tall when legs are extended, including the hat. The legs are sewn on separately so they can sit independently, but they can also stand if leaned against something. Whether you choose to make one, or the pair, these elves are perfect for cuddling, decorating, or gift-giving this holiday season!
Remember to like Loops and Love Crochet on Facebook and join the Loops and Love Crochet Group! I’d also LOVE it if you followed @loopsandlovecrochet on Instagram!
If you like crochet video tutorials, check out (and subscribe to) my Loops and Love Crochet YouTube Channel!

Disclosure: This post may contain affiliate links, which means I may receive a small commission if you click a link and purchase something that I have recommended. This is done at no extra cost to you. Thank you for supporting Loops & Love Crochet!
Materials
- Worsted-weight yarn – You can use any worsted-weight yarn for this project. You will need red, green, and white yarn plus a skin color and a hair color. Specifically, I used Bernat Satin in Crimson, Caron Simply Soft in Bone, and Red Heart Soft in Guacamole, White, and Toast.
- 4 mm crochet hook
- Safety eyes – 9 mm size
- Black embroidery thread for the eyelashes.
- Stuffing
- Yarn needle for sewing pieces together and weaving in ends. Bent needles are my favorite for amigurumi!
The Pattern
Body


Add stuffing to the body as you go. Stuff it generously, however not so much that you can see the stuffing through the stitches.
Round 1: In body color (red or green), magic circle, chain 1, make 6 SC into ring (6)
Round 2: 2 SC in each stitch around (12)
Round 3: 2 SC in first stitch, SC in next, repeat around (18)
Round 4: 2 SC in first stitch, SC in next 2, repeat around (24)
Round 5: 2 SC in first, SC in next 3, repeat around (30)
Round 6: 2 SC in first, SC in next 4, repeat around (36)
Rounds 7-11: SC in each stitch around (36)
Round 12: INV DEC, SC in next 4, repeat around (30)
Round 13: SC each stitch around (30)
Round 14: Work this round in back loops only. SC in each stitch around. (30)
Rounds 15-17: SC in each stitch around (30)
Round 18: INV DEC, SC in next 3, repeat around (24)
Rounds 19-20: SC in each stitch around (24)
Round 21: INV DEC, SC in next 2, repeat around (18)
Rounds 22-23: SC in each stitch around (18)
Round 24: INV DEC, SC in next stitch, repeat around (12)
Make sure you have added enough stuffing to the body. Then fasten off, leave a long tail to sew head onto body later. Do not sew body closed.
Girl Elf Skirt/Boy Elf Tunic
The skirt/tunic is worked in joining rounds, not continuous rounds. This means you will join the last stitch to the first with a slip stitch, chain 1 and then continue with the next round. If you are making Trixie follow the girl’s skirt instructions below. If you are making Twinkle, scroll down to the boy’s tunic instructions.
Skirt Instructions (Girl)

Round 1: Make a slip knot with red yarn. With the base of the body facing towards you, attach the slip knot with a slip stitch to one of the front loop stitches of round 14 (I joined to the first back loop stitch of the round). You will be able to see the front loops because they are where you made the round of back loop stitches. Chain 1, DC in same stitch and in each stitch around. Join to top of first DC with a Sl St. Chain 2. (30)
Round 2: 2 DC in first stitch, DC in next stitch. Repeat around. Join, ch 2. (45)
Rounds 3-6: DC in each stitch around. Join, ch. 2 (45)
After round 6, join to first DC and fasten off. Use yarn needle to weave in ends.

Tunic Instructions (Boy)

Round 1: In the same way as pictured above for the skirt instructions, make a slip knot with green yarn. With the base of the body facing towards you, attach the slip knot with a slip stitch to one of the front loop stitches of round 14 (I joined to the first back loop stitch of the round). You will be able to see the front loops because they are where you made the round of back loop stitches. Chain 1, SC in same stitch and in each stitch around. Join to top of first SC with a Sl St. Chain 1. (30)
Round 2: 2 SC in first stitch, SC in next 4 stitches. Repeat around. Join, ch 1. (36)
Rounds 3-10: SC in each stitch around. Join, ch. 1 (36)
After round 10, join to first SC with a slip stitch and fasten off. Use your yarn needle to weave in ends.


Legs (make 2)
The legs are worked in joining rounds. This helps keep the color changes neater and less noticeable for the stripes. Work the last stitch of the first color until the last yarn over. Yarn over with the new color and then join to the first stitch of the round with a slip stitch. If you are making the boy elf, start with green for the boot, and then alternate white and red for the legs. For the girl, start with red for the boot and then alternate white and green for the legs.
Stuff the legs as you go. I mostly stuffed the boot/foot area and then very gently stuffed the rest of the leg. If you add too much stuffing, especially towards the top of the legs, it will affect how your elf sits.
Round 1: In boot color, magic circle, chain 1, 6 SC into ring. Join to first SC with a Sl St, chain 1. (6)
Round 2: 2 SC in each stitch around, join, ch 1. (12)
Round 3: 2 SC in first stitch, SC in next, repeat around. Join, ch 1. (18)
Rounds 4-5: SC in each stitch around. Join, ch 1. (18)
Round 6: SC in first 5 stitches, INV DEC 4 times, SC in last 5. Join, ch 1 (14)
Round 7: SC in first 5 stitches, INV DEC 2 times, SC in last 5. Join, ch 1 (12)
Rounds 8-10: SC in each stitch around. Join, ch 1 (12) Change to white yarn at the end of round 10 (before joining).
Round 11: Work this round in back loops only. SC in each stitch around. Join, ch 1 (12)
Round 12: SC in each stitch around. Change to red (boy) or green (girl) yarn. Join, ch 1. (12)
Rounds 13-28: SC in each stitch around. Join, ch 1. (12) Alternate white and red/green every 2 rounds. 2 rounds white, 2 rounds red/green. You will end with 2 white rounds. When you are finished you will have 5 white sections and 4 red/green sections.
Fasten off, sew top of leg closed. Make sure that you sew the top closed with the front of the boot/foot facing you. Continue to the boot cuff instructions below.

Boot Cuffs
Next, make the boot cuffs at the top of each boot. Make a slip knot and join in one of the front loop stitches at the back of the boot. You will be able to see the front loop stitches because they are where you worked the round of white back loop only stitches in making the legs. Chain 1, HDC in same stitch and in each stitch around. Join with a Sl St into top of first HDC. Fasten off. Use your yarn needle to hide the ends of the yarn inside the legs/boot.

Arms (make 2)

Gently stuff the arms as you go, adding stuffing only to the bottom third (hand/wrist area).
Round 1: In skin color, magic circle, ch 1, 6 SC into ring (6)
Round 2: 2 SC in first stitch, SC in next, repeat around (9)
Rounds 3-4: SC in each stitch around (9). Change to elf shirt color (red or green) after round 4.
Rounds 5-17: SC in each stitch around (9)
Fasten off, sew the top of the arms closed. Leave a long tail to sew onto body.
Head


Stuff the head as you go. Make sure you stuff the head firmly, but not so much that you can see it through the stitches.
Round 1: In skin color, magic circle, chain 1 and make 6 SC stitches into ring (6)
Round 2: 2 SC in each stitch around (12)
Round 3: 2 SC in first stitch, SC in next, repeat around (18)
Round 4: 2 SC in first stitch, SC in next 2, repeat around (24)
Round 5: 2 SC in first stitch, SC in next 3, repeat around (30)
Round 6: 2 SC in first stitch, SC in next 4, repeat around (36)
Rounds 7-15: SC in each stitch around (36)
*Insert safety eyes between rounds 12 and 13. I placed them 6 stitches apart. If you are adding eyelashes, it is easier to stitch them on now before securing the eyes in place (see photo below). Eyebrows and mouth can be sewn on after head is completed. I added these features at the end of Part 3.
Round 16: INV DEC, SC next 4 stitches, repeat around (30)
*Start stuffing the head here before the opening gets too small. Continue stuffing as you go.
Round 17: INV DEC, SC next 3 stitches, repeat around (24)
Round 18: INV DEC, SC next 2 stitches, repeat around (18)
Round 19: INV DEC, SC next stitch, repeat around (12)
Round 20: INV DEC around (6)
Make sure you have added enough stuffing to the head. Fasten off and sew hole closed. Weave in ends.

Wig Cap
Round 1: In hair color, magic circle, chain 1 and make 6 SC stitches into ring (6)
Round 2: 2 SC in each stitch around (12)
Round 3: 2 SC in first stitch, SC in next, repeat around (18)
Round 4: 2 SC in first stitch, SC in next 2, repeat around (24)
Round 5: 2 SC in first stitch, SC in next 3, repeat around (30)
Round 6: 2 SC in first stitch, SC in next 4, repeat around (36)
Rounds 7-8: SC in each stitch around (36)
*If you are making the girl elf, fasten off here and leave a long tail to sew the wig cap to the head. Move on to the adding hair section below. If you are making the boy elf, continue below.
Round 9: SC in each stitch around, slip stitch to first SC of the round. Chain 1. (36)
Round 10: DC in first stitch, SC in next stitch. Continue alternating DC and SC stitches for the next 15 stitches (17 stitches total. You will end with a DC). Fasten off with a slip stitch in next stitch. Leave a long tail to sew onto head. Continue to sewing wig cap instructions below.


Adding hair for the girl elf: I added hair in each stitch around the edge of the wig cap. Start by cutting lots of pieces of yarn to use for the hair. It’s easier to make them long so that you can trim it off after you decide on the length you like. I made a bunch of strands of hair the same length by wrapping yarn around a book and then cutting one side. The strands I attached were approximately 15 inches long, but I did trim quite a bit off after I was finished styling her hair. Fold a piece of yarn in half and then use your crochet hook to pull it through one of the stitches on the wig cap. Then put the ends of the yarn through the loop you made to knot it (pictured below). I used a smaller hook to make it easier to get into the tight stitches (3.5 mm).

Sewing the wig cap to head: This will be easier for the boy elf than the girl elf, just because you won’t have all of the hair strands to move out of the way as you sew. Line the wig cap up on the head where you’d like it. Sew in and out of each stitch around the last round of the wig cap. If you are making the girl, you’ll have to be careful to work around the strands of hair you added.


For the girl elf, after the wig cap was attached, I added another round of hair to fill it out a bit more. I attached it in the stitches of the third round in from the outside. I waited until the head was attached to the body before styling/trimming the hair.


Hat
Round 1: In red, magic circle, chain 1 and make 6 SC stitches into ring (6)
Rounds 2-3: SC in each stitch around (6)
Round 4: 2 SC in each stitch around (12)
Rounds 5-6: SC in each stitch around (12)
Round 7: 2 SC in first stitch, SC in next, repeat around (18)
Rounds 8-9: SC in each stitch around (18)
Round 10: 2 SC in first stitch, SC in next 2, repeat around (24)
Rounds 11-12: SC in each stitch around (24)
Round 13: 2 SC in first stitch, SC in next 3, repeat around (30)
Rounds 14-15: SC in each stitch around (30)
Round 16: 2 SC in first stitch, SC in next 4, repeat around (36) Change color to white.
Rounds 17-18: SC in each stitch around (36)
Make a slip stitch in next stitch, fasten off. Leave a tail to sew onto head. Gently add some stuffing to the hat to help it keep it’s shape on the elf’s head.
Pompom
Round 1: In white, magic circle, chain 1 and make 6 SC stitches into ring (6)
Rounds 2-3: SC in each stitch around (6)
Fasten off and sew stitches closed around to make the round shape. Sew pompom to top of hat and then sew the hat to the head.

ELF ASSEMBLY
- Sew the legs onto the body: Line up where you want the legs to be on the body. I lined them up around the middle of the bottom the body, but a bit more towards the back. This is so the elf can sit without falling over. I also only sewed around the top of the legs so that they could either hang straight or fold up for sitting. **Note: Make sure you test where you put the legs to make sure your elf can sit, before fastening off your yarn. When you add the head, hair, and hat, there is some more weight at the back that may cause your elf to tip over (especially the girl elf, but the skirt can help her sit more than for the boy). If the elf is too tippy, you might need to move the legs back a bit.

- Sew the head onto the body. Make sure the top of the body is stuffed well. (But not so much stuffing that it’s visible through the stitches!) Then line up the head on the body, making sure to keep the eyes in the center so the face is lined up with the legs. You will also be able to see where the body matches with a round on the base of the head, which will help you place your stitches. Use the tail of yarn from the body (red or green, depending on the elf) and sew in and out of each stitch around until your head is stable. I sewed around the head a couple times and then through the middle a couple times, so it is nice and secure and not wobbly.

- Style the hair: You can style the hair however you choose. I just pulled the front section over to the side and tied it in a little ponytail with a piece of yarn the same color as the hair. Then I trimmed off excess hair to shorten it a bit.
- Sew the arms onto the body: I attached the arms on the sides of the body in the second round of stitches from the top. Sew in and out of each stitch at the top of the arms. Weave in ends.

- Sew the hat on top of the head: Line up where you’d like the hat to be placed. Attach to head by sewing around the stitches at the base of the hat. I did not sew around every stitch. I just added enough stitches to secure the hat by sewing around a few stitches at the front, back, and sides to keep it in place without it looking bumpy along the bottom. Again, this was easier on the boy elf than the girl elf. All that fun hair made it a bit more difficult. You just need to be more careful not to catch any hair strands as you are sewing.

- Make the belt and sew it on: In red or green yarn (opposite of what you used for the shirt/dress), make a chain long enough just to fit around the middle of the elf. Fasten off and use your yarn needle to sew it on just above the ridge where the skirt/tunic bottom is attached. I started at the back and then just added one stitch at the sides and front to keep the belt in place.


- Final touches: Lastly, I used black embroidery thread to make the eyebrows for the boy elf, and then added a smile on both elves! For the mouth, I separated a piece of red yarn into a single strand and then sewed a smile onto the faces.

Yay! You are all done! I hope you love the elf/elves you just made!
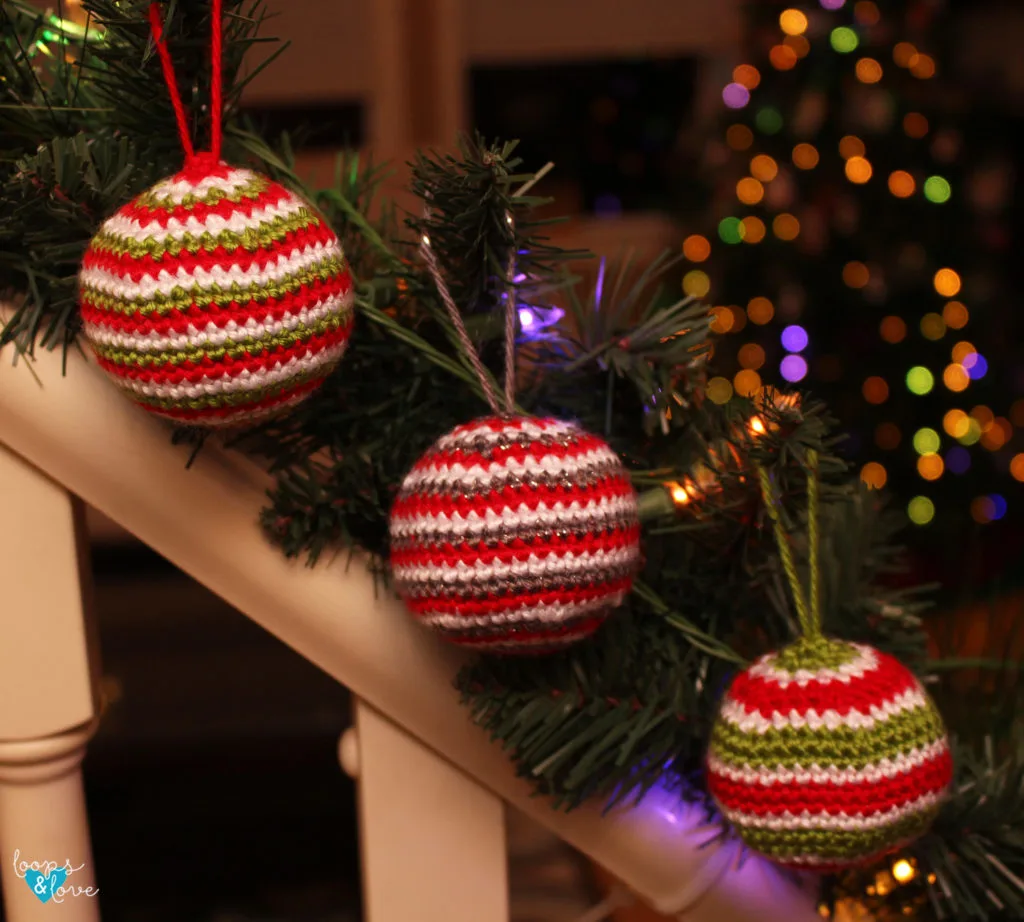
If you’re looking for another Holiday themed crochet pattern, check out my Easy Christmas Baubles!

**Want to be kept in the loop? Be sure to like Loops and Love Crochet on Facebook and join the Loops and Love Crochet Group! Don’t forget to follow @loopsandlovecrochet on Instagram! Remember to tag Loops and Love Crochet when you post your finished projects on social media! I’d love to see them!**
*You may make and sell any items made from my patterns, but please link back to my blog or Loops & Love Crochet as the designer. Please do not copy this pattern or photos and share as your own, in part or in whole. Instead, link back to the Loops and Love Crochet blog (especially when selling items you make from my patterns). Thank you!