This bright and cheerful Mommy and Me Seahorse amigurumi set is a quick and easy project you’ll love stitching up! The pattern includes two sizes—perfect as a playful pair or a sweet gift set—and the colorful design makes them extra fun to customize.
I designed this pattern a few years ago because my daughters loved carrying around any small stuffed animals they could find and taking them around everywhere with them.
This little seahorse set is perfect for little ones or also for a gift set for someone special. They also make great decor if you love ocean themed things!
This pattern is one of the eight patterns in my ocean themed amigurumi series. If you’re looking to make some more little sea creatures, the series also includes a Sea Turtle, Whale, Jellyfish, Fish, Stingray, and an Octopus!


This pattern includes instructions for making the mommy and the baby sea horse. Mommy seahorse measures about 6.5 inches from top to bottom, while baby seahorse is about 5 inches. These seahorses are worked from the bottom up, starting with the tail and ending with the head (in one piece). Then the mane, snout, and fins are attached at the end. I hope you love making the Mommy and Me Seahorse Amigurumi crochet pattern!
Remember to like Loops and Love Crochet on Facebook and join the Loops and Love Crochet Group for sharing your finished projects! I’d also LOVE it if you followed @loopsandlovecrochet on Instagram! If you like crochet video tutorials, check out (and subscribe to) my Loops and Love Crochet YouTube Channel!
Save this post for later by pinning it on Pinterest!

This Mommy and Me Seahorse Amigurumi pattern is available for FREE on this website. If you’d like an ad-free, printable PDF version, you may purchase it for a small fee from my Etsy or Ravelry shops. Thank you so much for supporting Loops & Love Crochet!
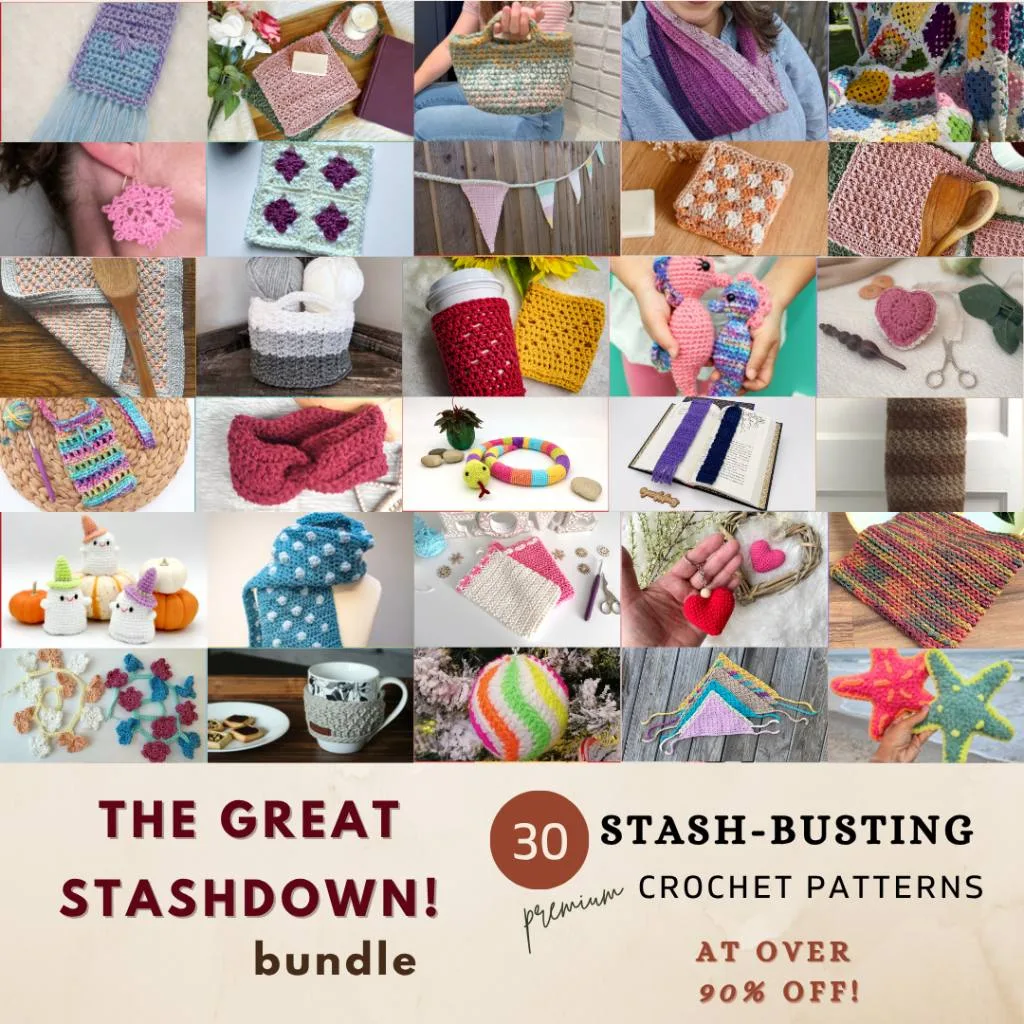
The Mommy and Me Seahorse Amigurumi crochet pattern was part of the Great Stashdown Blog Hop event August 1-30, 2025. You can still purchase the collection of 30 Blog Hop patterns for one low price! Click the photo below for details.

Disclosure: This post may contain affiliate links, which means I may receive a small commission if you click a link and purchase something that I have recommended. This is done at no extra cost to you. Thank you for supporting Loops & Love Crochet!
Materials:
- Worsted Weight yarn – You can use any worsted-weight yarn for this project. I used I Love This Yarn in Coral Sparkle and Paint Party. Remember that not all worsted-weight yarns are the same – some are thicker or thinner than others, which may affect the finished size of your project a little bit.
- Safety eyes – I used 9mm size for the mommy seahorse and 8mm for the baby.
- As an alternative to safety eyes, here is a great tutorial for making crochet eyes.
- Crochet Hook – I used a 3.5mm crochet hook for the Mommy Seahorse and a 3.25mm hook for the Baby Seahorse. You can use the same hook size for both seahorses. I used the smaller hook because I wanted to make the baby a little smaller and to keep the stitches tighter.
- Stuffing – any fiber-based stuffing
- Embroidery or crochet thread – a small amount of black for the eyelashes (optional)
- Yarn needle (for weaving in ends and attaching pieces together) – bent yarn needles work great for amigurumi projects.
- Scissors for cutting yarn (these little ones are my favorite!)
Stitches Used:
- Ch – chain
- Sl St – slip stitch
- SC – single crochet
- HDC – half double crochet
- DC – double crochet
- INV DEC – invisible single crochet decrease – insert hook into front loop of next stitch, then insert SC INC – single crochet increase – two single crochet stitches worked into one stitch. SC INC Video Tutorial HERE.
- INV DEC – invisible single crochet decrease – insert hook into front loop of next stitch, then insert your hook into the front loop of the following stitch (3 loops on hook). Yarn over and draw through 2 loops (2 loops on hook), yarn over and pull through 2 remining loops on hook. INV DEC Video Tutorial HERE
Important Notes:
- Magic Circle – Make a circle with your yarn, insert crochet hook into circle and draw up a loop. Use this loop to start your first chain 1 of the pattern. If you are unsure of how to make a magic circle, check out my Magic Circle Video Tutorial.
- Continuous Rounds – This pattern is worked in continuous rounds without joining. After you finish the stitches of one round, start right on the next round without joining between. You may want to use a stitch marker or a piece of yarn to keep track of where one round ends and the next starts.
- Stuff as you go – Add stuffing to the seahorse as you work it up. Make sure you are finished stuffing before the opening gets too small when working the decrease stitches between the body and the head, as well as when you are finishing off the head. You’ll want to add enough stuffing to make the piece firm, but not so much that you can see the stuffing through the stitches.
- Tension – For amigurumi projects, it helps if you crochet with a tighter tension. If you usually crochet loosely, it might be helpful for you to go down a hook size to keep the stitches closer together.
Mommy Seahorse


Tail/Body/Head
Stuff as you go – Do not add stuffing to the bottom of the tail because you will be curling it up when you are finished the body and head. Wait until the tail/body gets wider before you start stuffing.
Stuff firmly, but not so much that the stuffing shows through the stitches. Make sure you add enough stuffing before the opening gets too small at the top of the body before you start the head.
Round 1: In main body color, magic circle, chain 1 and make 4 SC sts into ring (4)
*Leave the yarn tail from the magic circle hanging out so you can use it to stitch the tail up later.
Round 2: *2 SC in first st, SC in next, repeat from * around (6)
Rounds 3-16: SC in each st around (6)
Round 17: 2 SC in first st, SC in next 5 sts (7)
Round 18: 2 SC in first st, SC in next 6 sts (8)
Round 19: 2 SC in first st, SC in next 7 sts (9)
Round 20: 2 SC in first st, SC in next 8 sts (10)
Round 21: *2 SC in first st, SC in next. Repeat from * one more time, then SC in last 6 (12)
Round 22: *2 SC in first st, SC in next. Repeat from * two more times, then SC in last 6 (15)
Round 23: *2 SC in first st, SC in next 2. Repeat from * two more times, then SC in last 6 (18)
Round 24: SC in first 3 sts, *2 SC in next, SC in next 2 sts. Repeat from * two more times, then SC in last 6 (21)
Round 25: SC in each st around (21)
Round 26: SC in first 3 sts, *2 SC in next, SC in next 3 sts. Repeat from * two more times, then SC in last 6 (24)
Rounds 27-32: SC in each st around (24)
*Start stuffing your seahorse. Don’t worry about getting the stuffing all the way down into the skinny part of the tail because you will be curling it up. The stuffing should start where the tail gets wider and starts to become part of the body.
Round 33: *INV DEC, SC in next 2 sts, repeat from * around (18)
Round 34: SC in each stitch around (18)
Round 35: *INV DEC, SC in next stitch, repeat from * around (12)
Round 36: SC in each stitch around (12)
*Make sure you have added enough stuffing to the body by this point.
Round 37: INV DEC around (6)
*You have now completed the body portion and will start increasing to make the head. The round count will start back at 1 to make it easier to keep track of the rounds for making the head.
Round 1: 2 SC in st around (12)
Round 2: *2 SC in first st, SC in next, repeat from * around (18)
Round 3: *2 SC in first st, SC in next 2 sts, repeat from * around (24)
Rounds 4-9: SC in each st around (24)
*Using the shape of the body to guide you, find the front of the seahorse. Insert safety eyes between rounds 7 and 8 centered at the front of the face approximately 7 stitches apart. If you’d like to your seahorse to have eyelashes, first place your safety eyes where you’d like them to be, but don’t secure them yet. Next, remove the eyes – this will create a hole to help you see where you want the eyelashes to go. Use your yarn needle to stitch on the eyelashes. Then insert the eyes again and secure the back. (See photo below)

*Start stuffing the head. You may need to use something narrow like a chopstick or a pencil to get some stuffing in the neck area to keep the head sturdy.
Round 10: *INV DEC, SC in next 2 sts, repeat from * around (18)
Round 11: *INV DEC, SC in next stitch, repeat from * around (12)
*make sure you have added enough stuffing to the head by this point.
Round 12: INV DEC around (6)
Fasten off, leave a yarn tail for sewing and then cut yarn. Sew top of head closed by passing yarn needle through the front loops of each stitch around and pulling tight. Weave in ends and cut tails. Set aside for assembly later. Continue to work up the rest of the seahorse pieces.


Snout
Round 1: In main body color, magic circle, chain 1 and make 6 SC sts into ring (6)
Rounds 2-4: SC in each st around. (6)
Make a slip stitch in the next stitch and then fasten off, cut yarn leaving a long tail for sewing. Set aside for assembly later.


Mane
Chain 20. [SC, HDC, Ch 1, HDC, SC] in the 2nd chain from your hook, skip a stitch, sl st in next stitch, *skip a stitch, [SC, HDC, Ch 1, HDC, SC] in next stitch, skip a stitch, sl st in next stitch. Repeat from * across. Fasten off, leaving a long tail. Set aside for assembly later.


Tail Fin
Row 1: Chain 4. In the 4th (farthest) chain from the hook, DC, ch 1, DC, ch 1, DC. Chain 2, turn.
Row 2: 3 DC in first stitch, slip stitch in chain space from previous round, 3 DC in next stitch, slip stitch in the chain space, 3 DC in last stitch. Fasten off, leaving a long tail.


If you are making the baby seahorse, continue onto the pattern below. The instructions to assemble the seahorses are following the baby seahorse pattern.
Baby Seahorse
*See the Mommy Seahorse pattern above for the photos of each of the seahorse parts, as well as more of the step-by-step photos.
Tail/Body/Head
Stuff as you go – Do not add stuffing to the bottom of the tail as you will be curling it up when you have finished the body and head. Wait until the tail/body gets wider before you start stuffing.
Stuff firmly, but not so much that the stuffing shows through the stitches. Make sure you add enough stuffing before the opening gets too small at the top of the body before you start the head.
Round 1: Magic circle, chain 1 and make 4 SC stitches into ring (4)
*Leave the yarn tail from the magic circle hanging out so you can use it to stitch the tail up later.
Round 2: *2 SC in first st, SC in next, repeat from * around (6)
Rounds 3-11: SC in each st around (6)
Round 12: 2 SC in first st, SC in next 5 sts (7)
Round 13: 2 SC in first st, SC in next 6 sts (8)
Round 14: 2 SC in first st, SC in next 7 sts (9)
Round 15: 2 SC in first st, SC in next 8 sts (10)
Round 16: *2 SC in first st, SC in next. Repeat from * one more time, then SC in last 6 (12)
Round 17: *2 SC in first st, SC in next. Repeat from * two more times, then SC in last 6 (15)
Round 18: *2 SC in first st, SC in next 2. Repeat from * two more times, then SC in last 6 (18)
Round 19: *SC in first 4 sts, 2 SC in next. Repeat from * one more time, then SC in last 8 (20)
Rounds 20-23: SC in each stitch around (20)
*Start stuffing your seahorse. Don’t worry about getting the stuffing all the way down into the skinny part of the tail because you will be curling it up. The stuffing should start where the tail gets wider and starts to become part of the body.
Round 24: *INV DEC, SC in next 3 sts, repeat from * around (16)
Round 25: SC in each stitch around (16)
Round 26: *INV DEC, SC in next 2 stitches, repeat from * around (12)
Round 27: SC in each stitch around (12)
*Make sure you have added enough stuffing to the body by this point.
Round 28: INV DEC around (6)
*You have now completed the body portion and will start increasing to make the head. The round count will start back at 1 to make it easier to keep track of the rounds for making the head.
Round 1: 2 SC in each st around (12)
Round 2: 2 SC in first st, SC in next, repeat around (18)
Round 3: 2 SC in first st, SC in next 8 st, repeat around (20)
Rounds 4-6 SC in each st around (20)
*Using the shape of the body to guide you, find the front of the seahorse. Insert safety eyes between rounds 5 and 6 centered at the front of the face approximately 5 stitches apart.
Round 7: INV DEC, SC in next 8 sts, repeat around (18)
*Start stuffing the head. You may need to use something narrow like a chopstick or a pencil to get some stuffing in the neck area to keep the head sturdy.
Round 8: INV DEC, SC in next st, repeat around (12)
Round 9: INV DEC around (6)
Fasten off, leave a yarn tail for sewing and then cut yarn. Sew top of head closed by passing yarn needle through the front loops of each stitch around and pulling tight. Weave in ends and cut tails. Set aside for assembly later. Continue to work up the rest of the seahorse pieces.
Snout
Round 1: Magic circle, chain 1 and make 5 SC sts into ring (5)
Rounds 2-3: SC in each st around. (5)
Make a slip stitch in the next st and then fasten off, cut yarn leaving a long tail for sewing. Set aside for assembly later.
Mane
Chain 16. [SC, HDC, Ch 1, HDC, SC] in the 2nd chain from your hook, skip a stitch, sl st in next stitch, *skip a stitch, [SC, HDC, Ch 1, HDC, SC] in next stitch, skip a stitch, sl st in next stitch. Repeat from * across. Fasten off, leaving a tail to sew onto the seahorse. Set aside for assembly later.
Tail Fin
Row 1: Chain 4, HDC in 4th (farthest) chain from hook, ch 1, HDC, ch 1, HDC. Chain 2, turn.
Row 2: 3 HDC in first stitch, slip stitch in chain space from previous round, 3 HDC in next stitch, slip stitch in the chain space, 3 HDC in last stitch. Fasten off, leaving a long tail. Set aside for assembly later.
Mommy and Me Seahorse Amigurumi Assembly Instructions
- Curl the tail up and sew it in place with your yarn needle and either the yarn tail left out from the start or a new strand of yarn. Using the photos below as a guide, curl the tail up towards the front and center of the seahorse. First, do one small curl and sew through it a couple of times, then curl it up one more time and sew a few stitches through it again to secure it in place. Weave in end and cut yarn.


- Curl the tail up and sew it in place with your yarn needle and either the yarn tail left out from the start or a new strand of yarn. Using the photos below as a guide, curl the tail up towards the front and center of the seahorse. First, do one small curl and sew through it a couple of times, then curl it up one more time and sew a few stitches through it again to secure it in place. Weave in end and cut yarn.


- Sew the mane onto your seahorse, starting at the base of the neck and working your way up to the top of the head. Weave in end and cut yarn.

- Lastly, sew the tail fin on the back of the body just above where the bottom tail ends and the main body starts. Make sure to sew around each of the stitches along the bottom of the tail fin so it is secure to the seahorse.

You’re all finished!! I hope you love the mommy and baby seahorses you just made!
If you are looking for more ocean inspired amigurumi crochet projects, check out the rest of my ocean amigurumi crochet patterns on my blog!
Check out the pattern bundle of all 30 Blog Hop patterns! This is perfect if you have missed some blog hop days and want to get your hands on those patterns, plus a bunch more to add to your collection!
**Want to be kept in the loop? Be sure to like Loops and Love Crochet on Facebook and join the Loops and Love Crochet Group! Don’t forget to follow @loopsandlovecrochet on Instagram! Remember to tag Loops and Love Crochet when you post your finished projects on social media! I’d love to see them! **
*You may make and sell any items made from my patterns, but please link back to my blog or Loops & Love Crochet as the designer. Please do not copy this pattern or photos and share as your own, in part or in whole. Instead, link back to the Loops and Love Crochet blog (especially when selling items you make from my patterns). Thank you!
Eileen
Sunday 4th of August 2019
Lovely little Seahorses. Thank you for sharing the pattern.
Loops and Love Crochet
Sunday 4th of August 2019
Thank you so much, Eileen!!