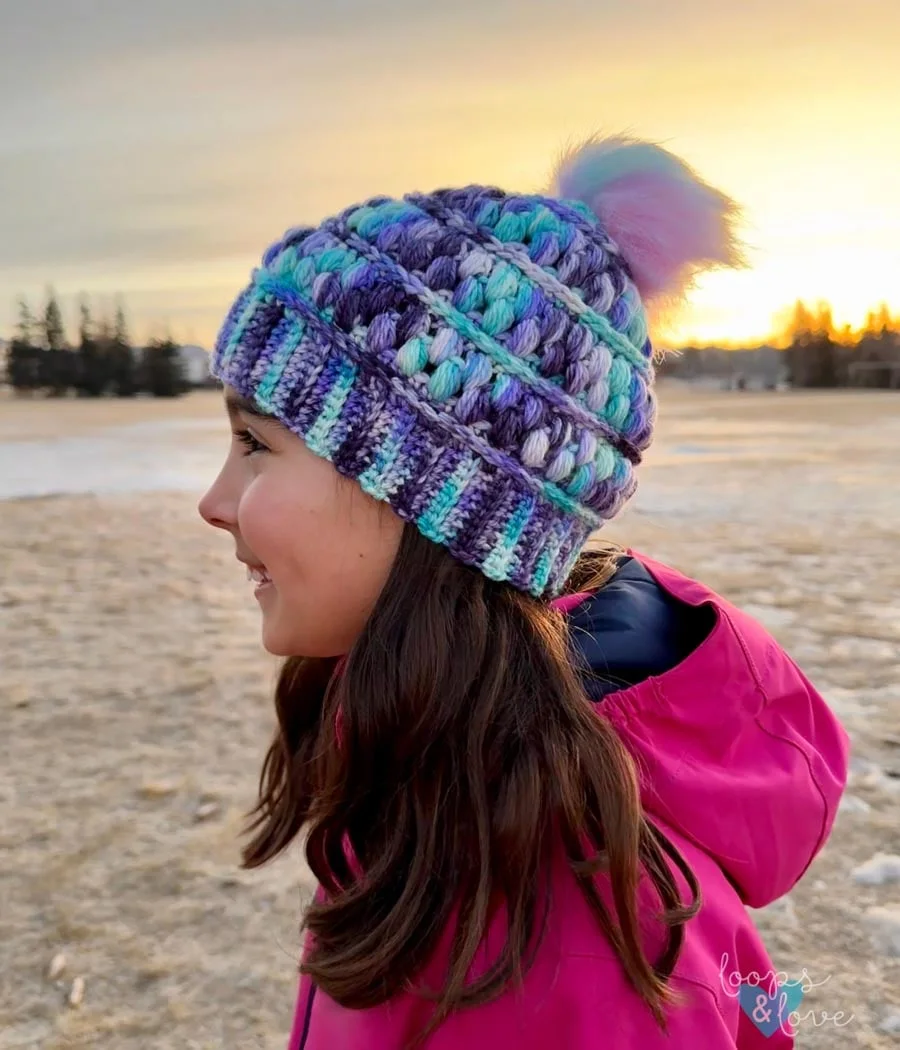
The Jelly Beanie is such a fun one to work up. The puff stitches add such fun, jelly bean like texture (hence the name) and endless color possibilities! These beanies look great in multiple colors or just in single color. I hope you love making the Jelly Beanie as much as I have!
This Jelly Beanie crochet pattern includes sizes newborn to adult, as well as a detailed photo tutorial at the end of this post! I also have a video tutorial on my YouTube channel HERE!
The Jelly Beanie is a bottom up beanie. This means that you’ll start by working the ribbing at the bottom of the hat. Then you’ll join the ribbing together and start working up the height of the beanie all the way to the top.
I’d love to see any Jelly Beanies you make from this pattern! Remember to tag @loopsandlovecrochet on Facebook or Instagram when sharing your finished creations!


If you’re looking for a couple other fun beanie patterns, check out the Avery Beanie and the Peek-a-Boo Beanie!


If you are looking for a messy bun version of the Jelly Beanie pattern, check out the Jelly Messy Bun Beanie pattern on the blog!
For a matching cowl and beanie set, the Jelly Bean Cowl complements the Jelly Beanie so nicely!


Remember to like Loops and Love Crochet on Facebook and join the Loops and Love Crochet Group! I’d also LOVE it if you followed @loopsandlovecrochet on Instagram!
If you like crochet video tutorials, check out (and subscribe to) my Loops and Love Crochet YouTube Channel!
The Jelly Beanie crochet pattern is available for FREE on this website. If you’d like an ad-free, printable PDF version, you may purchase it for a small fee from my Etsy or Ravelry shops. Thank you so much for supporting Loops & Love Crochet!
Disclosure: This post may contain affiliate links, which means I may receive a small commission if you click a link and purchase something that I have recommended. This is done at no extra cost to you. Thank you for supporting Loops & Love Crochet!
Pin the Jelly Beanie crochet pattern for later on Pinterest!


Materials:
- Worsted Weight yarn – You can use any #4 worsted-weight yarn for this project. For the beanies pictured above, I used I Love This Yarn. The color combinations from left to right are: Coral Sparkle with Bloomtique, Lavender Sparkle with Paint Party, and Aqua Sparkle with Day Dreamery. You’ll need approx. 100-160yds of yarn, depending on the size of Jelly Beanie you are making.
- 5 mm crochet hook (I crochet a little bit on the tighter side and I used a 5mm hook. If you crochet loosely, it might be a good idea to change your hook size so the beanie comes out the right size. Check the gauge measurements listed below. I love my Clover Amour hooks and they’re on sale right now on Amazon!
- Yarn needle (for weaving in ends)
- Pom Pom – If you are planning on adding a fun pom pom to your beanie, check these ones out HERE! There are sew on or snap on variations. Or you can make your own out of yarn and a pom pom maker (this Clover one is my favorite)! The Jelly Beanie also looks great without a pom pom too! Here’s a video tutorial on how to use the pom pom maker to make a yarn pom pom!
Jelly Beanie in Hand Dyed Yarn?
Do you have a special skein of hand dyed yarn in your stash? Hand dyed yarn isn’t always readily available in your yarn stash, but if you can easily make a beanie using a skein of hand dyed yarn! You can follow the pattern as written using your hand dyed yarn, making sure to check the gauge (and possibly going up a hook size). Or, you can also find a new version of the child-sized beanie using worsted-weight hand-dyed yarn at bottom of this page! I altered the Jelly Beanie pattern a bit because this yarn was a little thinner than the other worsted-weight yarns in this pattern and also went down to a 4.5 hook. I love the variations in the colors in this yarn!
If you don’t have hand dyed yarn in your stash, don’t worry! All of the beanie sizes in this pattern are designed for using more mainstream #4 worsted weight yarn. Keep on reading for the patterns!

Stitches Used:
- Ch – chain
- Sl St – slip stitch
- SC – single crochet
- DC – double crochet
- FPSC – font post single crochet
- SC DEC (or Sc2tog) – single crochet decrease
- DC DEC (or Dc2tog) – double crochet decrease
- Puff Stitch – Yarn over, insert hook into next stitch, pull up a loop, repeat this 3 more times into the same stitch (9 loops on hook), yarn over and pull through all loops on hook. Finish with a chain 1.
Gauge
- 8 rows of ribbing = approx. 2” long
- Each section including two rounds of Puff Stitches with a round of SC and a round of FPSC measures approx. 1.5” tall.
- When you finish the ribbing for the size of Jelly Beanie you are making, make sure it is approximately the same length as what it states in the pattern for that size. This is so your beanie comes out the right size and fits properly.
Important Notes:
- Always start the first stitch of the round in the same space as the chain 1 or chain 2.
- Chain stitches at the start of each round do not count towards stitch count.
- This pattern is worked in joining rounds. When you finish the stitches of one round, you will be joining to the first stitch of the round with a slip stitch, chaining 1 (or 2) and then starting the next round of the pattern, starting in same stitch as chain.
- When you are making the ribbed band, you should only need to stretch it gently to fit around your head. When you start working on the hat height and make the first row of SC and FPSC in the ends of the ribbing rows, be sure to keep your tension loose enough. If you work this round too tight, your hat will not have much stretch to it.
- I crochet a little on the tighter side. If you crochet quite loosely or more tightly, you may need to go up or down a hook size to get the desired hat size. Check the gauge of the pattern. If you are unsure about size, you can start with crocheting some of the ribbing and then measure it to check that your gauge matches closely.
- Photo Tutorial – I have a photo tutorial section at the end of the pattern to help with the instructions and stitches. I hope you find the step by step photos helpful!
- Video Tutorial – Check out the video on my YouTube Channel for a tutorial on how to work up all the stitches in the Jelly Beanie!
The Pattern
NEWBORN – 3 MONTH SIZE
Head circumference: approx. 13-15 inches
Hat height: approx. 5-5.25”
*If you’d like to make this beanie smaller so it fits a smaller newborn (and not up to 3 months), I’d recommend you go down a hook size to bring down the size a little bit).
Ribbed Band:
In main beanie color
Row 1: Chain 4. SC in 2nd chain from hook and in each chain across. Chain 1, turn. (3)
Row 2: SC in back loops only across. Chain 1, turn. (3)
Rows 3-38: Repeat row 2.
At this point, the ribbing should measure about 11.5 inches long, without stretching it. (If you’ve already stretched it to fit around a head, it might be a little longer than the measurement here).
Fold ribbing in half and join ends with a slip stitch. Then slip stitch in each stitch across. When you get to the end, flip the ribbing so the stitches are on the inside and your loop is at the top. Chain 1 and start the instructions below for the hat body. Your first SC stitch will be in the same stitch as the chain 1. (See photo tutorial below)
Hat body:
Round 1: SC in first stitch (same stitch as chain 1) and in each stitch around. Join with a sl st to first stitch, chain 1. (38)
*Make sure you don’t work this round into the ribbing too tightly. It’s best to keep a looser tension here so that the ribbing is able to stretch as much as needed to fit on the head of the person who is wearing it.
Round 2: FPSC in each stitch around. Make sure you go around each of the stitches from the previous round, even the last one that is hard to get into sometimes. Join with a sl st to first FPSC. Then sl st back to the first SC of the previous round (behind the FPSC round). This is so your next round is not worked in the post stitches (see photo tutorial). Chain 1. (38)
Round 3: SC in each stitch around. Make sure you are not working in the post stitches. Your SC stitches should be going into the round before the FPSC round (these are the stitches behind the FPSC stitches – shown in photo tutorial). Change color to accent color (if using). Join, chain 2. (38)
Round 4: Puff stitch in first stitch, skip a stitch, *puff stitch in next, skip a stitch. Repeat from * around. Join to first stitch, do not chain 2 here. (19 puff stitches)
Round 5: Sl st in the top of the first puff stitch from the previous round, sl st in the first puff stitch space, chain 2, puff stitch in same space and in each puff stitch space around (including in the space after the last puff stitch of the previous round). Change back to the main hat color. Join, chain 1. (19 puff stitches)
Round 6: SC in the first stitch and in each stitch around (in the top of each puff stitch and the chain stitch between each one as well). Join, chain 1. (38)
Round 7: FPSC in each stitch around. Make sure you go around each of the stitches from the previous round, even the last one that is hard to get into sometimes. Join with a sl st to first FPSC. Then sl st back to the first SC of the previous round (behind the FPSC round). This is so your next round is not worked in the post stitches (see photo tutorial). Chain 1. (38)
Round 8: SC DEC, SC in next 17 stitches, repeat around. Make sure you are not working in the post stitches. Your stitches should be going into the round before the FPSC round (these are the stitches behind the FPSC stitches – shown in photo tutorial). Change color to accent color (if using). Join, chain 2. (36)
Round 9: Puff stitch in first stitch, skip a stitch, *puff stitch in next, skip a stitch. Repeat from * around. Join to first stitch, chain 1. (18 puff stitches)
Round 10: SC in the first stitch and in each stitch around (in the top of each puff stitch and the chain stitch between each one as well). Join, chain 1. (36)
Round 11: FPSC in each stitch around. Make sure you go around each of the stitches from the previous round, even the last one that is hard to get into sometimes. Join with a sl st to first FPSC. Then sl st back to the first SC of the previous round (behind the FPSC round). This is so your next round is not worked in the post stitches (see photo tutorial). Chain 2. (36)
Round 12: DC DEC, DC in next stitch. Repeat around. Join, chain 1. (24)
Round 13: SC DEC around. Repeat around. Join, chain 1. (12)
Round 14: SC DEC, SC in next stitch. Repeat around. Join, chain 1. (9)
Round 15: SC in each stitch around. Join. Fasten off leaving a long tail to sew top of hat closed. (9)
Closing the top of the hat: Use your yarn needle to run yarn under the front loops of each stitch around. When you are through all of the front loops, pull yarn tight to close hole. Sew around the stitches in the circle one more time and then weave in ends before cutting yarn. (See photo tutorial below)
3-6 MONTH SIZE
Head circumference: approx. 15-16 inches
Hat height: approx. 5.75”- 6”
Ribbed Band:
In main beanie color
Row 1: Chain 6. SC in 2nd chain from hook and in each chain across. Chain 1, turn. (5)
Row 2: SC in back loops only across. Chain 1, turn. (5)
Rows 3-44: Repeat row 2.
At this point, the ribbing should measure about 13 inches long, without stretching it. (If you’ve already stretched it to fit around a head, it might be a little longer than the measurement here).
Fold ribbing in half and join ends with a slip stitch. Then slip stitch in each stitch across. When you get to the end, flip the ribbing so the stitches are on the inside and your loop is at the top. Chain 1 and start the instructions below for the hat body. Your first SC stitch will be in the same stitch as the chain 1. (See photo tutorial below)
Hat body:
Round 1: SC in first stitch (same stitch as chain 1) and in each stitch around. Join with a sl st to first stitch, chain 1. (44)
*Make sure you don’t work this round into the ribbing too tightly. It’s best to keep a looser tension here so that the ribbing is able to stretch as much as needed to fit on the head of the person who is wearing it.
Round 2: FPSC in each stitch around. Make sure you go around each of the stitches from the previous round, even the last one that is hard to get into sometimes. Join with a sl st to first FPSC. Then sl st back to the first SC of the previous round (behind the FPSC round). This is so your next round is not worked in the post stitches (see photo tutorial). Chain 1. (44)
Round 3: SC in each stitch around. Make sure you are not working in the post stitches. Your SC stitches should be going into the round before the FPSC round (these are the stitches behind the FPSC stitches – shown in photo tutorial). Change color to accent color (if using). Join, chain 2. (44)
Round 4: Puff stitch in first stitch, skip a stitch, *puff stitch in next, skip a stitch. Repeat from * around. Join to first stitch, do not chain 2 here. (22 puff stitches)
Round 5: Sl st in the top of the first puff stitch from the previous round, sl st in the first puff stitch space, chain 2, puff stitch in same space and in each puff stitch space around (including in the space after the last puff stitch of the previous round). Change back to the main hat color. Join, chain 1. (22 puff stitches)
Round 6: SC in the first stitch and in each stitch around (in the top of each puff stitch and the chain stitch between each one as well). Join, chain 1. (44)
Round 7: FPSC in each stitch around. Make sure you go around each of the stitches from the previous round, even the last one that is hard to get into sometimes. Join with a sl st to first FPSC. Then sl st back to the first SC of the previous round (behind the FPSC round). This is so your next round is not worked in the post stitches (see photo tutorial). Chain 1. (44)
Round 8: SC in each stitch around. Make sure you are not working in the post stitches. Your SC stitches should be going into the round before the FPSC round (these are the stitches behind the FPSC stitches – shown in photo tutorial). Change color to accent color (if using). Join, chain 2. (44)
Round 9: Puff stitch in first stitch, skip a stitch, *puff stitch in next, skip a stitch. Repeat from * around. Join to first stitch, do not chain 2 here. (22 puff stitches)
Round 10: Sl st in the top of the first puff stitch from the previous round, sl st in the first puff stitch space, chain 2, puff stitch in same space and in each puff stitch space around (including in the space after the last puff stitch of the previous round). Change back to the main hat color. Join, chain 1. (22 puff stitches)
Round 11: SC in the first stitch and in each stitch around (in the top of each puff stitch and the chain stitch between each one as well). Join, chain 1. (44)
Round 12: FPSC in each stitch around. Make sure you go around each of the stitches from the previous round, even the last one that is hard to get into sometimes. Join with a sl st to first FPSC. Then sl st back to the first SC of the previous round (behind the FPSC round). This is so your next round is not worked in the post stitches (see photo tutorial). Chain 2. (44)
Round 13: DC DEC, DC in next two stitches. Repeat around. Join, chain 1. (33)
Round 14: SC DEC, SC in next stitch. Repeat around. Join, chain 1. (22)
Round 15: SC DEC around. Join, chain 1. (11)
Round 16: SC in each stitch around. Join. Fasten off leaving a long tail to sew top of hat closed. (11)
Closing the top of the hat: Use your yarn needle to run yarn under the front loops of each stitch around. When you are through all of the front loops, pull yarn tight to close hole. Sew around the stitches in the circle one more time and then weave in ends before cutting yarn. (See photo tutorial below)
6-12 MONTH SIZE
Head circumference: approx. 16-18 inches
Hat height: approx. 6.25”-6.5”
Ribbed Band:
In main beanie color
Row 1: Chain 7. SC in 2nd chain from hook and in each chain across. Chain 1, turn. (6)
Row 2: SC in back loops only across. Chain 1, turn. (6)
Rows 3-50: Repeat row 2.
At this point, the ribbing should measure about 14.5 inches long, without stretching it. (If you’ve already stretched it to fit around a head, it might be a little longer than the measurement here).
Fold ribbing in half and join ends with a slip stitch. Then slip stitch in each stitch across. When you get to the end, flip the ribbing so the stitches are on the inside and your loop is at the top. Chain 1 and start the instructions below for the hat body. Your first SC stitch will be in the same stitch as the chain 1. (See photo tutorial below)
Hat body:
Round 1: SC in first stitch (same stitch as chain 1) and in each stitch around. Join with a sl st to first stitch, chain 1. (50)
*Make sure you don’t work this round into the ribbing too tightly. It’s best to keep
a looser tension here so that the ribbing is able to stretch as much as needed
to fit on the head of the person who is wearing it.
Round 2: FPSC in each stitch around. Make sure you go around each of the stitches from the previous round, even the last one that is hard to get into sometimes. Join with a sl st to first FPSC. Then sl st back to the first SC of the previous round (behind the FPSC round). This is so your next round is not worked in the post stitches (see photo tutorial). Chain 1. (50)
Round 3: SC in each stitch around. Make sure you are not working in the post stitches. Your SC stitches should be going into the round before the FPSC round (these are the stitches behind the FPSC stitches – shown in photo tutorial). Change color to accent color (if using). Join, chain 2. (50)
Round 4: Puff stitch in first stitch, skip a stitch, *puff stitch in next, skip a stitch. Repeat from * around. Join to first stitch, do not chain 2 here. (25 puff stitches)
Round 5: Sl st in the top of the first puff stitch from the previous round, sl st in the first puff stitch space, chain 2, puff stitch in same space and in each puff stitch space around (including in the space after the last puff stitch of the previous round). Change back to the main hat color. Join, chain 1. (25 puff stitches)
Round 6: SC in the first stitch and in each stitch around (in the top of each puff stitch and the chain stitch between each one as well). Join, chain 1. (50)
Round 7: FPSC in each stitch around. Make sure you go around each of the stitches from the previous round, even the last one that is hard to get into sometimes. Join with a sl st to first FPSC. Then sl st back to the first SC of the previous round (behind the FPSC round). This is so your next round is not worked in the post stitches (see photo tutorial). Chain 1. (50)
Round 8: SC in each stitch around. Make sure you are not working in the post stitches. Your SC stitches should be going into the round before the FPSC round (these are the stitches behind the FPSC stitches – shown in photo tutorial). Change color to accent color (if using). Join, chain 2. (50)
Round 9: Puff stitch in first stitch, skip a stitch, *puff stitch in next, skip a stitch. Repeat from * around. Join to first stitch, do not chain 2 here. (25 puff stitches)
Round 10: Sl st in the top of the first puff stitch from the previous round, sl st in the first puff stitch space, chain 2, puff stitch in same space and in each puff stitch space around (including in the space after the last puff stitch of the previous round). Change back to the main hat color. Join, chain 1. (25 puff stitches)
Round 11: SC in the first stitch and in each stitch around (in the top of each puff stitch and the chain stitch between each one as well). Join, chain 1. (50)
Round 12: FPSC in each stitch around. Make sure you go around each of the stitches from the previous round, even the last one that is hard to get into sometimes. Join with a sl st to first FPSC. Then sl st back to the first SC of the previous round (behind the FPSC round). This is so your next round is not worked in the post stitches (see photo tutorial). Chain 1. (50)
Round 13: SC DEC, SC in next 3 stitches. Repeat around. Join, chain 2. (40)
Round 14: DC DEC, DC in next 2 stitches. Repeat around. Join, chain 1. (30)
Round 15: SC DEC, SC in next stitch. Repeat around. Join, chain 1. (20)
Round 16: SC DEC around. (10)
Round 17: SC in each stitch around, join. Fasten off leaving a long tail to sew top of hat closed. (10)
Closing the top of the hat: Use your yarn needle to run yarn under the front loops of each stitch around. When you are through all of the front loops, pull yarn tight to close hole. Sew around the stitches in the circle one more time and then weave in ends before cutting yarn. (See photo tutorial below)
TODDLER SIZE
Approximately 1-2 years
Head circumference: 18-19”
Hat height: approx. 7”
Ribbed Band:
In main beanie color
Row 1: Chain 7. SC in 2nd chain from hook and in each chain across. Chain 1, turn. (6)
Row 2: SC in back loops only across. Chain 1, turn. (6)
Rows 3-56: Repeat row 2.
At this point, the ribbing should measure about 13-14 inches long, without stretching it. (If you’ve already stretched it to fit around a head, it might be a little longer than the measurement here).
Fold ribbing in half and join ends with a slip stitch. Then slip stitch in each stitch across. When you get to the end, flip the ribbing so the stitches are on the inside and your loop is at the top. Chain 1 and start the instructions below for the hat body. Your first SC stitch will be in the same stitch as the chain 1. (See photo tutorial below)
Hat body:
Round 1: SC in first stitch (same stitch as chain 1) and in each stitch around. Join with a sl st to first stitch, chain 1. (56)
*Make sure you don’t work this round into the ribbing too tightly. It’s best to keep a looser tension here so that the ribbing is able to stretch as much as needed to fit on the head of the person who is wearing it.
Round 2: FPSC in each stitch around. Make sure you go around each of the stitches from the previous round, even the last one that is hard to get into sometimes. Join with a sl st to first FPSC. Then sl st back to the first SC of the previous round (behind the FPSC round). This is so your next round is not worked in the post stitches (see photo tutorial). Chain 1. (56)
Round 3: SC in each stitch around. Make sure you are not working in the post stitches. Your SC stitches should be going into the round before the FPSC round (these are the stitches behind the FPSC stitches – shown in photo tutorial). Change color to accent color (if using). Join, chain 2. (56)
Round 4: Puff stitch in first stitch, skip a stitch, *puff stitch in next, skip a stitch. Repeat from * around. Join to first stitch, do not chain 2. (28 puff stitches)
Round 5: Sl st in the top of the first puff stitch from the previous round, sl st in the first puff stitch space, chain 2, puff stitch in same space and in each puff stitch space around (including in the space after the last puff stitch of the previous round). Change back to the main hat color. Join, chain 1. (28 puff stitches)
Round 6: SC in the first stitch and in each stitch around (in the top of each puff stitch and the chain stitch between each one as well). Join, chain 1. (56)
Round 7: FPSC in each stitch around. Make sure you go around each of the stitches from the previous round, even the last one that is hard to get into sometimes. Join with a sl st to first FPSC. Then sl st back to the first SC of the previous round (behind the FPSC round). This is so your next round is not worked in the post stitches (see photo tutorial). Chain 1. (56)
Round 8: SC in each stitch around. Make sure you are not working in the post stitches. Your SC stitches should be going into the round before the FPSC round (these are the stitches behind the FPSC stitches – shown in photo tutorial). Change color to accent color (if using). Join, chain 2. (56)
Round 9: Puff stitch in first stitch, skip a stitch, *puff stitch in next, skip a stitch. Repeat from * around. Join to first stitch, do not chain 2. (28 puff stitches)
Round 10: Sl st in the top of the first puff stitch from the previous round, sl st in to the first puff stitch space, chain 2, puff stitch in same space and in each puff stitch space around (including in the space after the last puff stitch of the previous round). Change back to the main hat color. Join, chain 1. (28 puff stitches)
Round 11: SC in the first stitch and in each stitch around (in the top of each puff stitch and the chain stitch between each one as well). Join, chain 1. (56)
Round 12: FPSC in each stitch around. Make sure you go around each of the stitches from the previous round, even the last one that is hard to get into sometimes. Join with a sl st to first FPSC. Then sl st back to the first SC of the previous round (behind the FPSC round). This is so your next round is not worked in the post stitches (see photo tutorial). Chain 1. (56)
Round 13: SC DEC, SC in next 5 stitches (working in the stitches behind the post stitches). Repeat around. Change to accent color. Join, chain 2. (48)
Round 14: Puff stitch in first stitch, skip a stitch, *puff stitch in next, skip a stitch. Repeat from * around. Change back to main color. Join, chain 1 (24 puff stitches)
Round 15: SC DEC, SC in next 4 stitches (remember to work in the top of each puff stitch and the chain stitch between each one as well). Join, chain 1. (40)
Round 16: FPSC in each stitch around. Make sure you go around each of the stitches from the previous round, even the last one that is hard to get into sometimes. Join with a sl st to first FPSC. Then sl st back to the first SC of the previous round (behind the FPSC round). This is so your next round is not worked in the post stitches (see photo tutorial). Chain 1. (40)
Round 17: SC DEC, SC in next 3 stitches (working in the stitches behind the post stitches). Repeat around. Join, chain 2. (32)
Round 18: DC DEC, DC in next 2 stitches. Repeat around. Join, chain 1. (24)
Round 19: SC DEC, SC in next stitch. Repeat around. Join, chain 1. (16)
Round 20: SC DEC around. Join, chain 1. (8)
Round 21: SC in each stitch around. Join. Fasten off leaving a long tail to sew top of hat closed. (8)
Closing the top of the hat: Use your yarn needle to run yarn under the front loops of each stitch around. When you are through all of the front loops, pull yarn tight to close hole. Sew around the stitches in the circle one more time and then weave in ends before cutting yarn. (See photo tutorial below)
CHILD SIZE
Approximately 3-10 years
Head circumference: 19-21”
Hat height: approx. 7.5”
*I have also added a new child size to this beanie made with a thinner worsted-weight yarn and a 4.5mm hook that fits a little bit larger for the 5-10 age range. You can find it at the end of the pattern.
Ribbed Band:
In main beanie color
Row 1: Chain 8. SC in 2nd chain from hook and in each chain across. Chain 1, turn. (7)
Row 2: SC in back loops only across. Chain 1, turn. (7)
Rows 3-60: Repeat row 2.
At this point, the ribbing should measure about 15-15.5 inches long, without stretching it. (If you’ve already stretched it to fit around a head, it might be a little longer than the measurement here).
Fold ribbing in half and join ends with a slip stitch. Then slip stitch in each stitch across. When you get to the end, flip the ribbing so the stitches are on the inside and your loop is at the top. Chain 1 and start the instructions below for the hat body. Your first SC stitch will be in the same stitch as the chain 1. (See photo tutorial below)
Hat body:
Round 1: SC in first stitch (same stitch as chain 1) and in each stitch around. Join with a sl st to first stitch, chain 1. (60)
*Make sure you don’t work this round into the ribbing too tightly. It’s best to keep a looser tension here so that the ribbing is able to stretch as much as needed to fit on the head of the person who is wearing it.
Round 2: FPSC in each stitch around. Make sure you go around each of the stitches from the previous round, even the last one that is hard to get into sometimes. Join with a sl st to first FPSC. Then sl st back to the first SC of the previous round (behind the FPSC round). This is so your next round is not worked in the post stitches (see photo tutorial). Chain 1. (60)
Round 3: SC in each stitch around. Make sure you are not working in the post stitches. Your SC stitches should be going into the round before the FPSC round (these are the stitches behind the FPSC stitches – shown in photo tutorial). Change color to accent color (if using). Join, chain 2. (60)
Round 4: Puff stitch in first stitch, skip a stitch, *puff stitch in next, skip a stitch. Repeat from * around. Join to first stitch, do not chain 2. (30 puff stitches)
Round 5: Sl st in the top of the first puff stitch from the previous round, sl st in the first puff stitch space, chain 2, puff stitch in same space and in each puff stitch space around (including in the space after the last puff stitch of the previous round). Change back to the main hat color. Join, chain 1. (30 puff stitches)
Round 6: SC in the first stitch and in each stitch around (in the top of each puff stitch and the chain stitch between each one as well). Join, chain 1. (60)
Round 7: FPSC in each stitch around. Make sure you go around each of the stitches from the previous round, even the last one that is hard to get into sometimes. Join with a sl st to first FPSC. Then sl st back to the first SC of the previous round (behind the FPSC round). This is so your next round is not worked in the post stitches (see photo tutorial). Chain 1. (60)
Round 8: SC in each stitch around. Make sure you are not working in the post stitches. Your SC stitches should be going into the round before the FPSC round (these are the stitches behind the FPSC stitches – shown in photo tutorial). Change color to accent color (if using). Join, chain 2. (60)
Round 9: Puff stitch in first stitch, skip a stitch, *puff stitch in next, skip a stitch. Repeat from * around. Join to first stitch, do not chain 2. (30 puff stitches)
Round 10: Sl st in the top of the first puff stitch from the previous round, sl st in to the first puff stitch space, chain 2, puff stitch in same space and in each puff stitch space around (including in the space after the last puff stitch of the previous round). Change back to the main hat color. Join, chain 1. (30 puff stitches)
Round 11: SC in the first stitch and in each stitch around (in the top of each puff stitch and the chain stitch between each one as well). Join, chain 1. (60)
Round 12: FPSC in each stitch around. Make sure you go around each of the stitches from the previous round, even the last one that is hard to get into sometimes. Join with a sl st to first FPSC. Then sl st back to the first SC of the previous round (behind the FPSC round). This is so your next round is not worked in the post stitches (see photo tutorial). Chain 1. (60)
Round 13: SC DEC, SC in next 3 stitches (working in the stitches behind the post stitches). Repeat around. Change to accent color. Join, chain 2. (48)
Round 14: Puff stitch in first stitch, skip a stitch, *puff stitch in next, skip a stitch. Repeat from * around. Join to first stitch, do not chain 2. (24 puff stitches)
Round 15: Sl st in the top of the first puff stitch from the previous round, sl st in to the first puff stitch space, chain 2, puff stitch in same space and in each puff stitch space around (including in the space after the last puff stitch of the previous round). Change back to the main hat color. Join, chain 1. (24 puff stitches)
Round 16: SC DEC, SC in next 4 stitches (remember to work in the top of each puff stitch and the chain stitch between each one as well). Join, chain 1. (40)
Round 17: FPSC in each stitch around. Make sure you go around each of the stitches from the previous round, even the last one that is hard to get into sometimes. Join with a sl st to first FPSC. Then sl st back to the first SC of the previous round (behind the FPSC round). This is so your next round is not worked in the post stitches (see photo tutorial). Chain 1. (40)
Round 18: SC DEC, SC in next 3 stitches (working in the stitches behind the post stitches). Repeat around. Join, chain 2. (32)
Round 19: DC DEC, DC in next 2 stitches. Repeat around. Join, chain 1. (24)
Round 20: SC DEC, SC in next stitch. Repeat around. Join, chain 1. (16)
Round 21: SC in each stitch around. Join. Fasten off leaving a long tail to close top of hat (16)
Closing the top of the hat: Use your yarn needle to run yarn under the front loops of each stitch around. When you are through all of the front loops, pull yarn tight to close hole. Sew around the stitches in the circle one more time and then weave in ends before cutting yarn. (See photo tutorial below)
TEEN/ADULT SIZE
Head circumference: 22-24”
Hat height: approx. 8.75”
Note: For teen or small adult, you may want to go down to a 4.5 mm hook to get a snugger fit.
Ribbed Band:
In main beanie color
Row 1: Chain 10. SC in 2nd chain from hook and in each chain across. Chain 1, turn. (9)
Row 2: SC in back loops only across. Chain 1, turn. (9)
Rows 3-64: Repeat row 2.
At this point, the ribbing should measure about 16.5-17.5 inches long, without stretching it. (If you’ve already stretched it to fit around a head, it might be a little longer than the measurement here).
Fold ribbing in half and join ends with a slip stitch. Then slip stitch in each stitch across. When you get to the end, flip the ribbing so the stitches are on the inside and your loop is at the top. Chain 1 and start the instructions below for the hat body. Your first SC stitch will be in the same stitch as the chain 1. (See photo tutorial below)
Hat body:
Round 1: SC in first stitch (same stitch as chain 1) and in each stitch around. Join with a sl st to first stitch, chain 1. (64)
*Make sure you don’t work this round into the ribbing too tightly. It’s best to keep a looser tension here so that the ribbing is able to stretch as much as needed to fit on the head of the person who is wearing it.
Round 2: FPSC in each stitch around. Make sure you go around each of the stitches from the previous round, even the last one that is hard to get into sometimes. Join with a sl st to first FPSC. Then sl st back to the first SC of the previous round (behind the FPSC round). This is so your next round is not worked in the post stitches (see photo tutorial). Chain 1. (64)
Round 3: SC in each stitch around. Make sure you are not working in the post stitches. Your SC stitches should be going into the round before the FPSC round (these are the stitches behind the FPSC stitches – shown in photo tutorial). Change color to accent color (if using). Join, chain 2. (64)
Round 4: Puff stitch in first stitch, skip a stitch, *puff stitch in next, skip a stitch. Repeat from * around. Join to first stitch, do not chain 2. (32 puff stitches)
Round 5: Sl st in the top of the first puff stitch from the previous round, sl st in the first puff stitch space, chain 2, puff stitch in same space and in each puff stitch space around (including in the space after the last puff stitch of the previous round). Change back to the main hat color. Join, chain 1. (32 puff stitches)
Round 6: SC in the first stitch and in each stitch around (in the top of each puff stitch and the chain stitch between each one as well). Join, chain 1. (64)
Round 7: FPSC in each stitch around. Make sure you go around each of the stitches from the previous round, even the last one that is hard to get into sometimes. Join with a sl st to first FPSC. Then sl st back to the first SC of the previous round (behind the FPSC round). This is so your next round is not worked in the post stitches (see photo tutorial). Chain 1. (64)
Round 8: SC in each stitch around. Make sure you are not working in the post stitches. Your SC stitches should be going into the round before the FPSC round (these are the stitches behind the FPSC stitches – shown in photo tutorial). Change color to accent color (if using). Join, chain 2. (64)
Round 9: Puff stitch in first stitch, skip a stitch, *puff stitch in next, skip a stitch. Repeat from * around. Join to first stitch, do not chain 2. (32 puff stitches)
Round 10: Sl st in the top of the first puff stitch from the previous round, sl st in the first puff stitch space, chain 2, puff stitch in same space and in each puff stitch space around (including in the space after the last puff stitch of the previous round). Change back to the main hat color. Join, chain 1. (32 puff stitches)
Round 11: SC in the first stitch and in each stitch around (in the top of each puff stitch and the chain stitch between each one as well). Join, chain 1. (64)
Round 12: FPSC in each stitch around. Make sure you go around each of the stitches from the previous round, even the last one that is hard to get into sometimes. Join with a sl st to first FPSC. Then sl st back to the first SC of the previous round (behind the FPSC round). This is so your next round is not worked in the post stitches (see photo tutorial). Chain 1. (64)
Round 13: SC DEC, SC in next 6 stitches (working in the stitches behind the post stitches). Repeat around. Change to accent color. Join, chain 2. (56)
Round 14: Puff stitch in first stitch, skip a stitch, *puff stitch in next, skip a stitch. Repeat from * around. Join to first stitch, do not chain 2. (28 puff stitches)
Round 15: Sl st in the top of the first puff stitch from the previous round, sl st in to the first puff stitch space, chain 2, puff stitch in same space and in each puff stitch space around (including in the space after the last puff stitch of the previous round). Change back to the main hat color. Join, chain 1. (28 puff stitches)
Round 16: SC in the first stitch and in each stitch around (in the top of each puff stitch and the chain stitch between each one as well). Join, chain 1. (56)
Round 17: FPSC in each stitch around. Make sure you go around each of the stitches from the previous round, even the last one that is hard to get into sometimes. Join with a sl st to first FPSC. Then sl st back to the first SC of the previous round (behind the FPSC round). This is so your next round is not worked in the post stitches (see photo tutorial). Chain 1. (56)
Round 18: SC DEC, SC in next 2 stitches (working in the stitches behind the post stitches). Repeat around. Join, chain 2. (42)
Round 19: DC DEC, DC in next stitch. Repeat around. Join, chain 2. (28)
Round 20: DC DEC in each stitch around. Join, chain 1. (14)
Round 21: SC in each stitch around. Join. Fasten off leaving a long tail to close top of hat. (14)
Closing the top of the hat: Use your yarn needle to run yarn under the front loops of each stitch around. When you are through all of the front loops, pull yarn tight to close hole. Sew around the stitches in the circle one more time and then weave in ends before cutting yarn. (See photo tutorial below)
***Child-Sized Jelly Beanie adapted specifically for a thinner yarn and a smaller hook.
For this beanie, approx. 150 yds of hand-dyed worsted-weight yarn was used with a 4.5mm crochet hook. The beanie pictured below was made with Woolly Mama Yarns worsted-weight yarn in the Daydreamer colorway. I did not change between a main color and an accent color because these colors were just beautiful on their own. However, you can still do the puff stitches in an accent color, if you’d like too. Either way, your hat will be beautiful!


Approximately 5-10 years Head circumference: 19-21” Hat height: approx. 8”
Ribbed Band:
In main beanie color,
Row 1: Chain 8. SC in 2nd chain from hook and in each chain across. Chain 1, turn. (7)
Row 2: SC in back loops only across. Chain 1, turn. (7)
Rows 3-70: Repeat row 2.
At this point, the ribbing should measure about 15.5-16 inches long, without stretching it. (If you’ve already stretched it to fit around a head, it might be a little longer than the measurement here). Note that the ribbing is very stretchy, but once you work the next rounds, the beanie will hold it’s shape.
Fold ribbing in half and join ends with a slip stitch. Then slip stitch in each stitch across. When you get to the end, flip the ribbing so the stitches are on the inside and your loop is at the top. Chain 1 and start the instructions below for the hat body. Your first SC stitch will be in the same stitch as the chain 1. (See photo tutorial below)
Hat body:
Round 1: SC in first stitch (same stitch as chain 1) and in each stitch around. Join with a sl st to first stitch, chain 1. (70)
*Make sure you don’t work this round into the ribbing too tightly. It’s best to keep a looser tension here so that the ribbing is able to stretch as much as needed to fit on the head of the person who is wearing it.
Round 2: FPSC in each stitch around. Make sure you go around each of the stitches from the previous round, even the last one that is hard to get into sometimes. Join with a sl st to first FPSC. Then sl st back to the first SC of the previous round (behind the FPSC round). This is so your next round is not worked in the post stitches (see photo tutorial). Chain 1. (70)
Round 3: SC in each stitch around. Make sure you are not working in the post stitches. Your SC stitches should be going into the round before the FPSC round (these are the stitches behind the FPSC stitches – shown in photo tutorial). Join, chain 2. (70)
Round 4: Puff stitch in first stitch, skip a stitch, *puff stitch in next, skip a stitch. Repeat from * around. Join to first stitch, do not chain 2. (35 puff stitches)
Round 5: Sl st in the top of the first puff stitch from the previous round, sl st in the first puff stitch space, chain 2, puff stitch in same space and in each puff stitch space around (including in the space after the last puff stitch of the previous round). Join, chain 1. (35 puff stitches)
Round 6: SC in the first stitch and in each stitch around (in the top of each puff stitch and the chain stitch between each one as well). Join, chain 1. (70)
Round 7: FPSC in each stitch around. Make sure you go around each of the stitches from the previous round, even the last one that is hard to get into sometimes. Join with a sl st to first FPSC. Then sl st back to the first SC of the previous round (behind the FPSC round). This is so your next round is not worked in the post stitches (see photo tutorial). Chain 1. (70)
Round 8: SC in each stitch around. Make sure you are not working in the post stitches. Your SC stitches should be going into the round before the FPSC round (these are the stitches behind the FPSC stitches – shown in photo tutorial). Join, chain 2. (70)
Round 9: Puff stitch in first stitch, skip a stitch, *puff stitch in next, skip a stitch. Repeat from * around. Join to first stitch, do not chain 2. (35 puff stitches)
Round 10: Sl st in the top of the first puff stitch from the previous round, sl st in to the first puff stitch space, chain 2, puff stitch in same space and in each puff stitch space around (including in the space after the last puff stitch of the previous round). Join, chain 1. (35 puff stitches)
Round 11: SC DEC, SC in next 5 stitches (working in the stitches behind the post stitches). Repeat around. Join, chain 2. (60)
Round 12: FPSC in each stitch around. Make sure you go around each of the stitches from the previous round, even the last one that is hard to get into sometimes. Join with a sl st to first FPSC. Then sl st back to the first SC of the previous round (behind the FPSC round). This is so your next round is not worked in the post stitches (see photo tutorial). Chain 1. (60)
Round 13: SC DEC, SC in next 4 stitches (working in the stitches behind the post stitches). Repeat around. Join, chain 2. (50)
Round 14: Puff stitch in first stitch, skip a stitch, *puff stitch in next, skip a stitch. Repeat from * around. Join to first stitch, do not chain 2. (25 puff stitches)
Round 15: Sl st in the top of the first puff stitch from the previous round, sl st in to the first puff stitch space, chain 2, puff stitch in same space and in each puff stitch space around (including in the space after the last puff stitch of the previous round). Join, chain 1. (25 puff stitches)
Round 16: SC DEC, SC in next 3 stitches (remember to work in the top of each puff stitch and the chain stitch between each one as well). Join, chain 1. (40)
Round 17: FPSC in each stitch around. Make sure you go around each of the stitches from the previous round, even the last one that is hard to get into sometimes. Join with a sl st to first FPSC. Then sl st back to the first SC of the previous round (behind the FPSC round). This is so your next round is not worked in the post stitches (see photo tutorial). Chain 1. (40)
Round 18: SC DEC, SC in next 2 stitches (working in the stitches behind the post stitches). Repeat around. Join, chain 2. (30)
Round 19: DC DEC, DC in next stitch. Repeat around. Join, chain 1. (20)
Round 20: SC DEC in each stitch around. Join. (10)
Closing the top of the hat: Use your yarn needle to run yarn under the front loops of each stitch around. When you are through all of the front loops, pull yarn tight to close hole. Sew around the stitches in the circle one more time and then weave in ends before cutting yarn. (See photo tutorial below)
Photo Tutorial
In this section, you will find all of the step by step “how to” photos to help you with making your Jelly Beanie. Remember you can also check out the video tutorial too!


Yay! You are all done!! I hope you love your new Jelly Beanie! Have fun making them in all different color combinations!


**Want to be kept in the loop? Be sure to like Loops and Love Crochet on Facebook and join the Loops and Love Crochet Group! Don’t forget to follow @loopsandlovecrochet on Instagram! Remember to tag Loops and Love Crochet when you post your fnished projects on social media! I’d love to see them! **
*You may make and sell any items made from my patterns, but please link back to my blog or Loops & Love Crochet as the designer. Please do not copy this pattern or photos and share as your own, in part or in whole. Instead, link back to the Loops and Love Crochet blog (especially when selling items you make from my patterns). Thank you!

Catherine McLennan
Wednesday 12th of February 2020
Love these hats, the stitch pattern works great with the yarn. Gorgeous colours...
Loops and Love Crochet
Wednesday 12th of February 2020
Thank you so much!!!
Kerri
Saturday 8th of February 2020
I love this pattern. I look forward to making more of them. Thank you :)
Loops and Love Crochet
Saturday 8th of February 2020
Thank you so much, Kerri!!!
Shirley Calhoun
Friday 7th of February 2020
How do I print the 'Jelly Bean' hat pattern out?
Loops and Love Crochet
Friday 7th of February 2020
Hi Shirley, The Jelly Beanie crochet pattern is free on my blog, however, I have copy/paste protection on my blog so you will be unable to right click to cut/copy/paste text. I am sorry for the inconvenience, but it helps me protect the content on my site and the money I earn from running ads helps offset the expenses of maintaining a blog. I’m not sure if it helps, but I do sell a printable, ad-free PDF version for a few dollars in my Etsy and Ravelry shops. Thank you so much for your interest in this crochet pattern! :)
Jay
Wednesday 5th of February 2020
Hi, I love these hats I’m in the UK and mainly have Double Knit yarn (I think it’s light worsted in US) would it I have to adapt the pattern much to use that kind of yarn? Thank you
Cindy Brienze
Friday 31st of January 2020
Thank you so much for the beautiful patterns you share with us! I especially like the video tutorials too as I have a hard time following written patterns. Your work is amazing! Thank you!!
Loops and Love Crochet
Friday 31st of January 2020
Hi Cindy, Thank you so much for your kind words! Very sweet of you to say! I am happy to hear that you like the patterns and find the videos helpful. Thank you!!!